- Introduction
- Widget Types
- Widgets Library (Bundles)
- Adding widgets bundle
- Widgets Bundles export/import
- Widget Types export/import
Introduction
All IoT Dashboards are constructed using IoT Hub widgets defined in the Widget Library. Each widget provides end-user functionality such as data visualization, remote device control, alarm management and display of static custom HTML content.
Widget Types
According to the provided features, each widget definition represents a specific type of widget. There are five widget types:

Each widget type has its own specific data source configuration and the corresponding API widget. Each widget requires data sources to visualize data. Types of available data source depend on widget type of the widget:
- Target device - this data source type is used in RPC. Basically, you need to specify the target device for the RPC widget;
- Alarm source - this data source type is used in Alarm widgets. This data source requires the source entity to display related alarms and corresponding alarm fields;
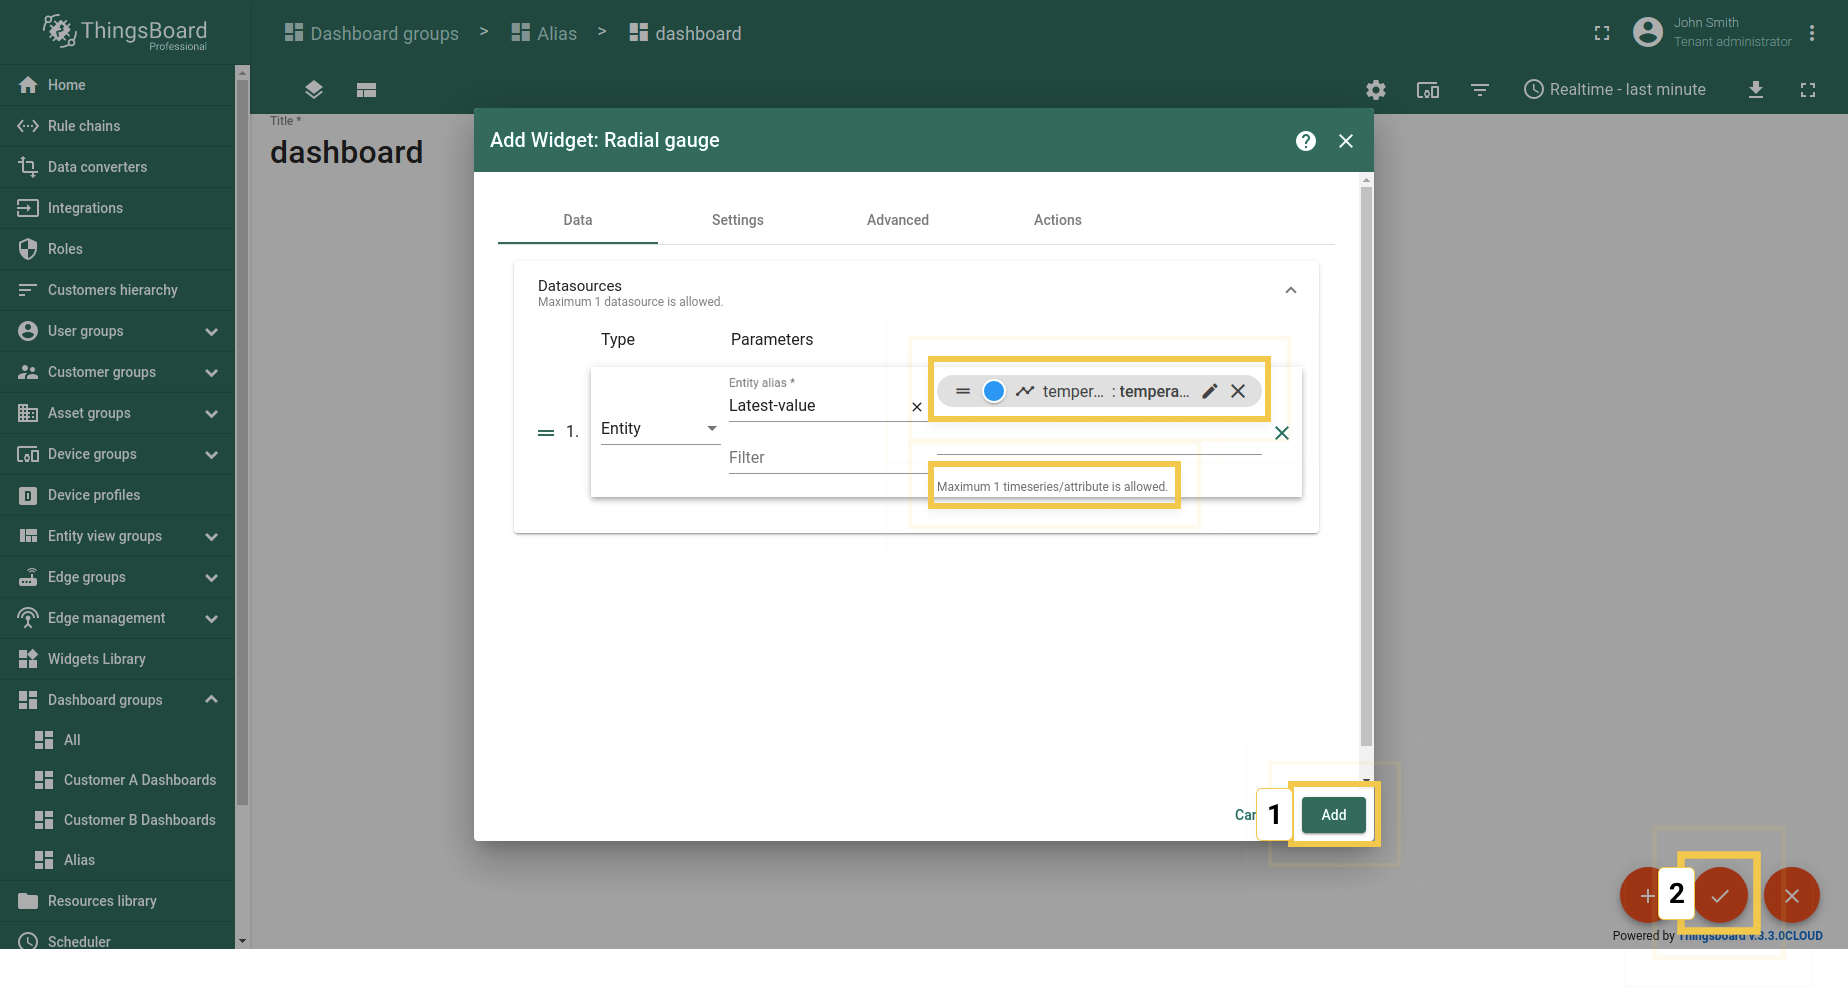
- Entity - this datasource type is used in both time-series and latest values widgets. Basically, you need to specify the target entity, and the time series key, or the attribute name;
- Entities count - this data source type is used in latest values widgets. Basically, you need to specify the target entity.
- Function - this data source type is used in both time series and latest values widgets for debugging. Basically, you can specify a javascript function that will simulate data from a device in order to set up visualization;
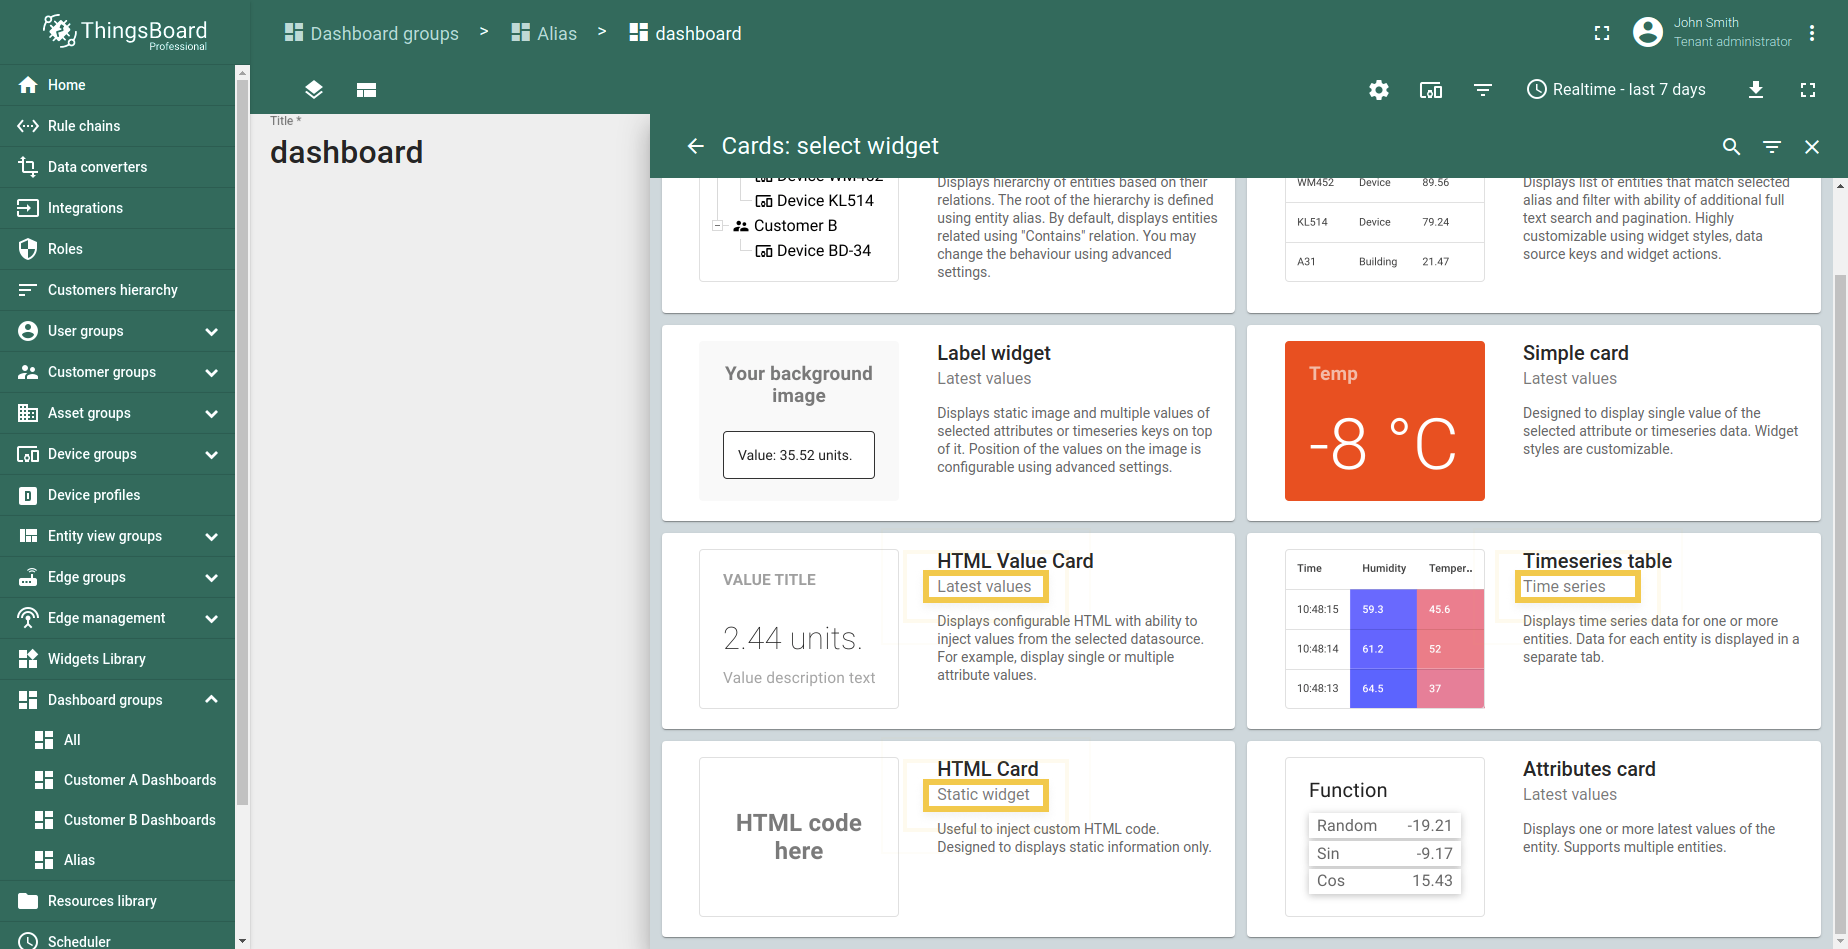
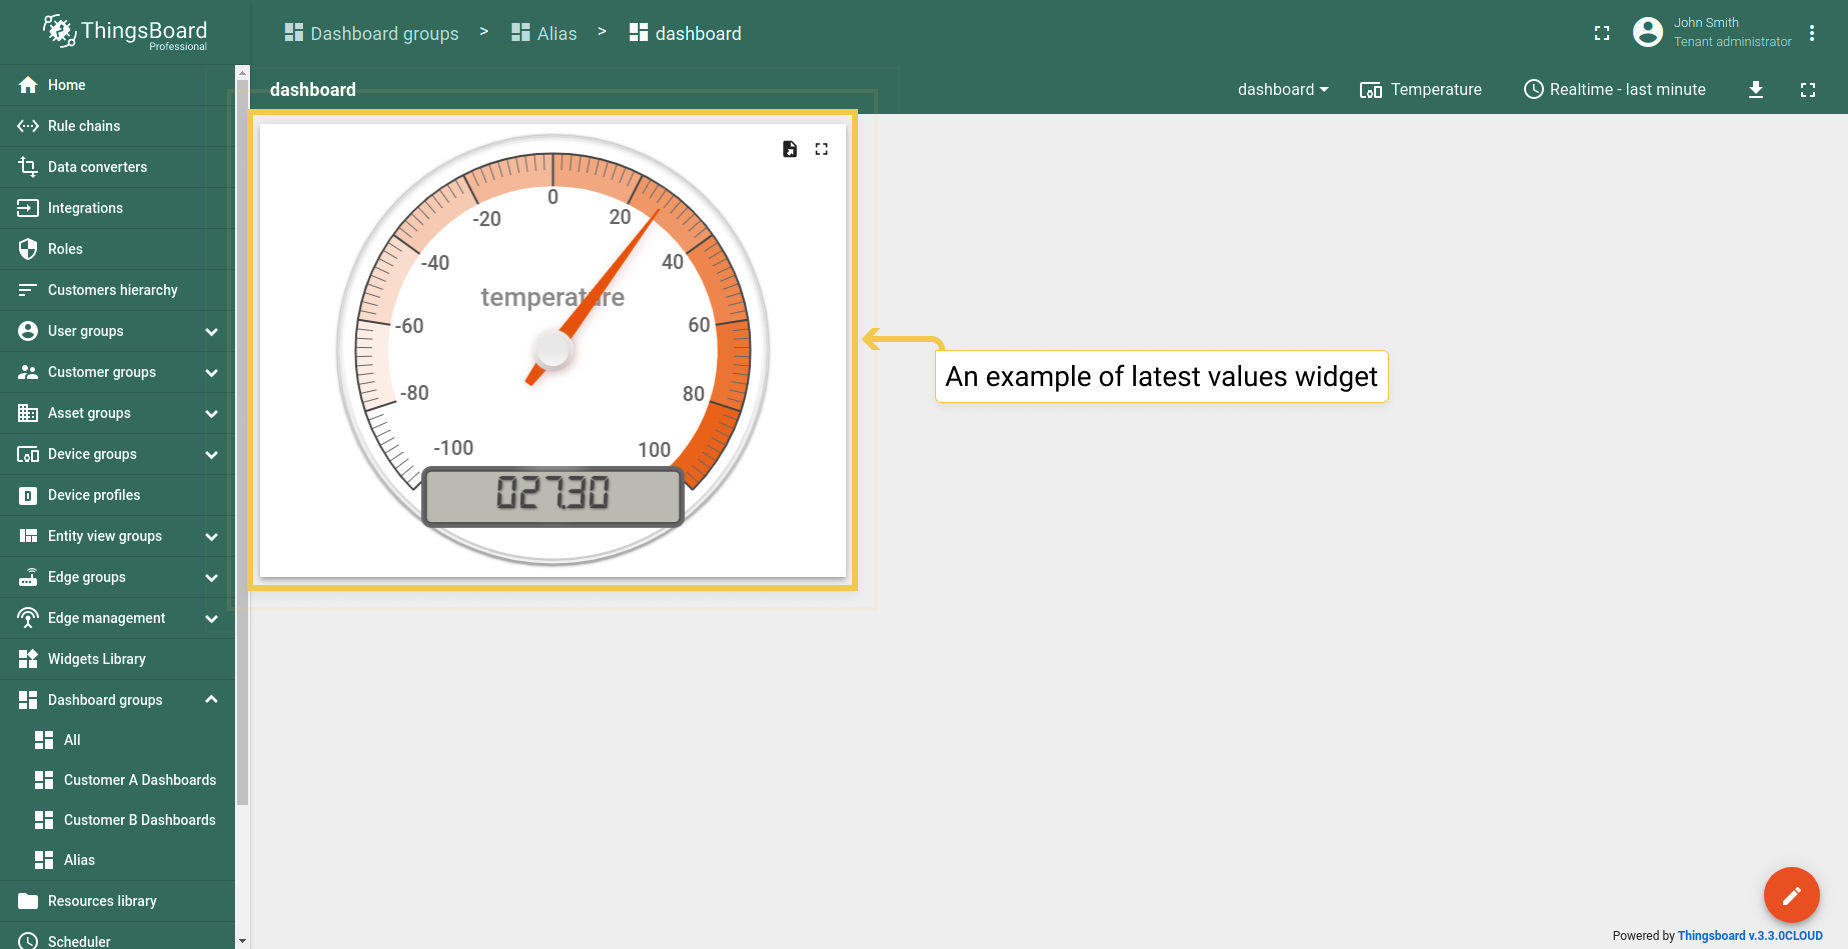
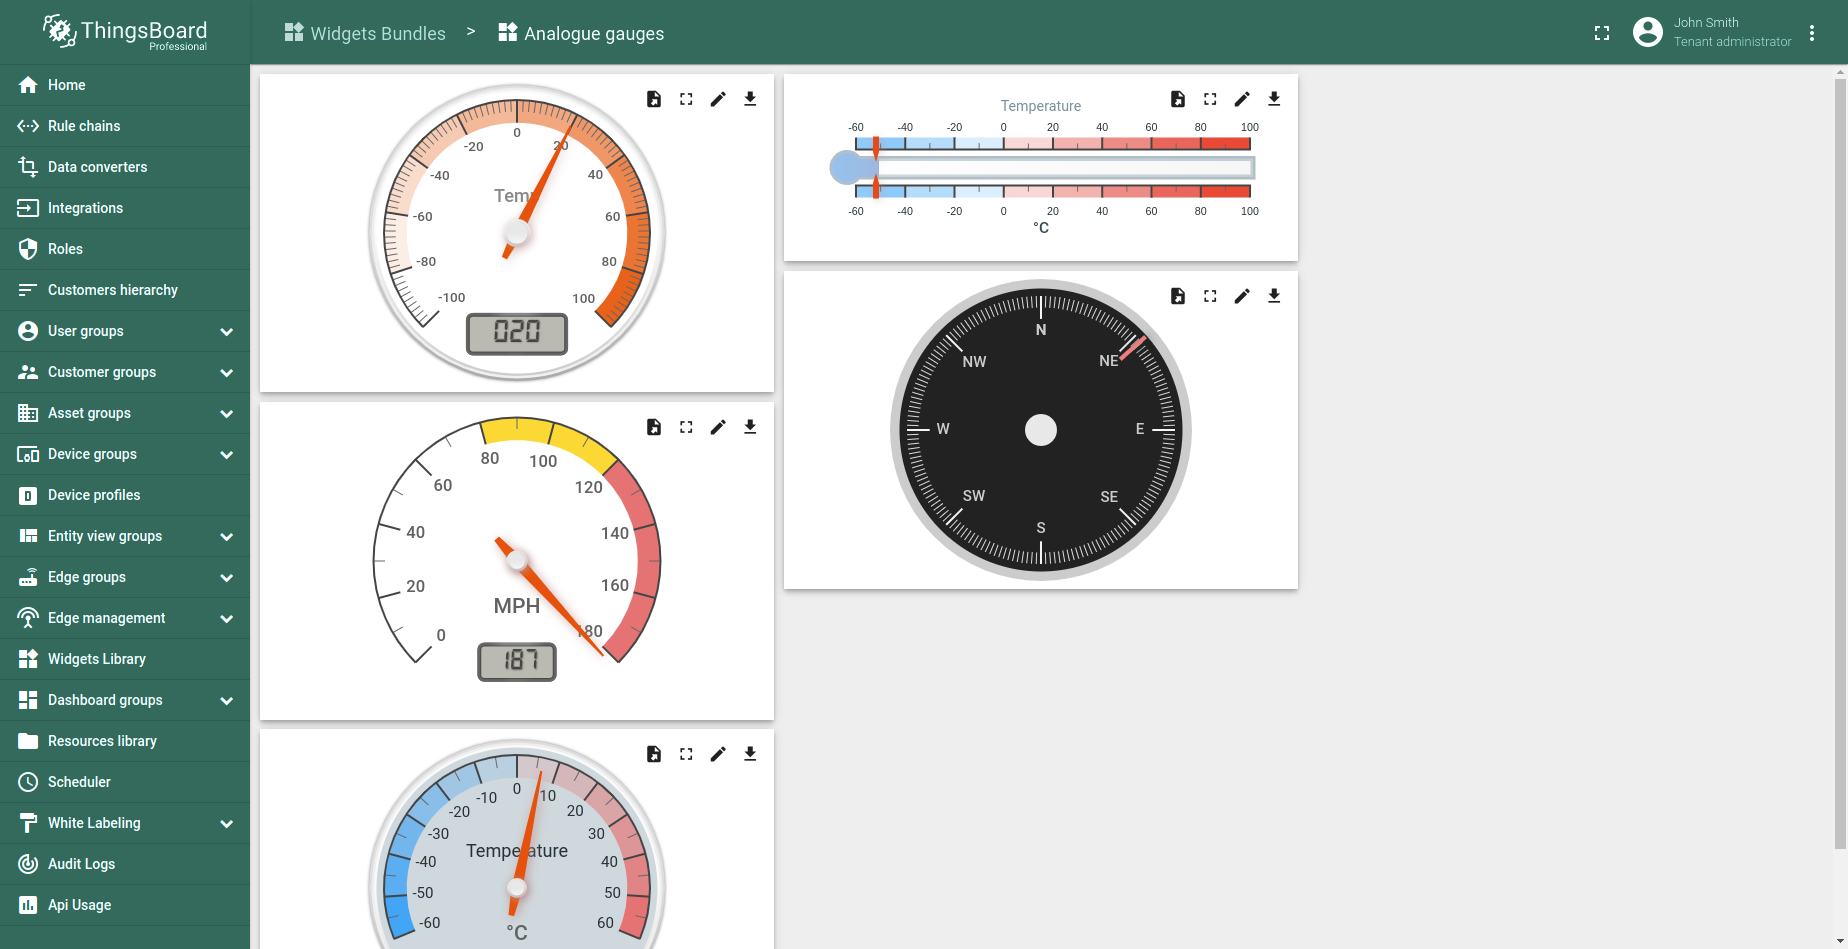
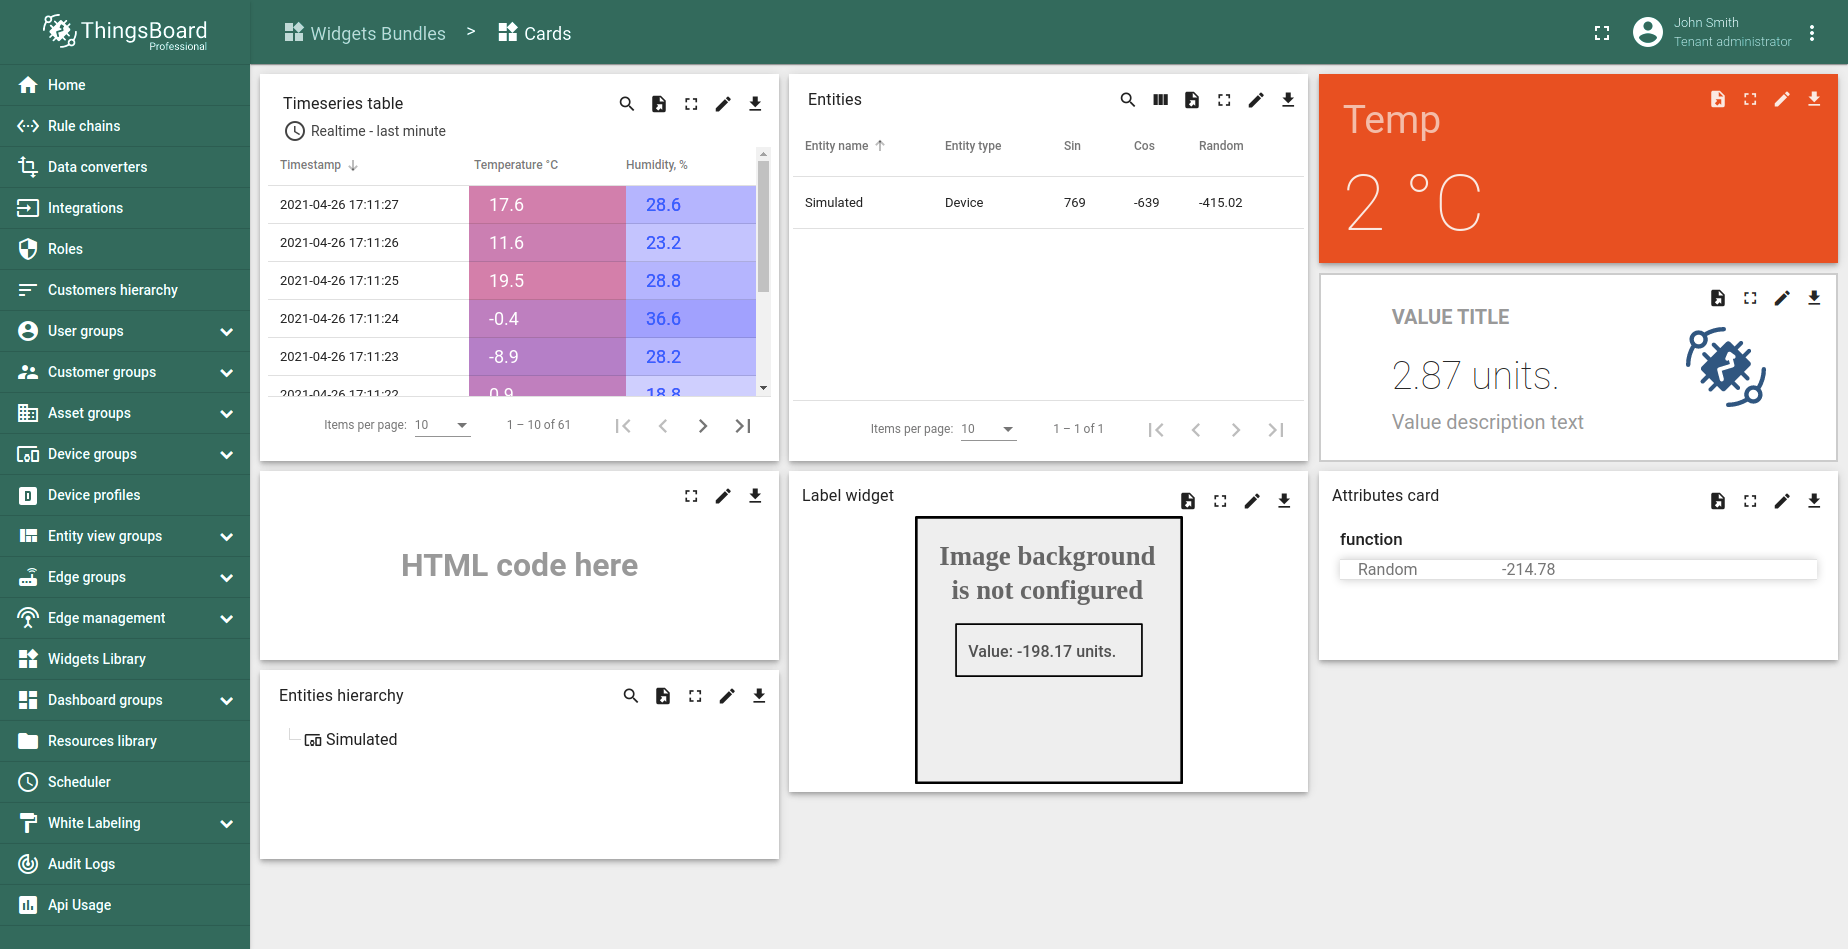
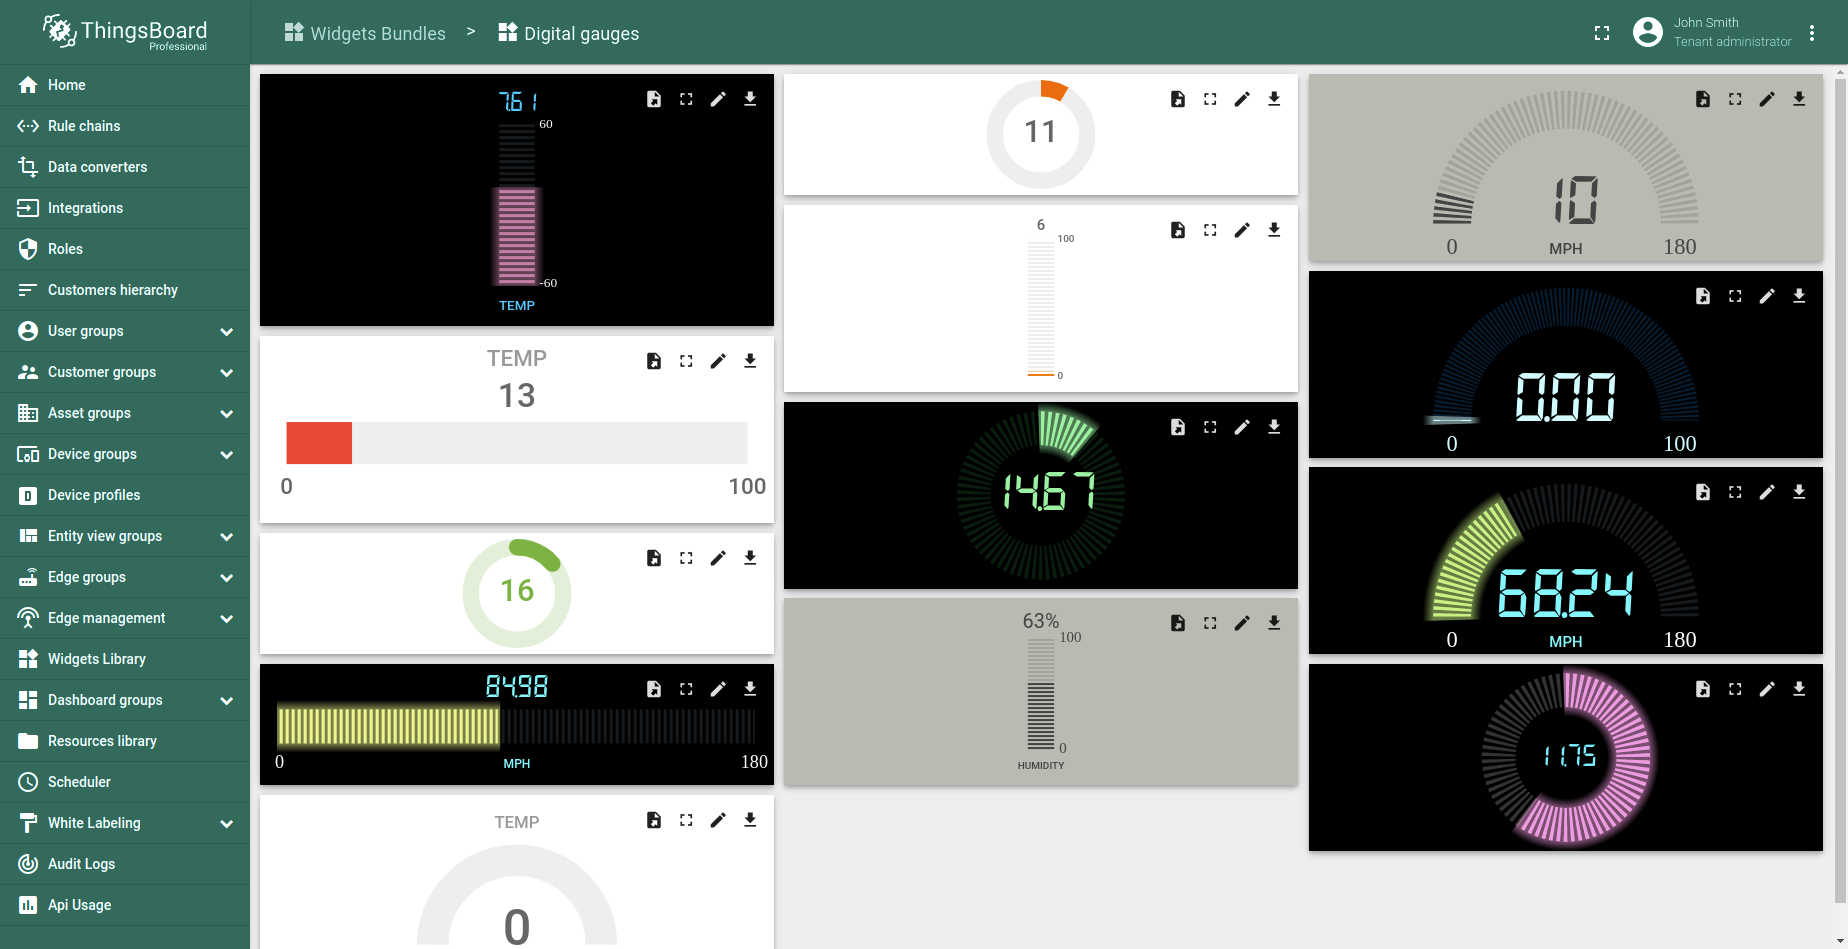
Latest values
Latest values widget type displays the latest values of a specific entity attribute or time series data point (for example, any Gauge Widget or Entities Table widget). This type of widgets uses values of entity attribute(s) or time series as a data source. Digital Gauge in example is displaying current temperature value.
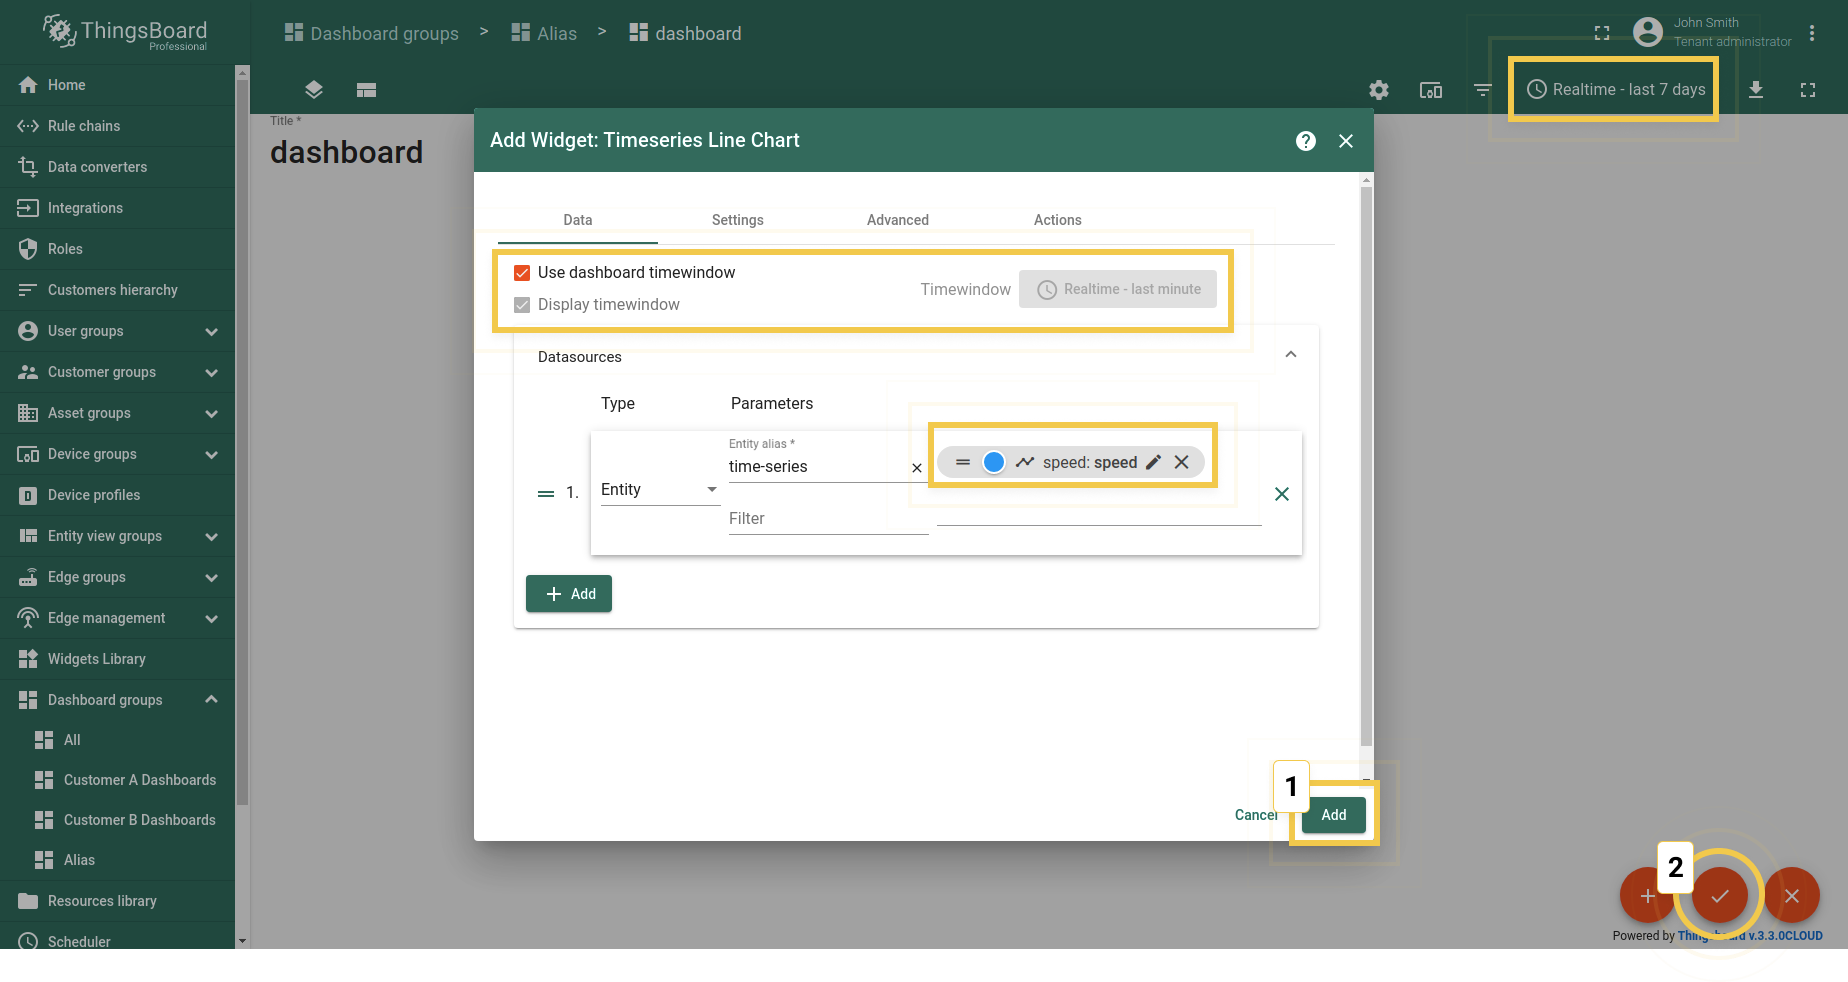
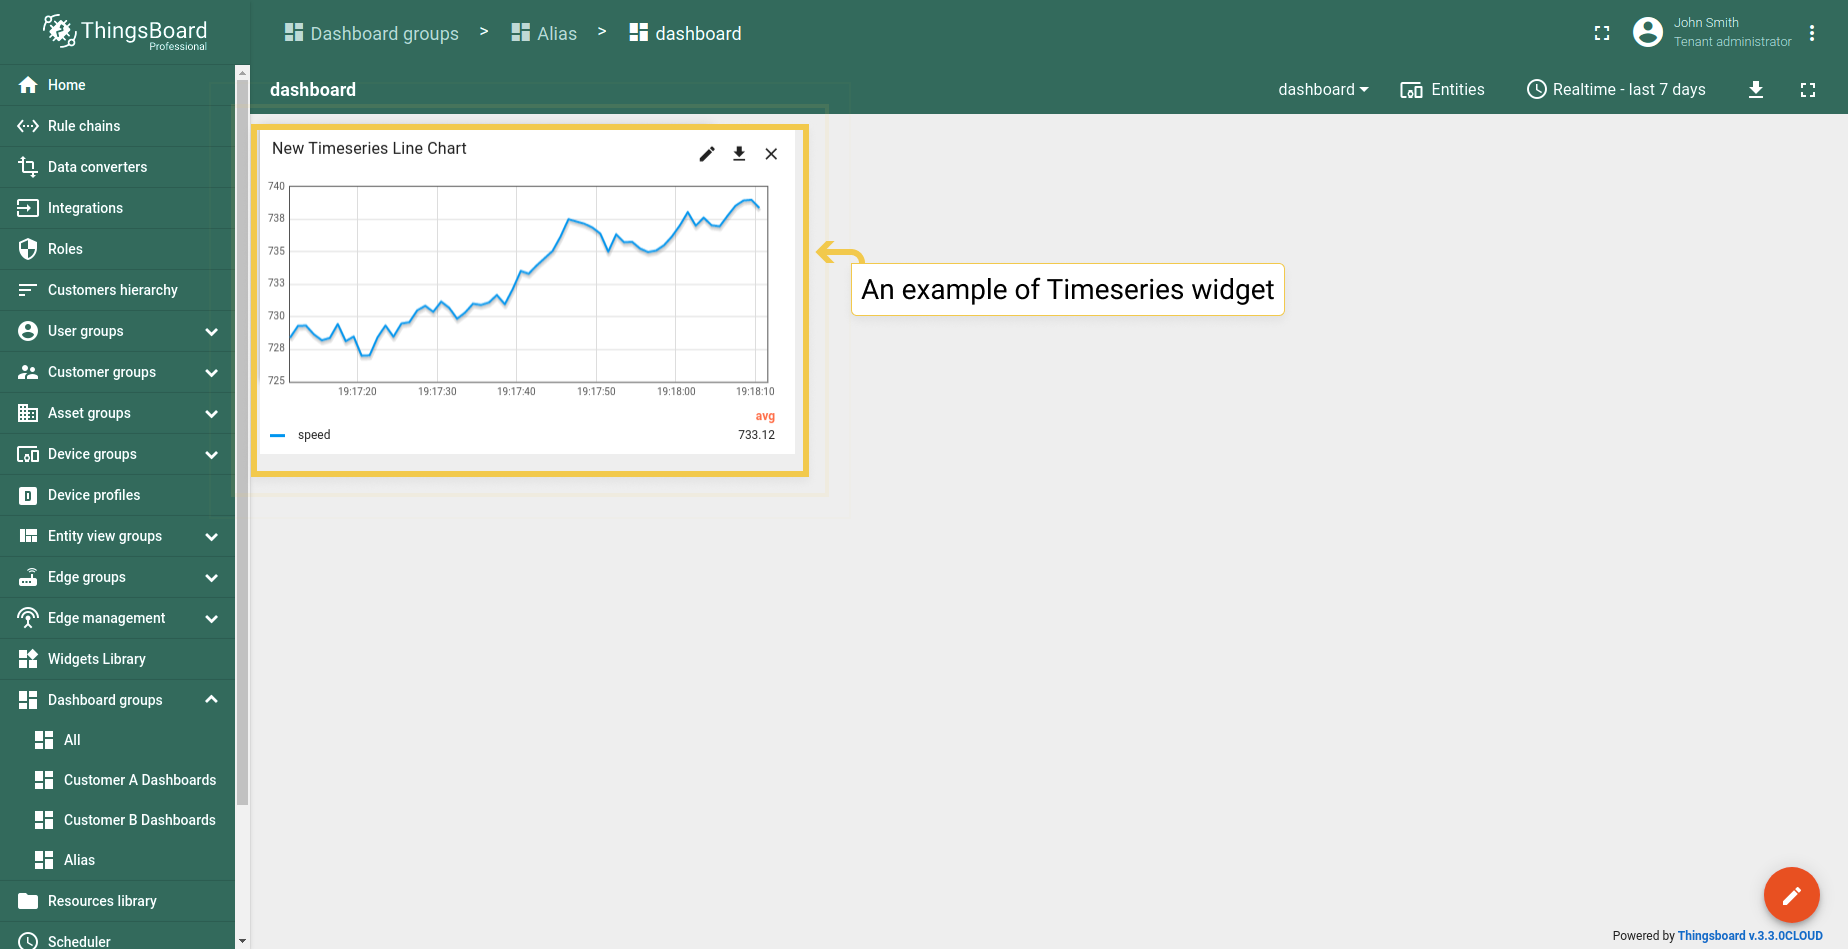
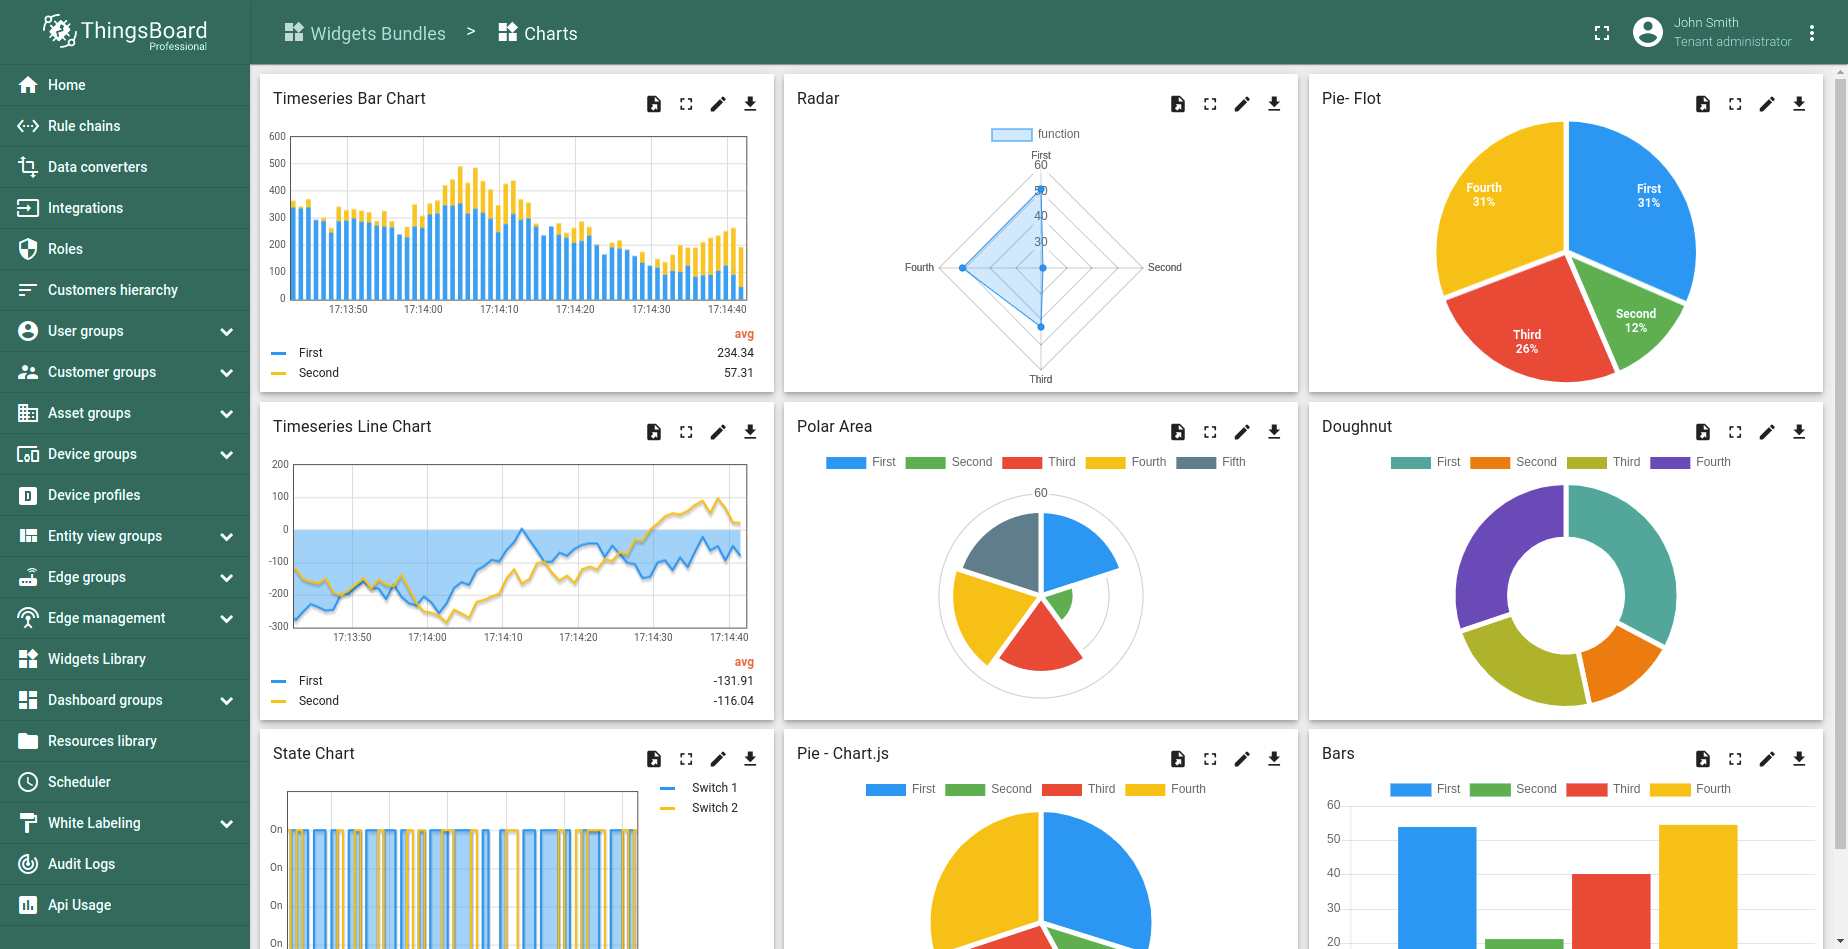
Time series
Time series widget type displays historical values for the selected period of time, or the latest values in the certain time window (for example, “Timeseries Line Chart” or “Timeseries Bar Chart”). This widget types uses only the values of entity time series as a data source. In order to specify the time frame of displayed values, Timewindow settings are used. The time window can be specified on the dashboard page or in the widget details. It can be either realtime - dynamically changed time frame for a certain latest interval, or history - fixed historical time frame. All these settings are part of Time series widget configuration. In the example, the “Timeseries Line Chart” displays speed value of device in real-time.
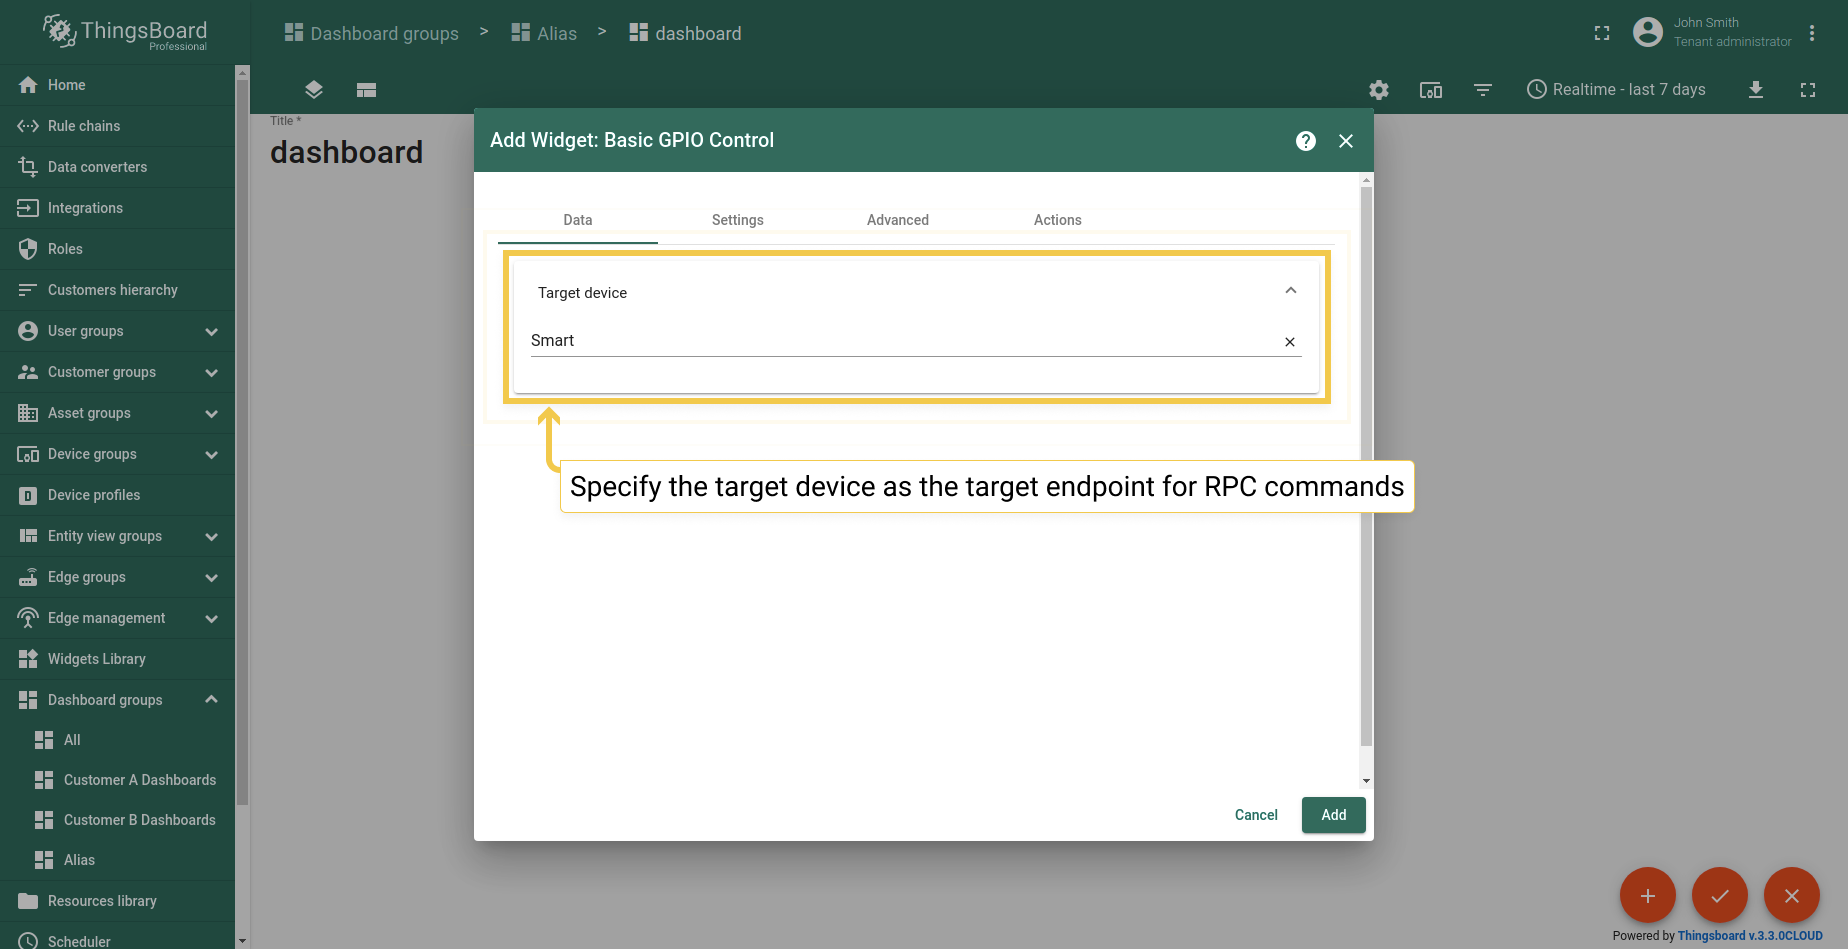
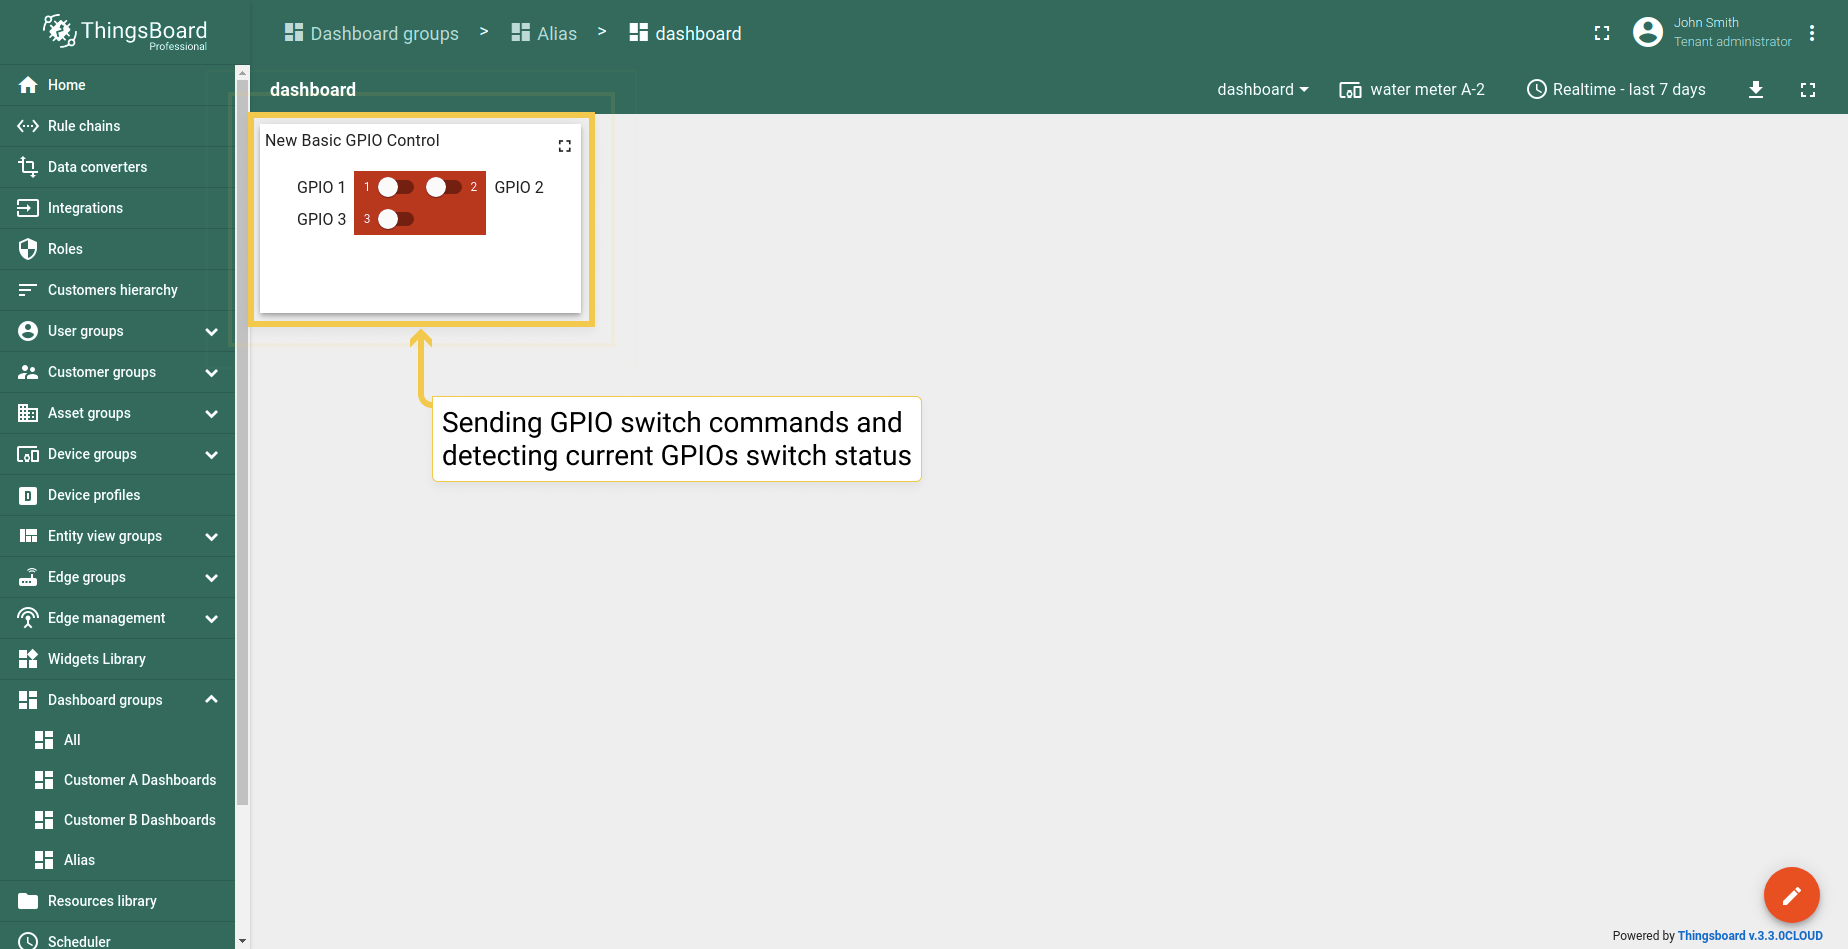
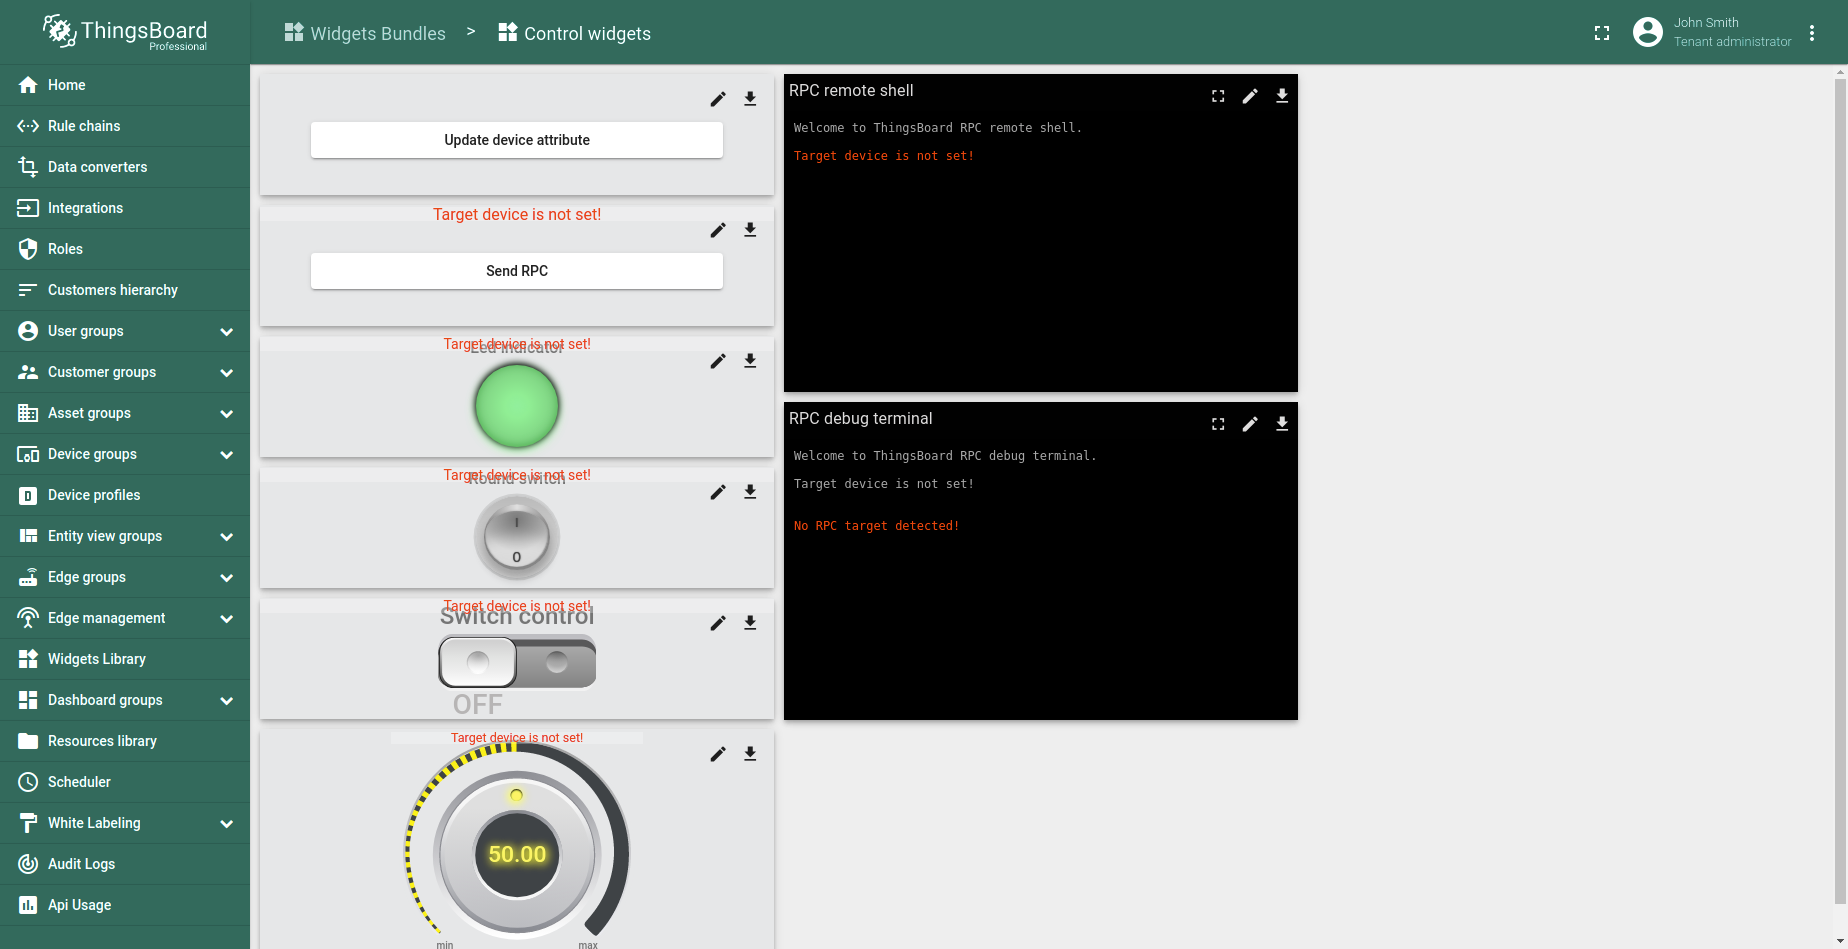
RPC (Control widget)
Control widget allows sending RPC commands to devices, it handles and visualize reply from the device (for example, “Raspberry Pi GPIO Control”). RPC widgets are configured by specifying the target device as the target endpoint for RPC commands. In the example, the “Basic GPIO Control” widget sends GPIO switch commands and detects current GPIOs switch status.
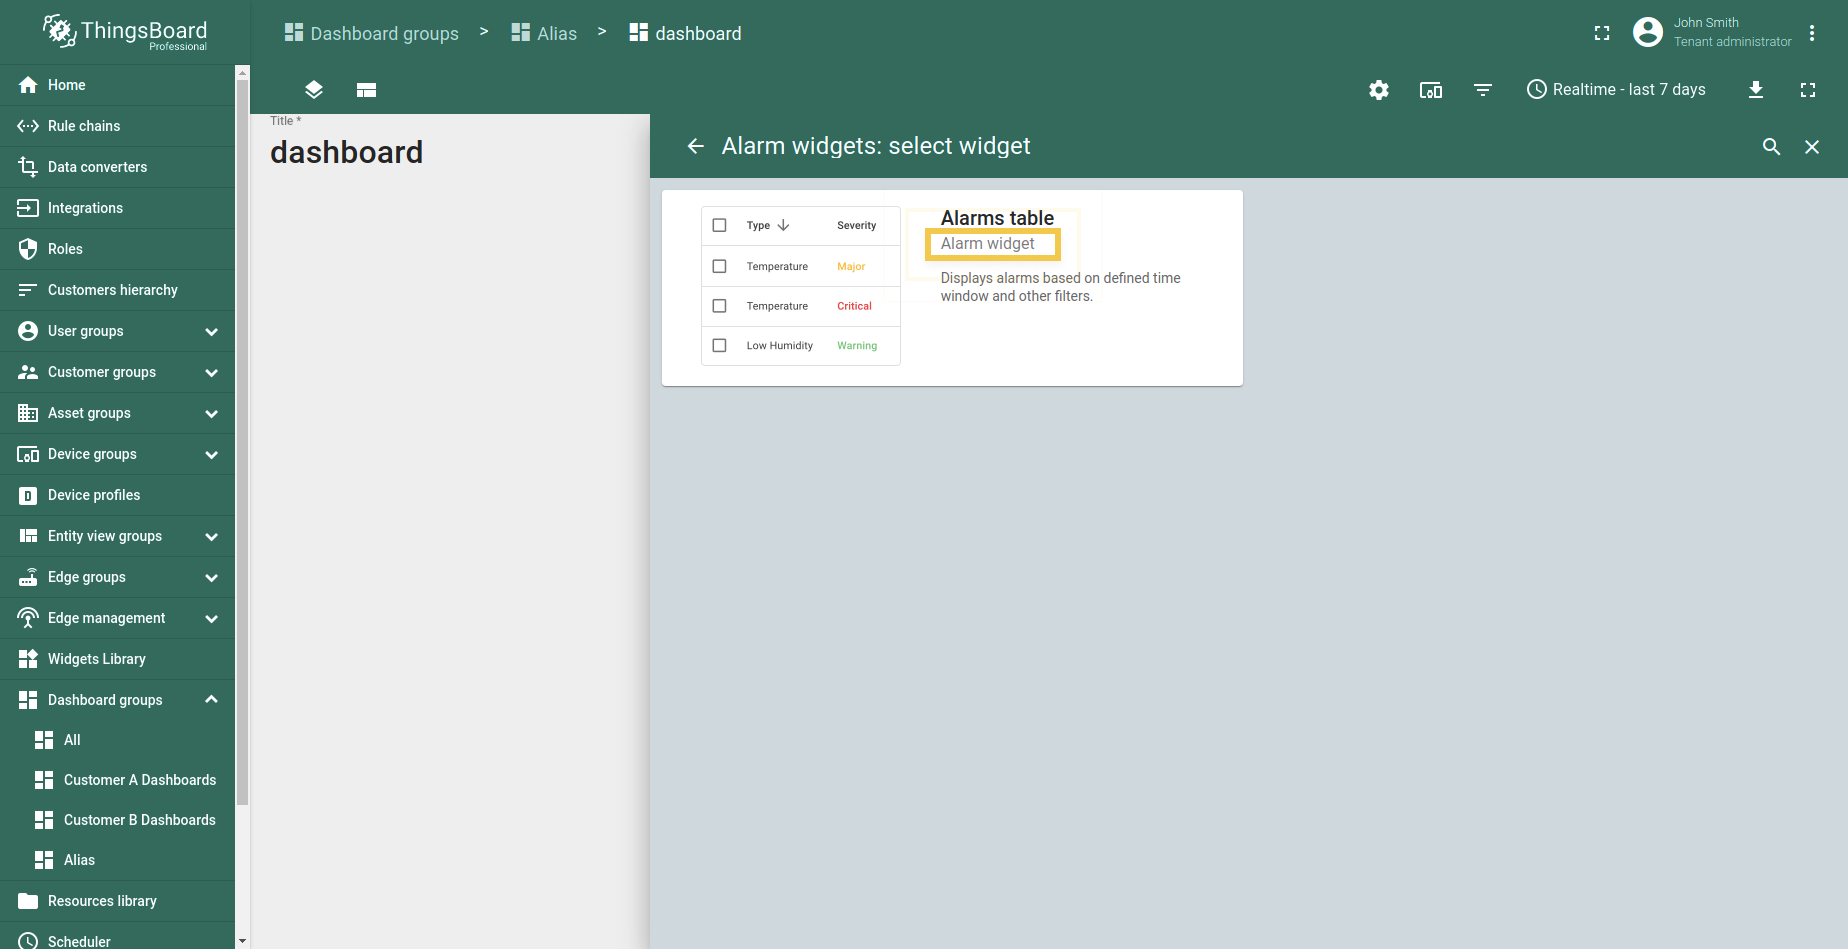
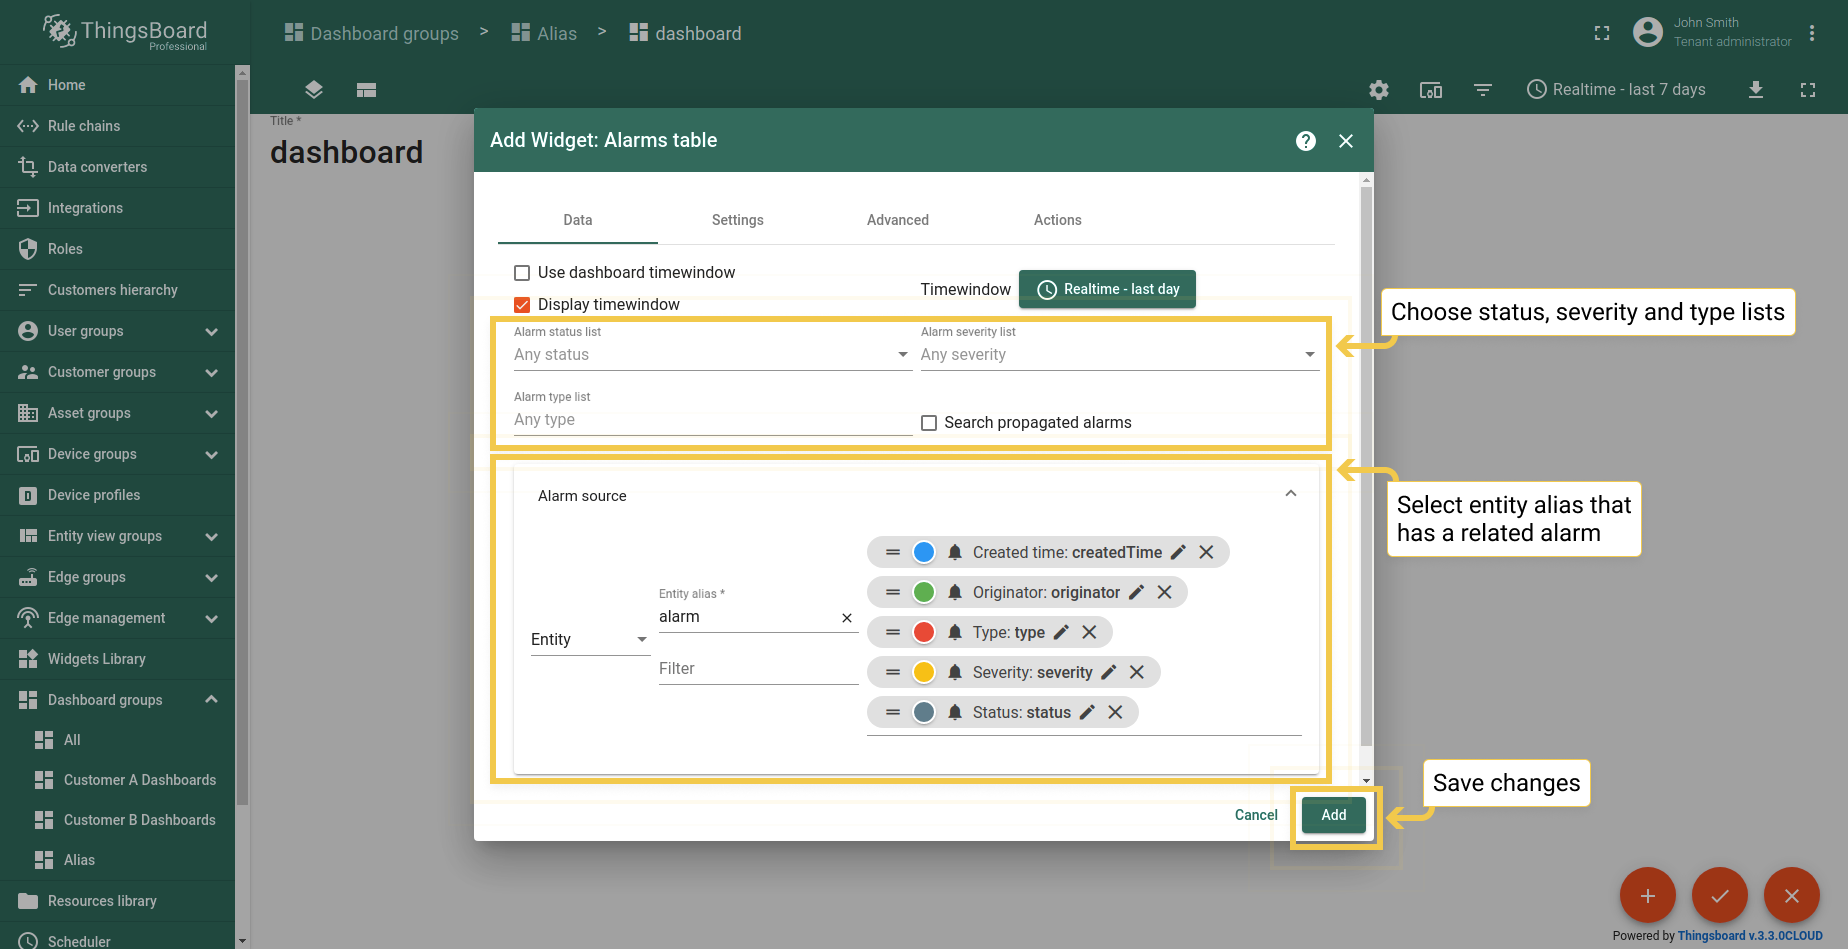
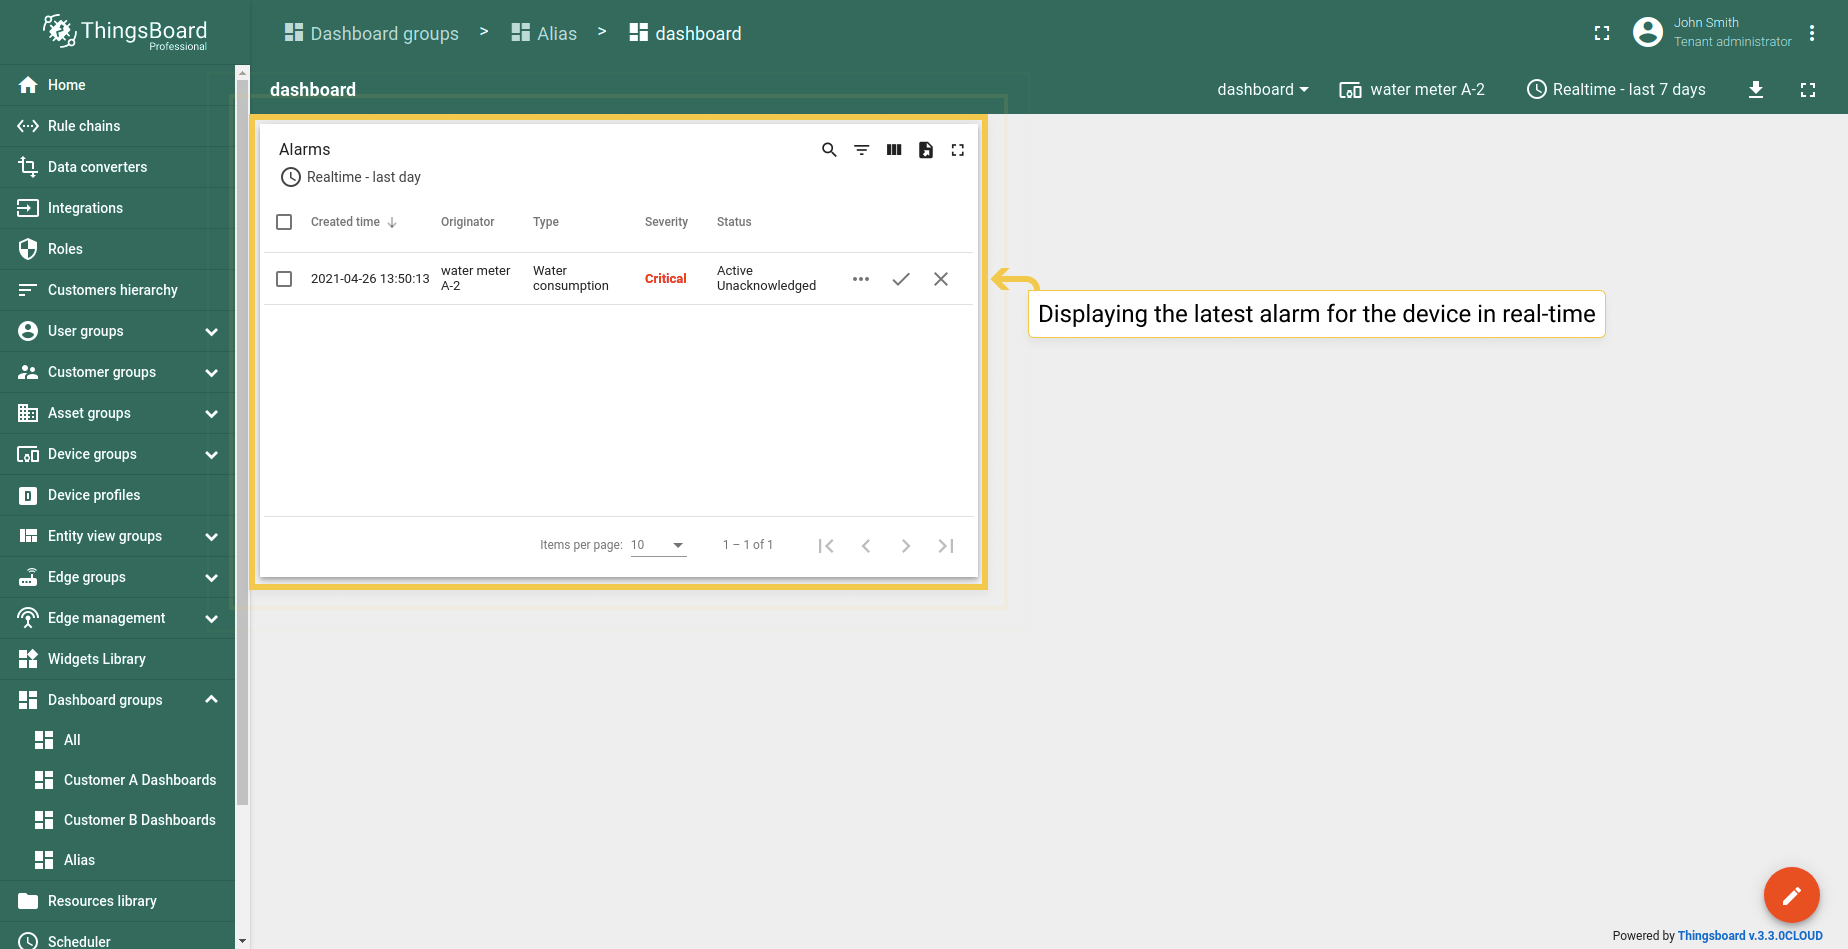
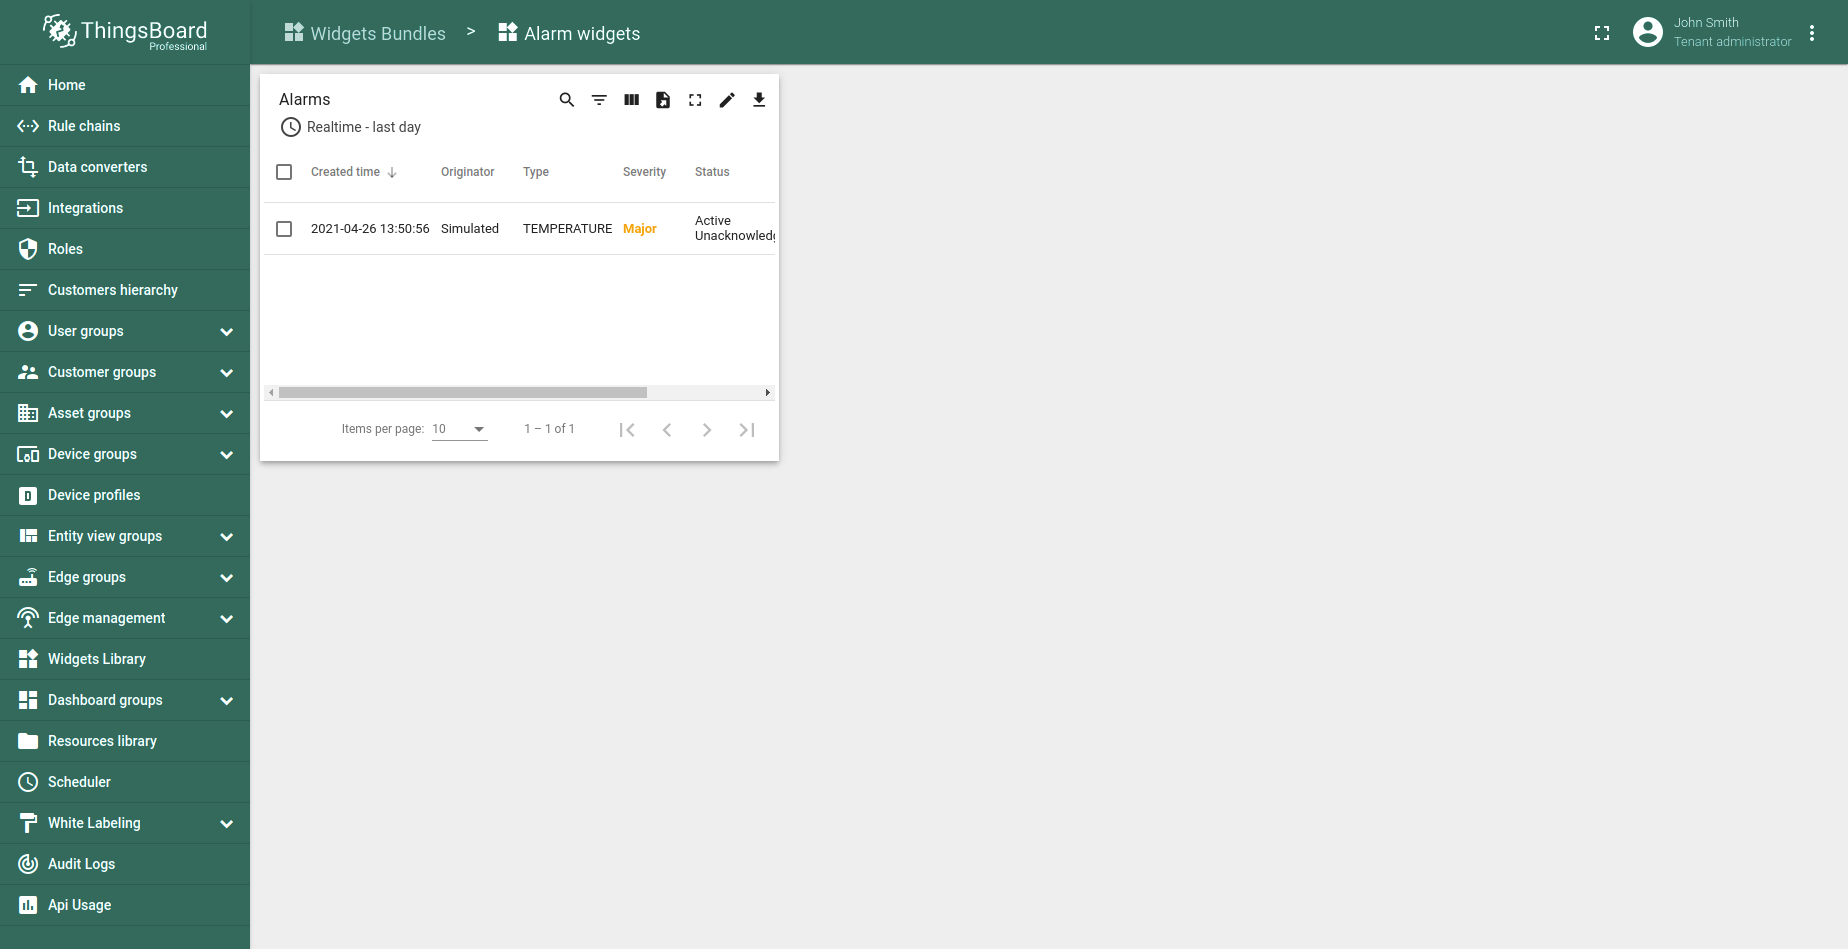
Alarm Widget
Alarm Widget type displays alarms related to the specified entity in the certain time window (for example, “Alarms table”).
Alarm widget is configured by specifying an entity as the alarm source, and the corresponding alarm fields.
As the Time series widgets, Alarm widgets have the timewindow configuration to specify the time frame of the displayed alarms.
In addition, the configuration contains “Alarm status”, “Alarms severity” and “Alarm type” parameters.
“Alarm status” parameter specifies the status of alarms being fetched. “Alarms severity” controls alarms fetching frequency in seconds.
“Alarm type” helps to identify the root cause of the alarm. For example, “HighTemperature” and “LowHumidity” are two different alarms.
In the example, the “Alarms table” widget displays the latest alarm for the device in real-time.
Static
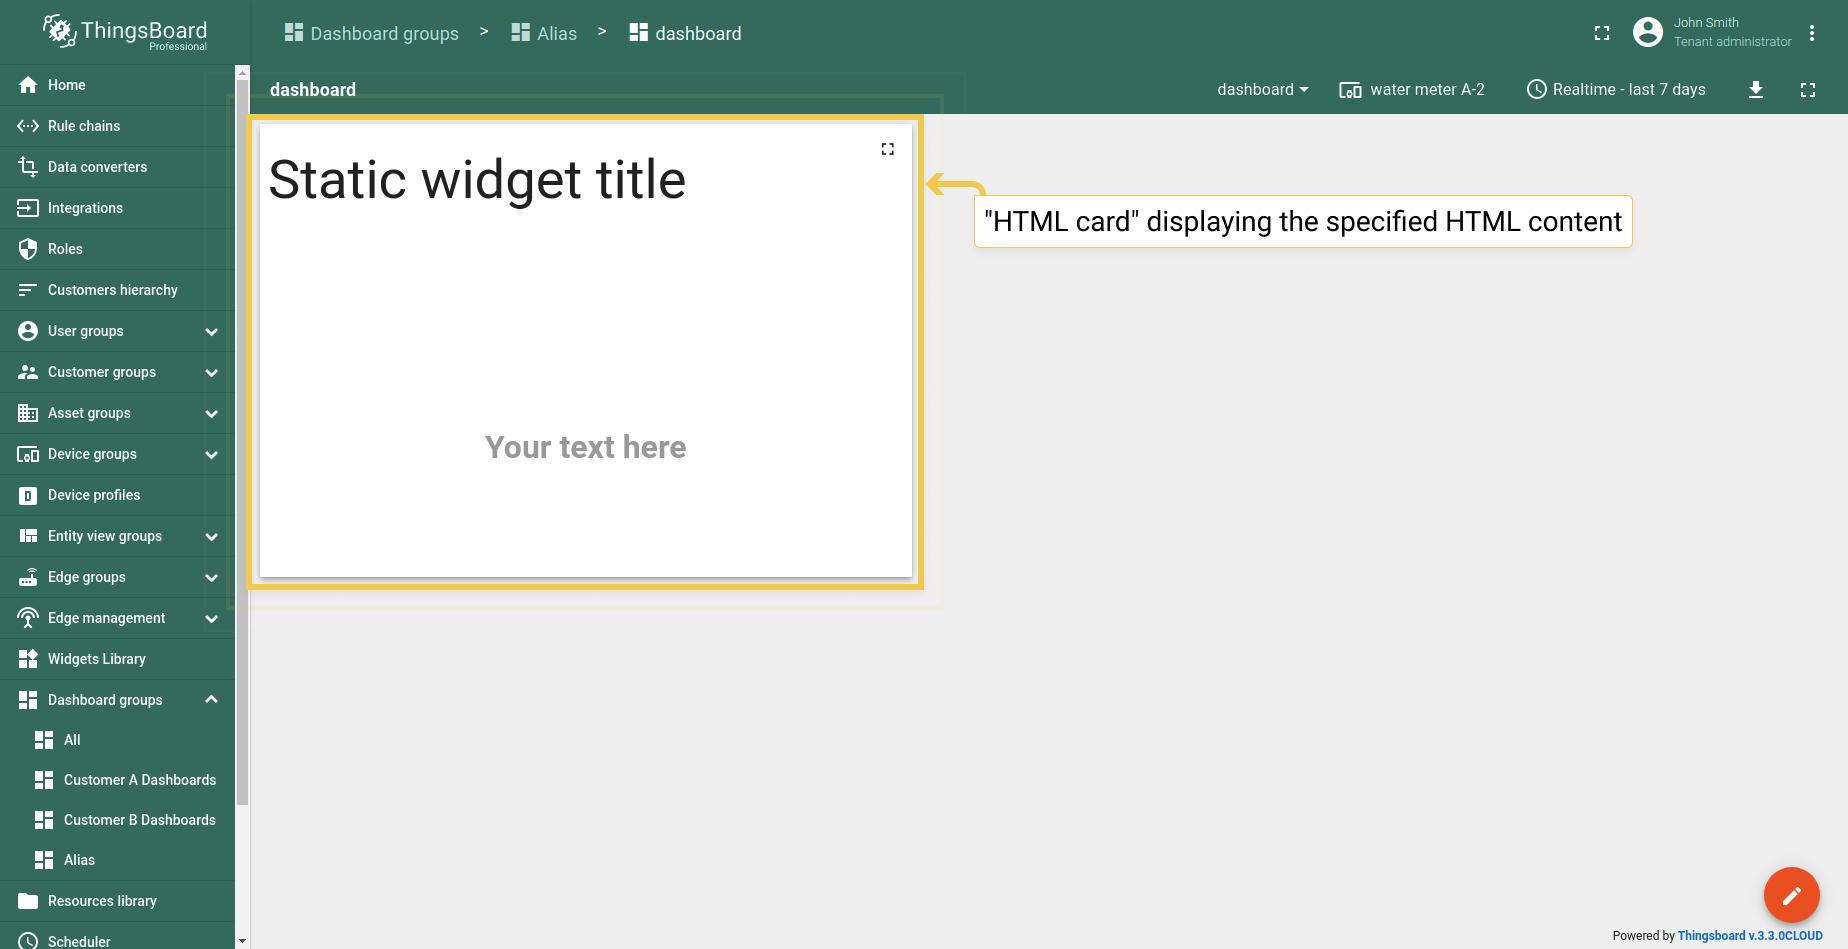
Static widget type displays static customizable HTML content (for example, “HTML card”). Static widgets don’t use any data sources and usually configured by specifying static HTML content and optionally CSS styles. An example of a Static widget is the “HTML card” that displays the specified HTML content.
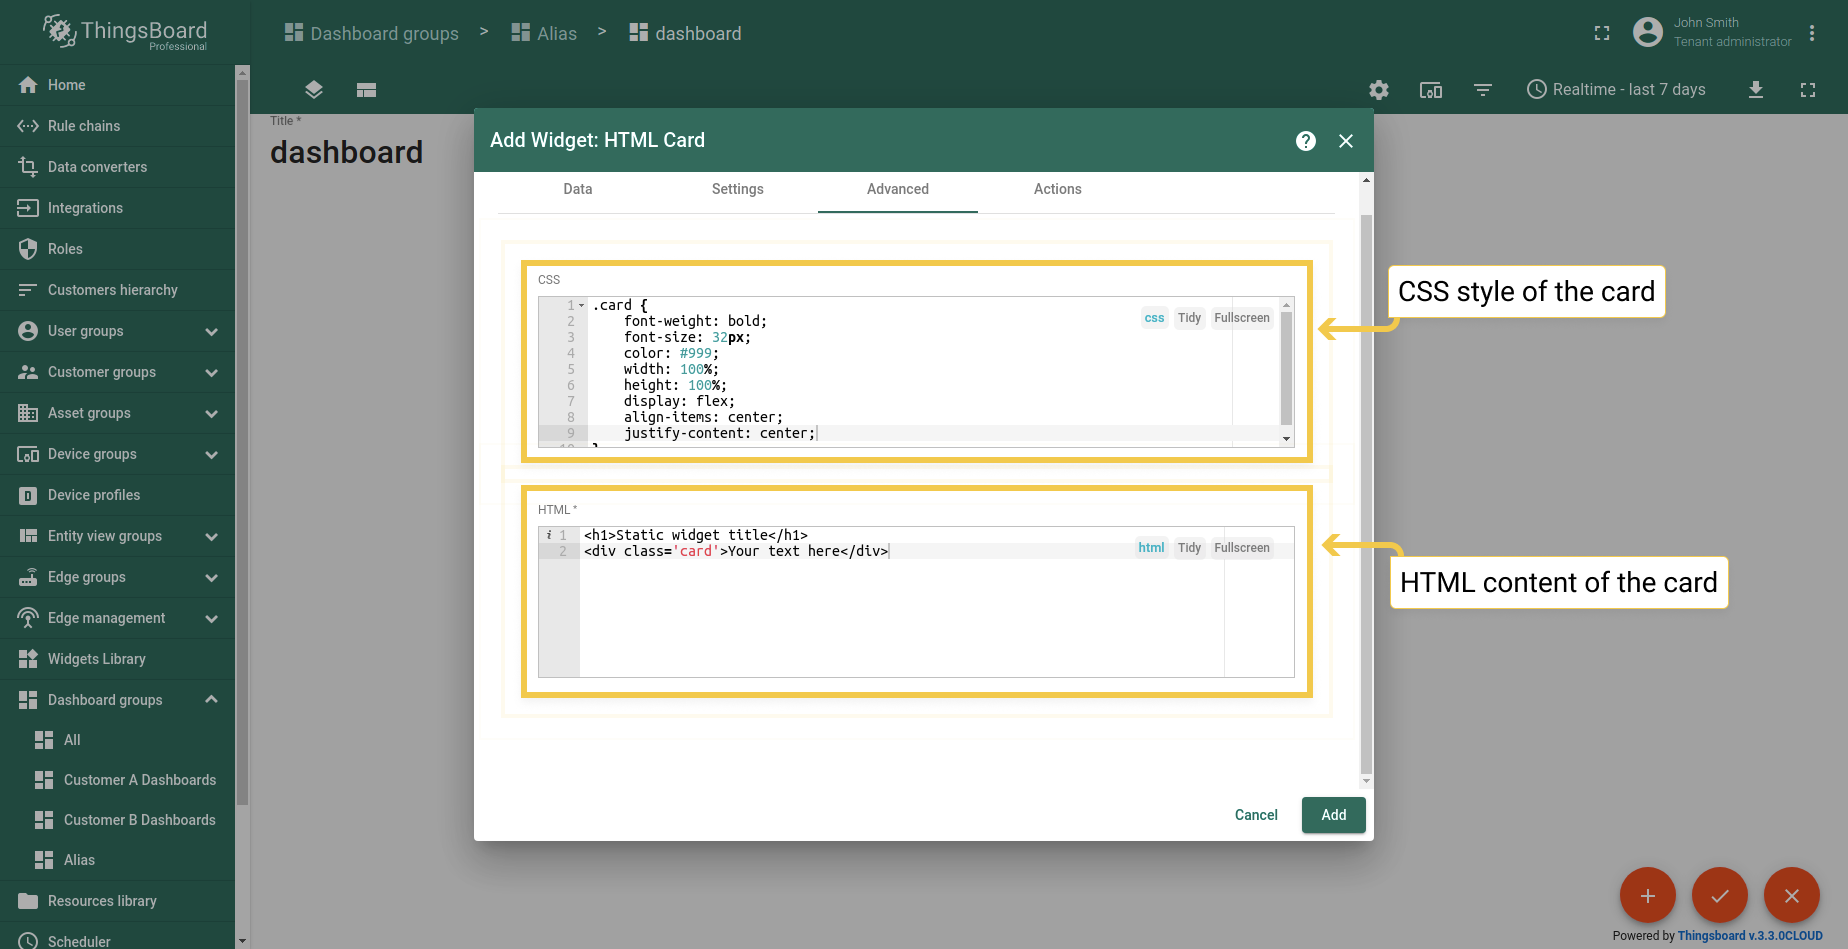
An example of a CSS style function to adjust an HTML card style.
1
2
3
4
5
6
7
8
9
10
.card {
font-weight: bold;
font-size: 32px;
color: #999;
width: 100%;
height: 100%;
display: flex;
align-items: center;
justify-content: center;
}
An example of an HTML code for specifying card content.
1
2
<h1>Static widget title</h1>
<div class='card'>Your text here</div>
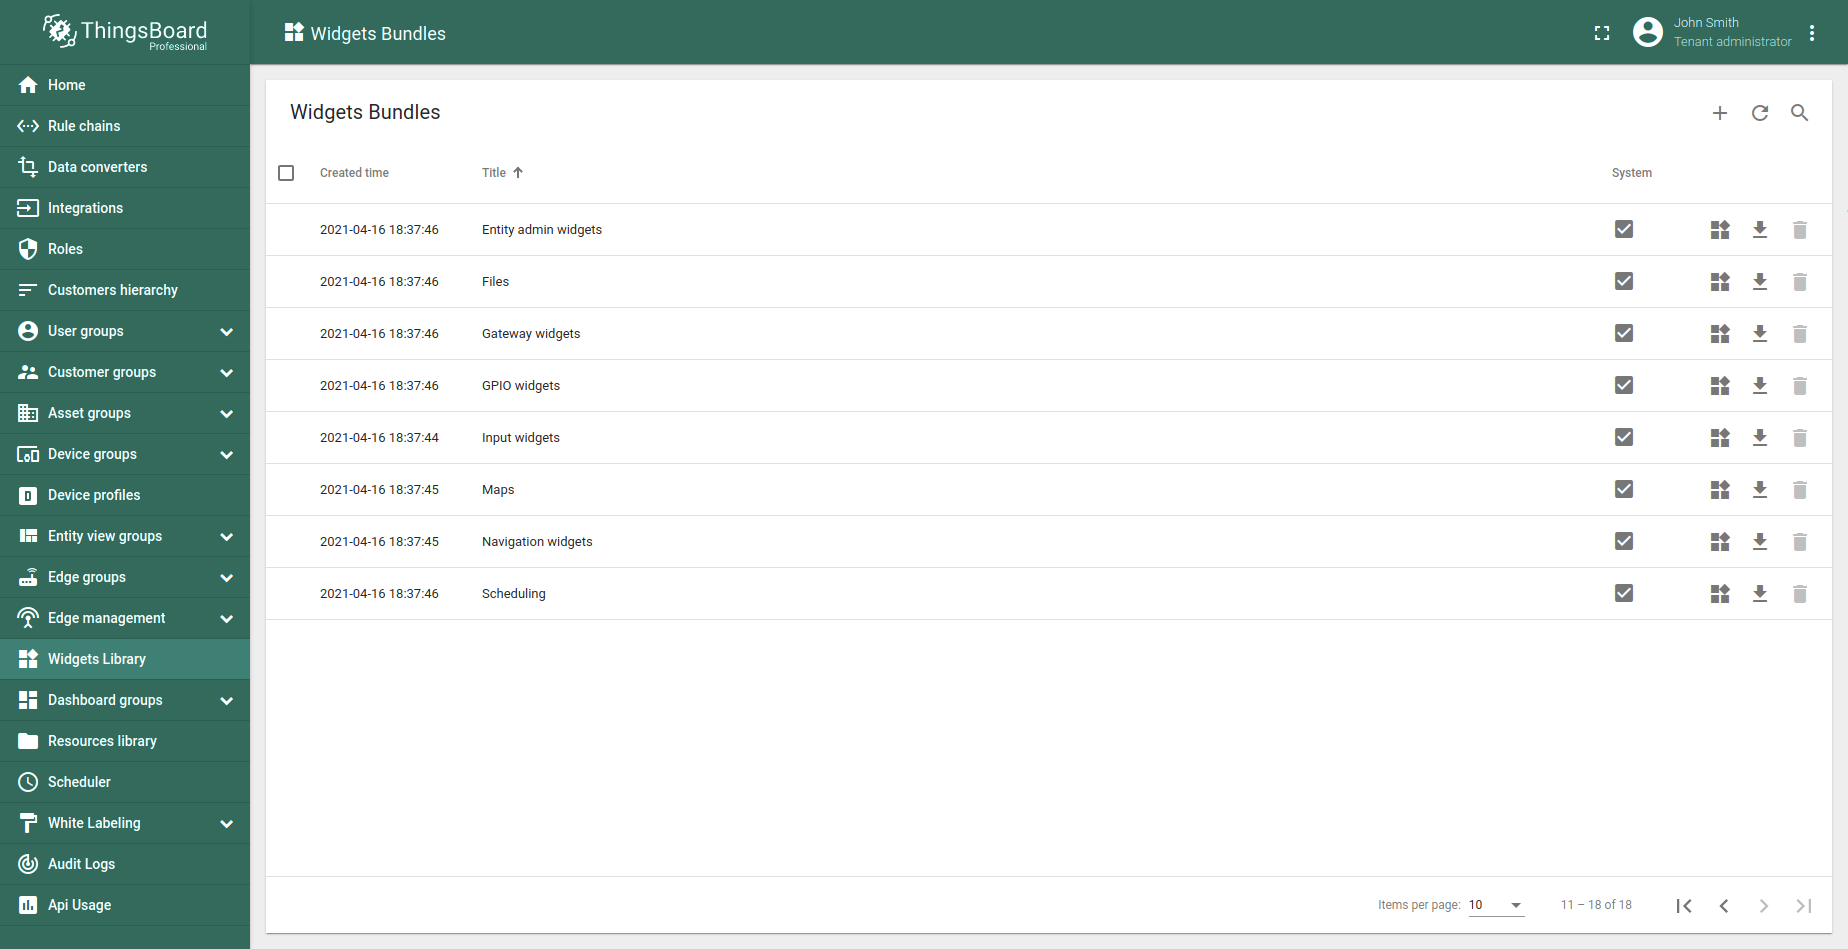
Widgets Library (Bundles)
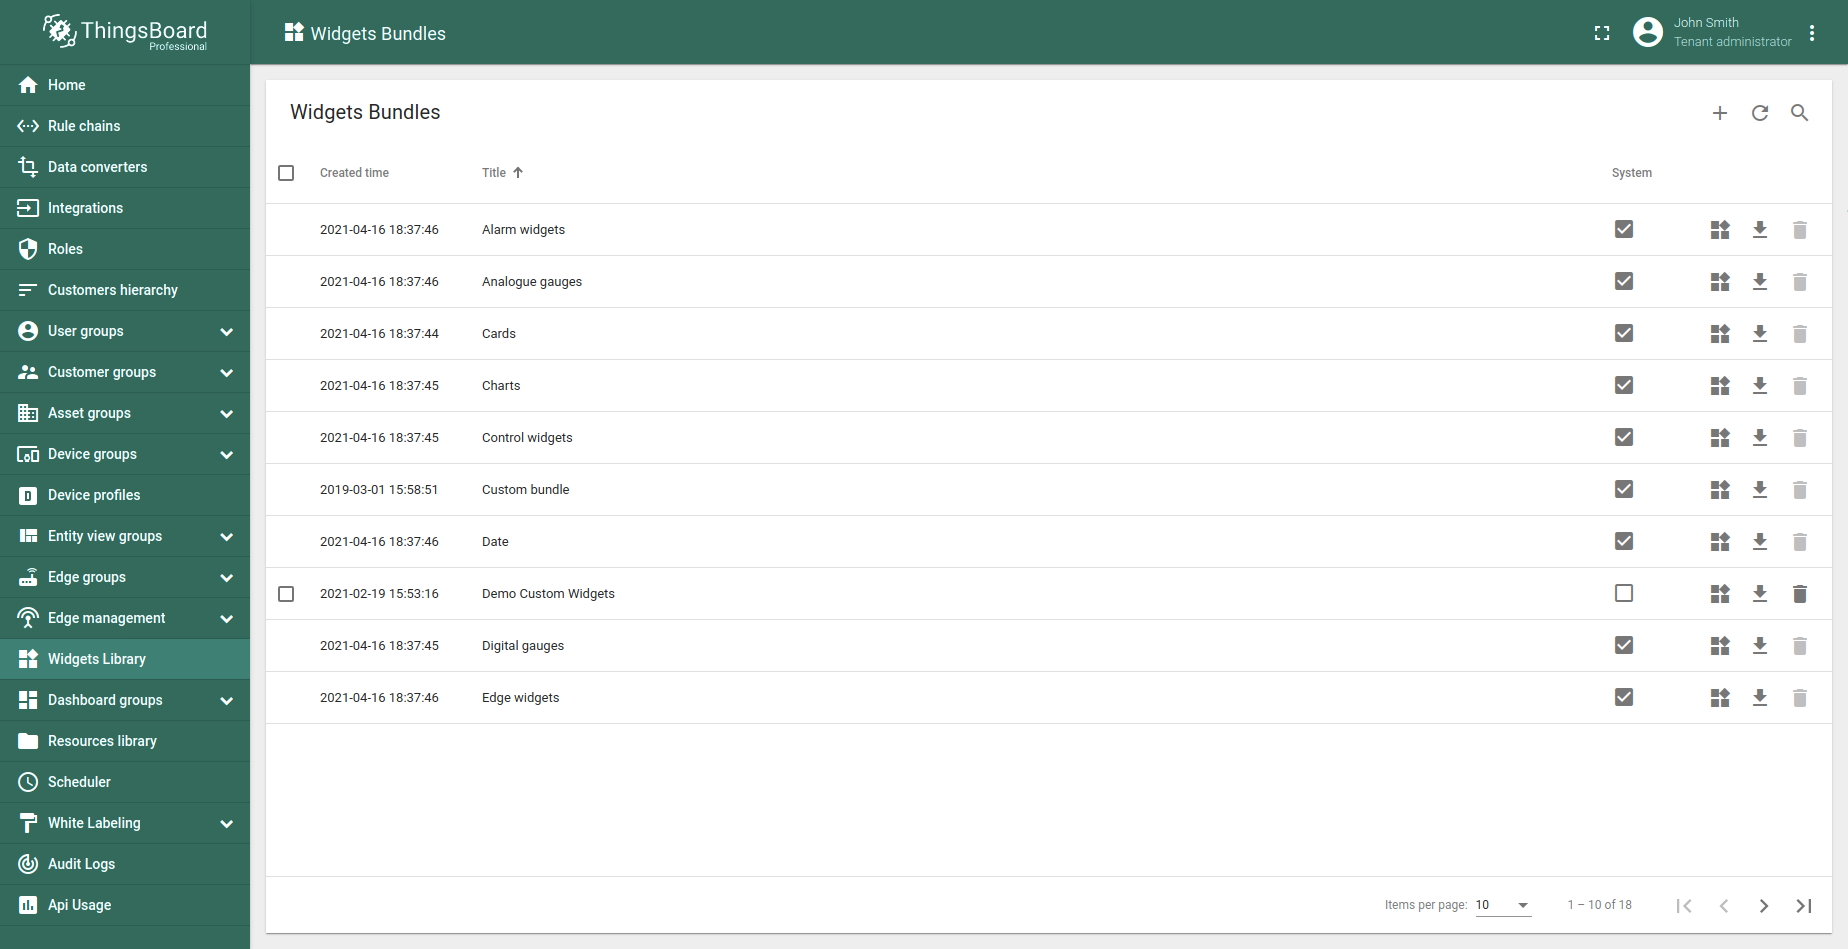
Widgets are grouped into widget bundles according to their purposes. There are System-level and Tenant-level Widgets bundles.
Initial IoT Hub installation comes with a basic set of system-level Widgets bundles.
System level bundles can be managed by a System administrator and are available for use by any tenant in the system.
Tenant level bundles can be managed by a Tenant administrator and are available for use only by this tenant and his customers.
You can always implement and add your widgets by following this guide.
Alarm widgets
Alarm widgets bundle is useful for visualization alarms for specific entities, both in real-time and history modes.
Analog Gauges
Analog Gauges bundle is useful for visualization temperature, humidity, speed, and other integer or float values.
Cards
Cards bundle is useful for visualization time series data or attributes in table or card widgets.
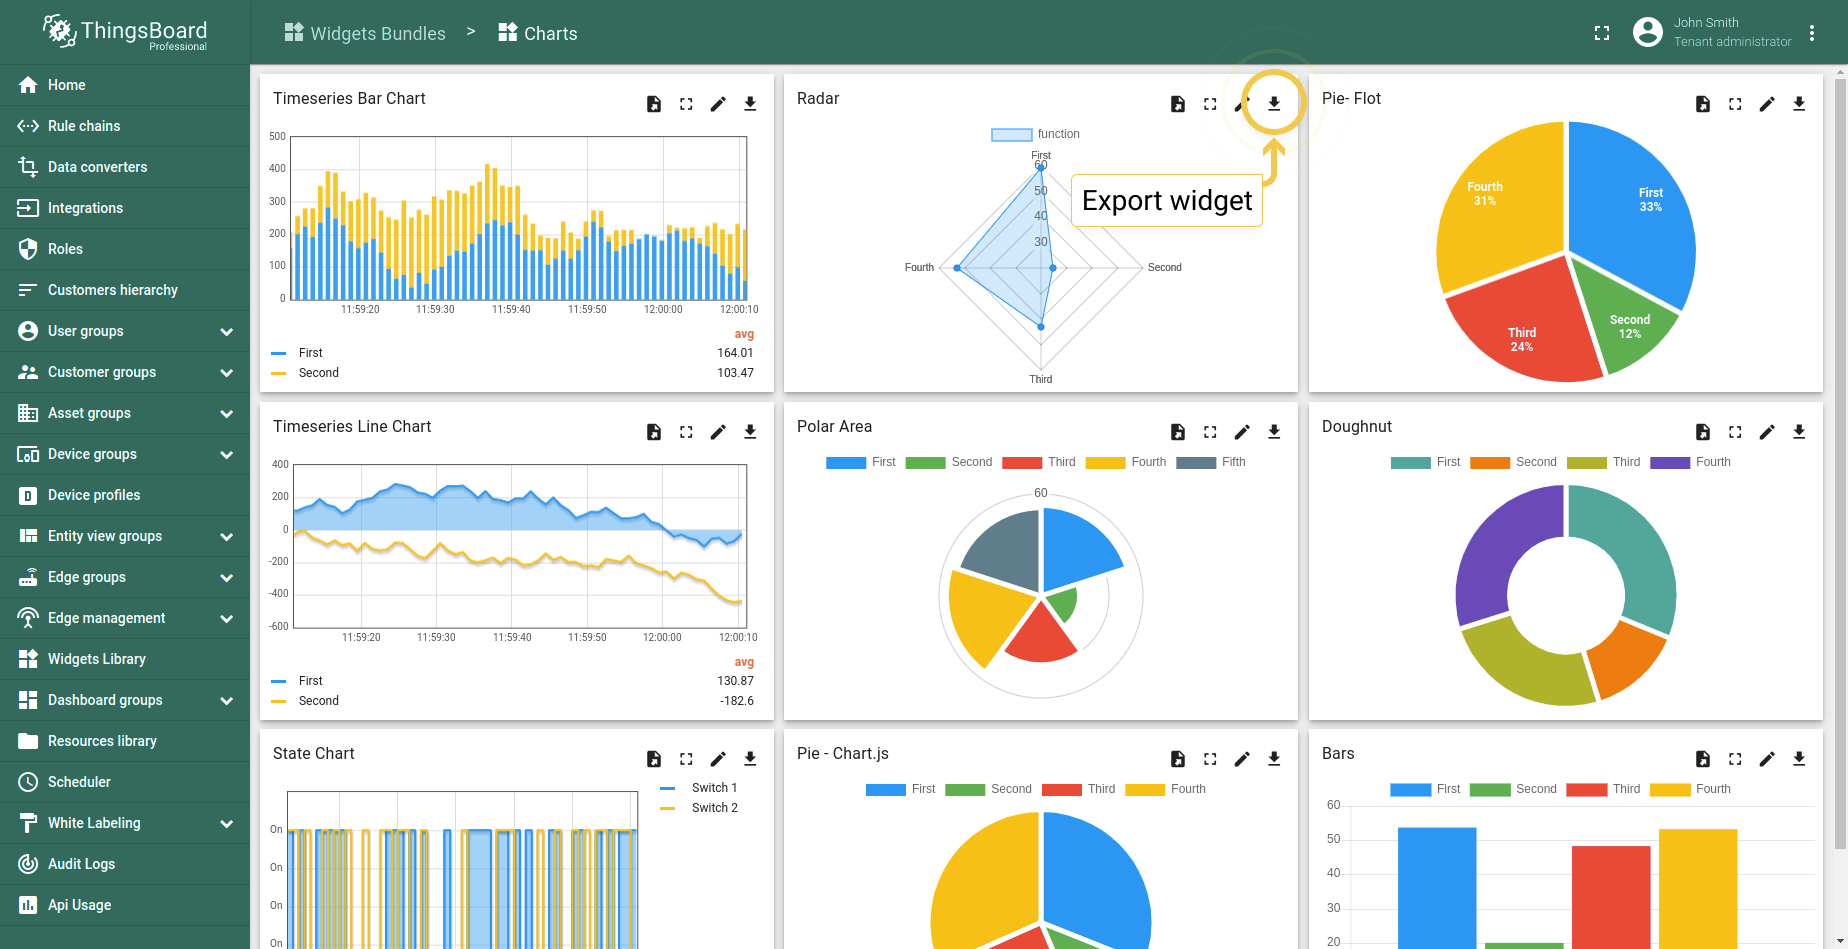
Charts
Charts bundle is useful for visualization historical or real-time data with a time window.
Control widgets
Control widgets bundle is useful for visualization the current state and sending RPC commands to target devices.
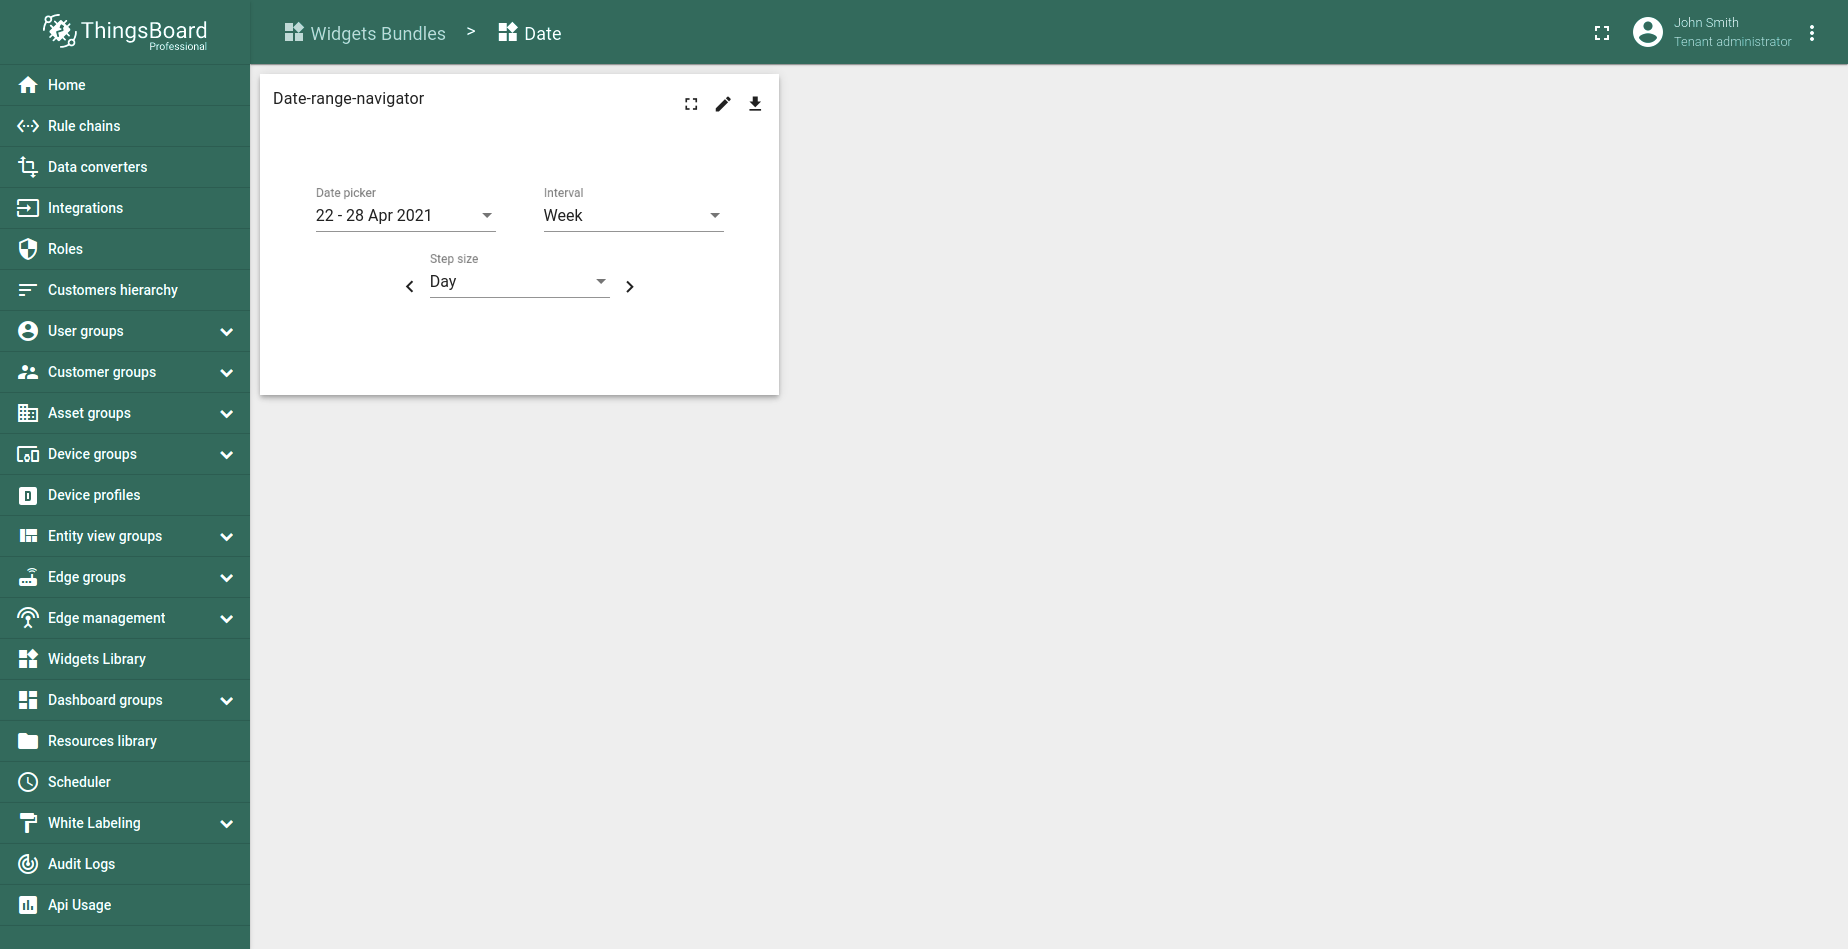
Date widgets
Date widgets bundle is useful for changing the data range for other widgets on the dashboard.
Digital Gauges
Digital Gauges bundle is useful for visualization temperature, humidity, speed and other integer or float values.
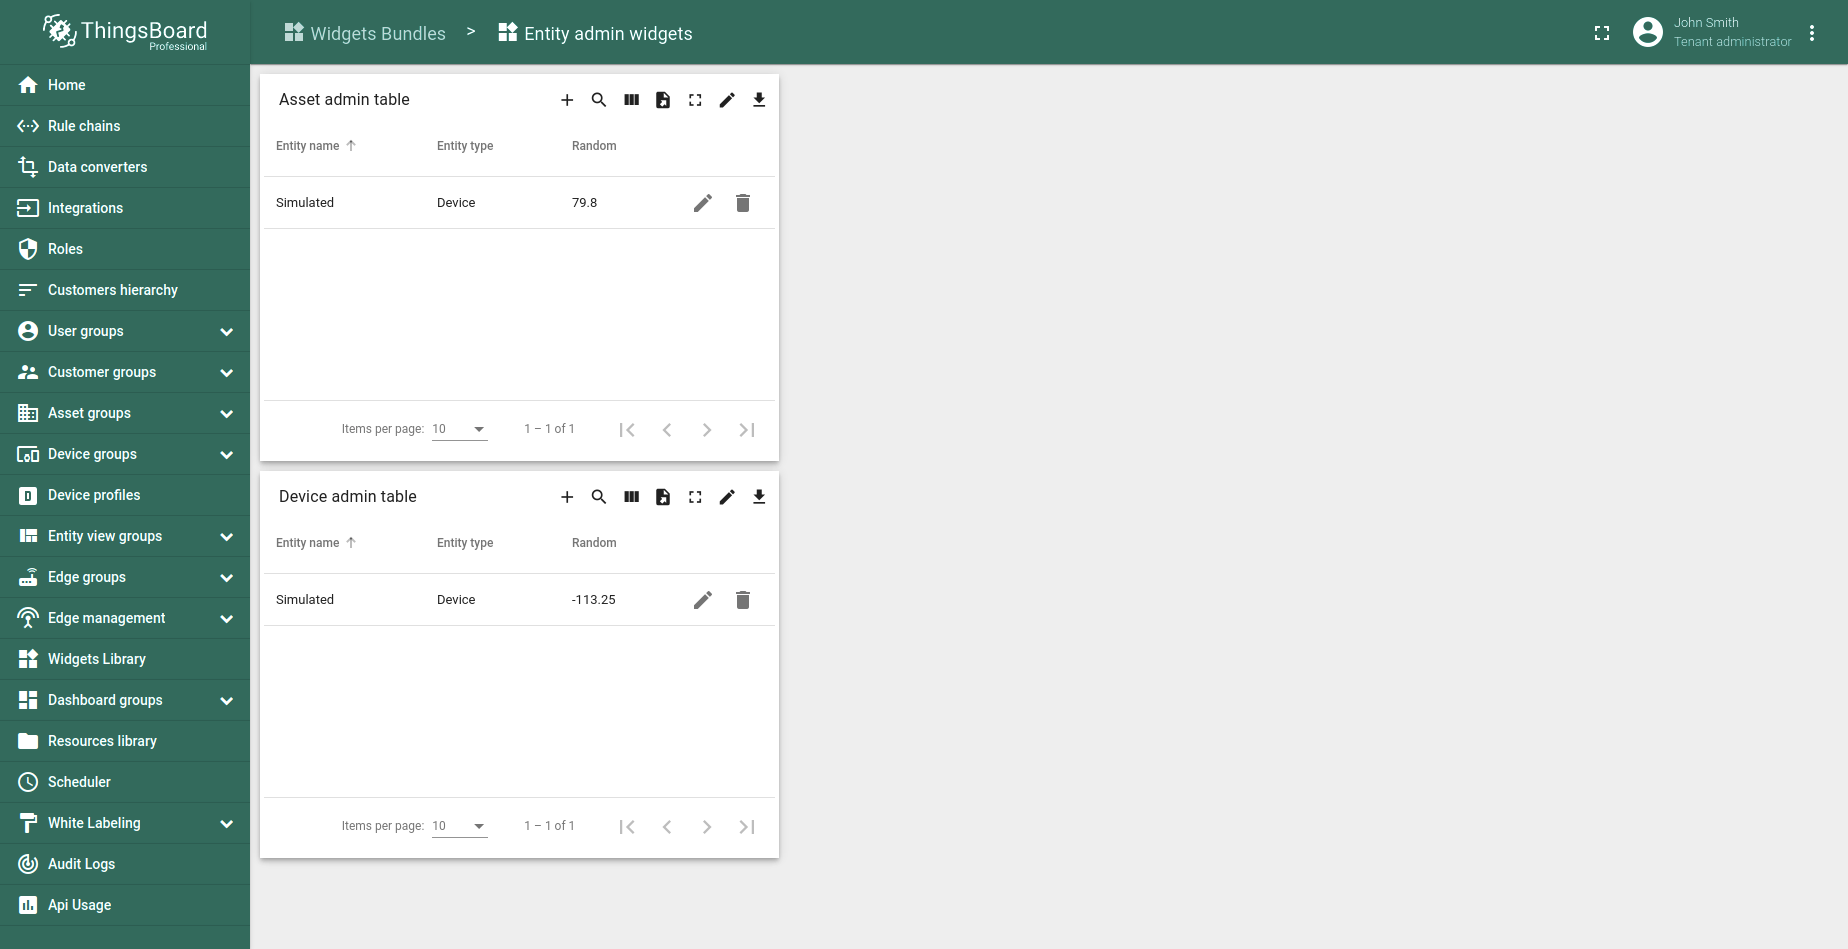
Entity admin widgets
Entity admin widgets are templates of complex widgets that allow listing and creating/updating/deleting devices and assets.
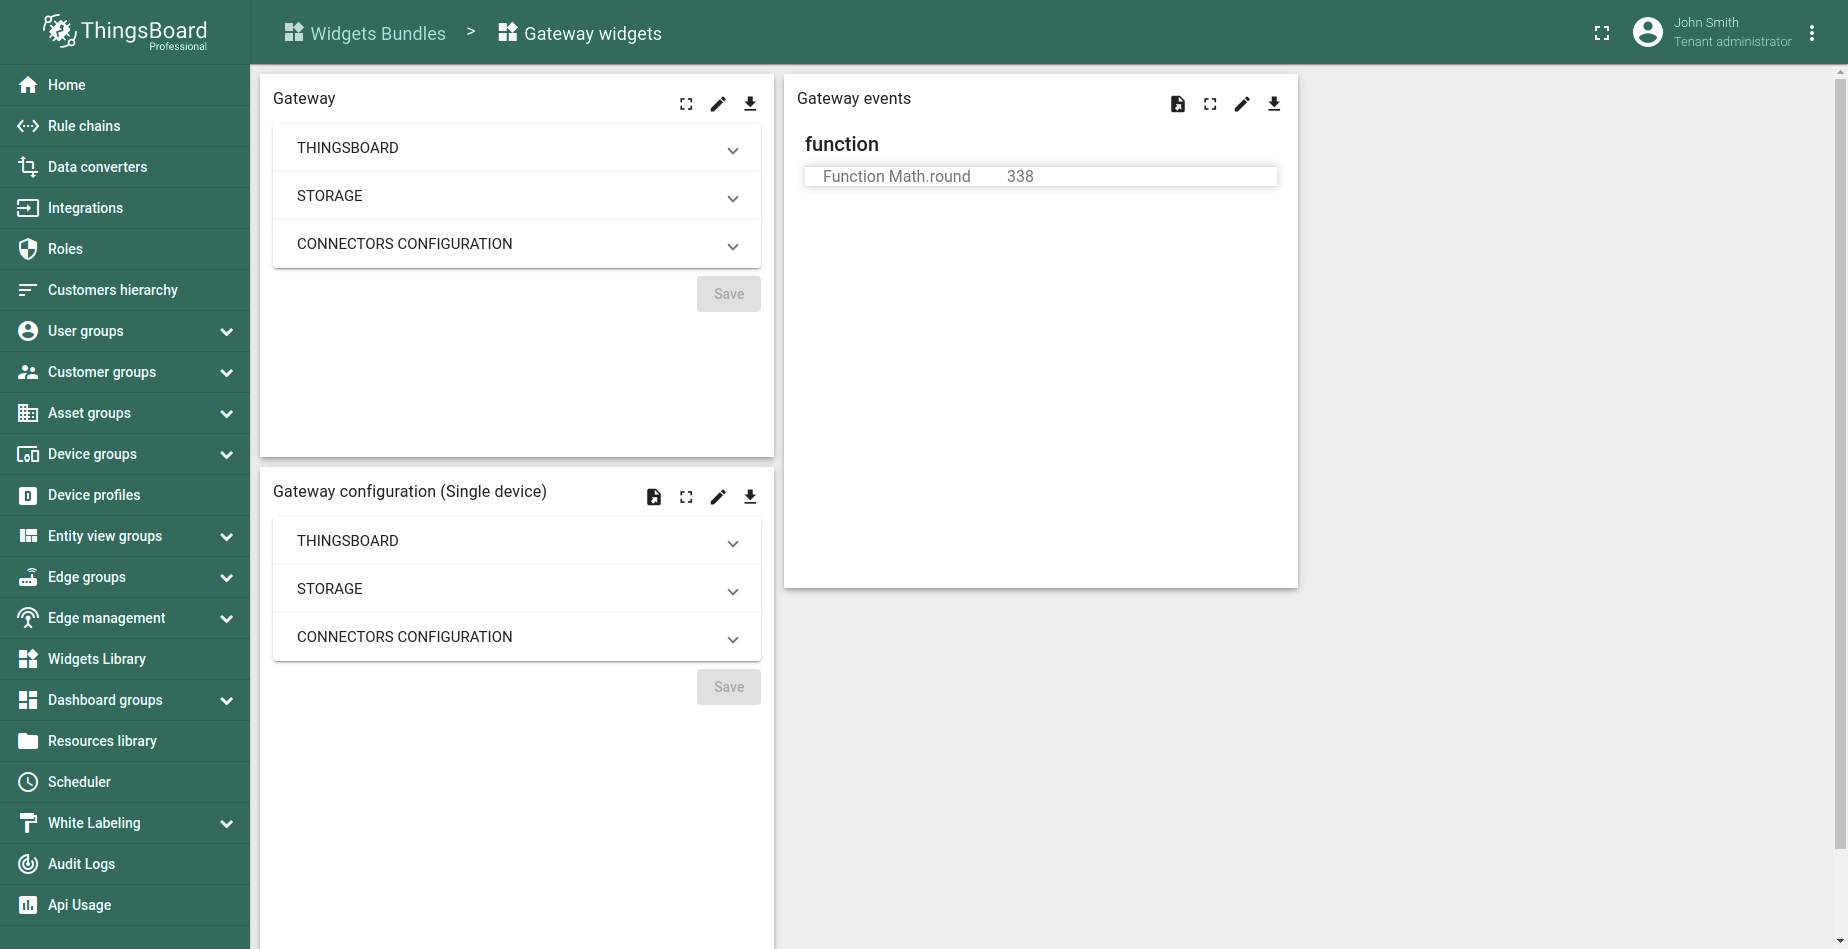
Gateway widgets
Gateway widgets bundle is useful for managing extensions.
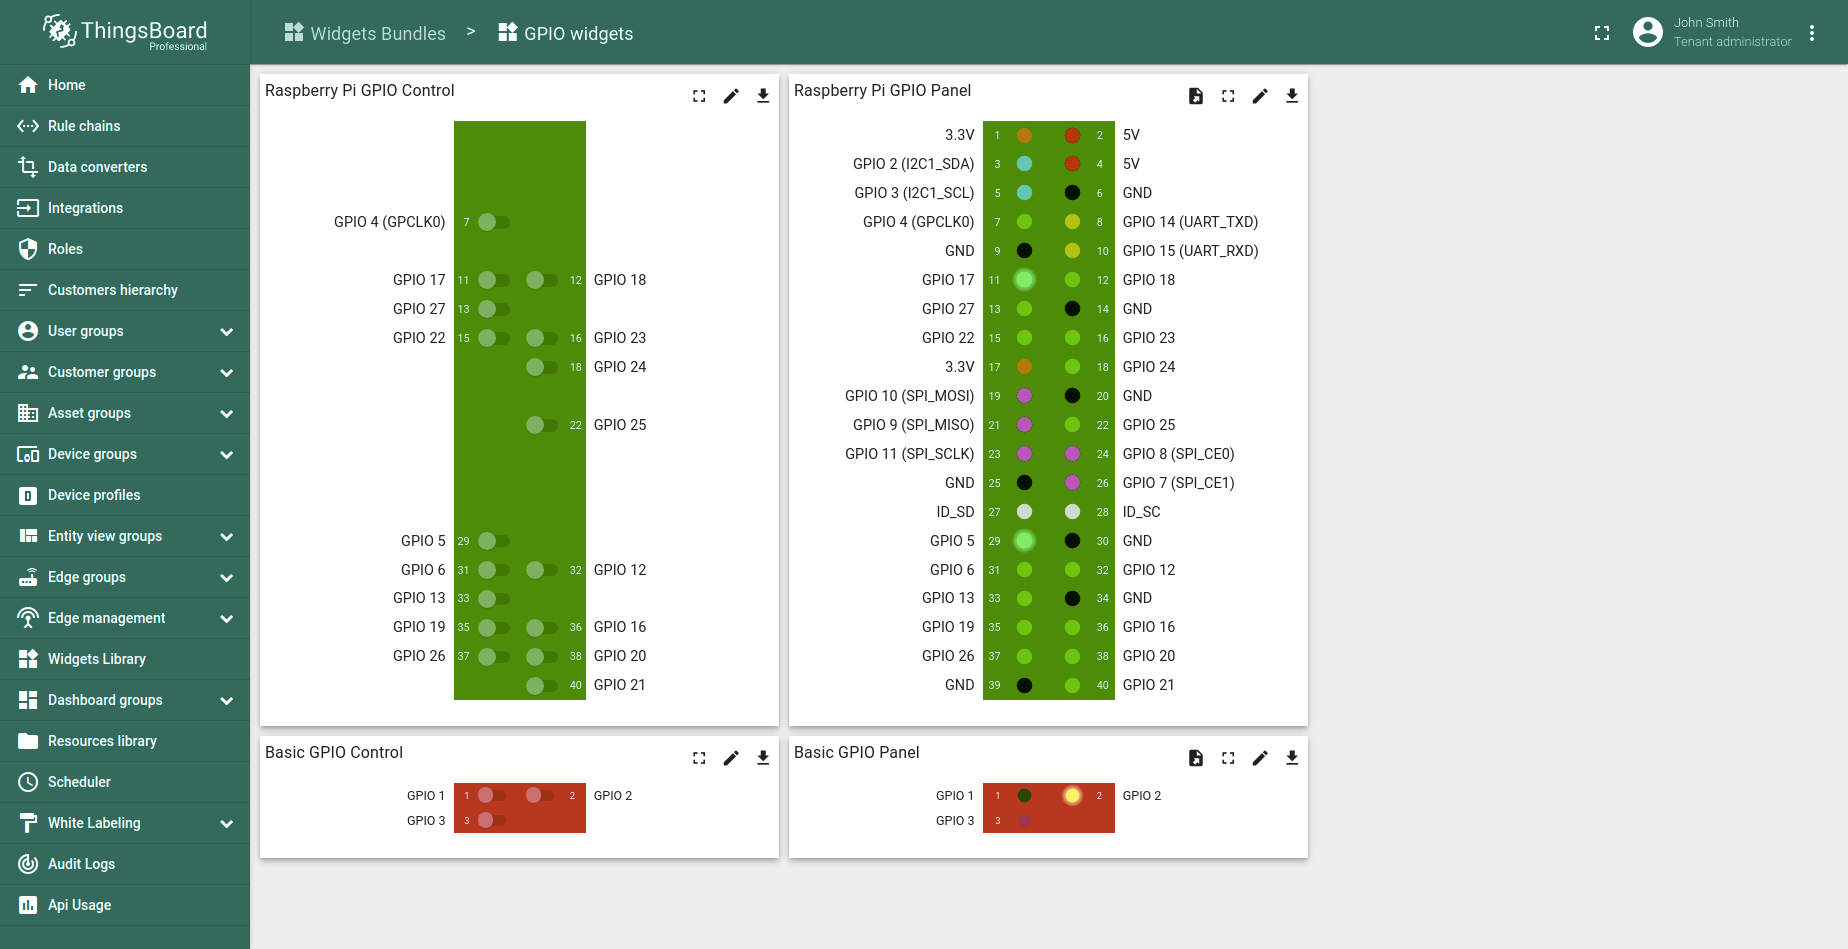
GPIO widgets
GPIO widgets bundle is useful for visualization and controlling GPIO state for target devices.
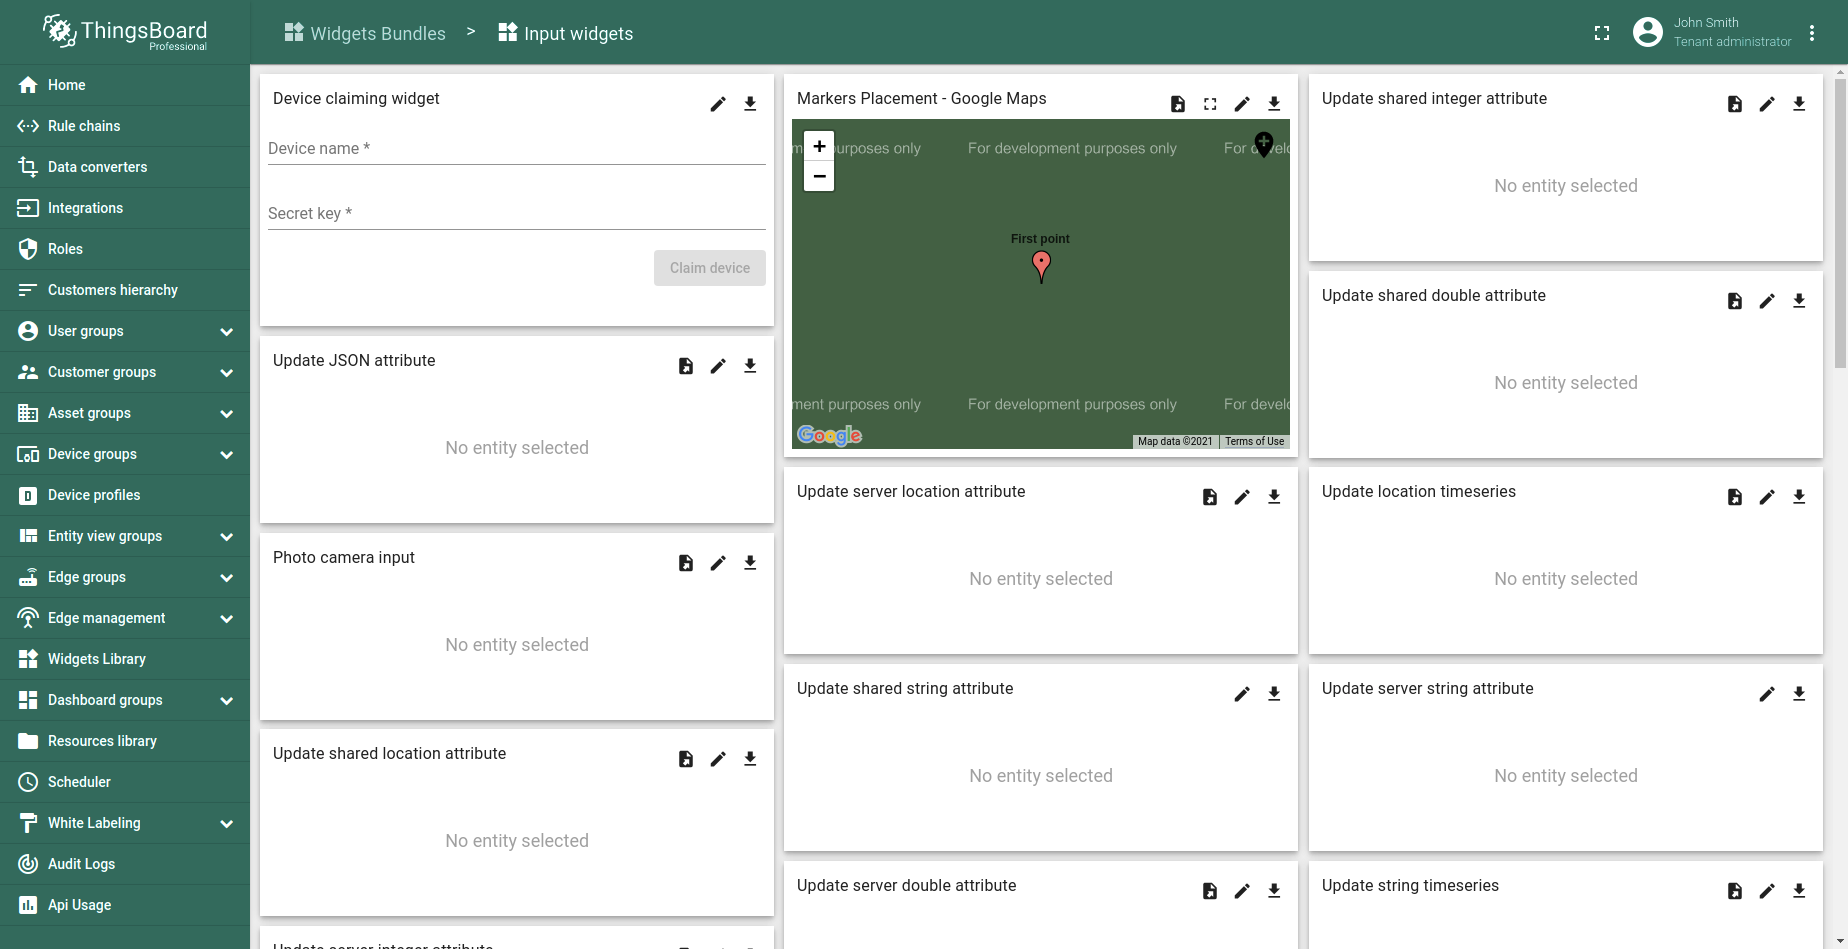
Input widgets
Input widgets bundle is useful for modifying the attributes of an entity.
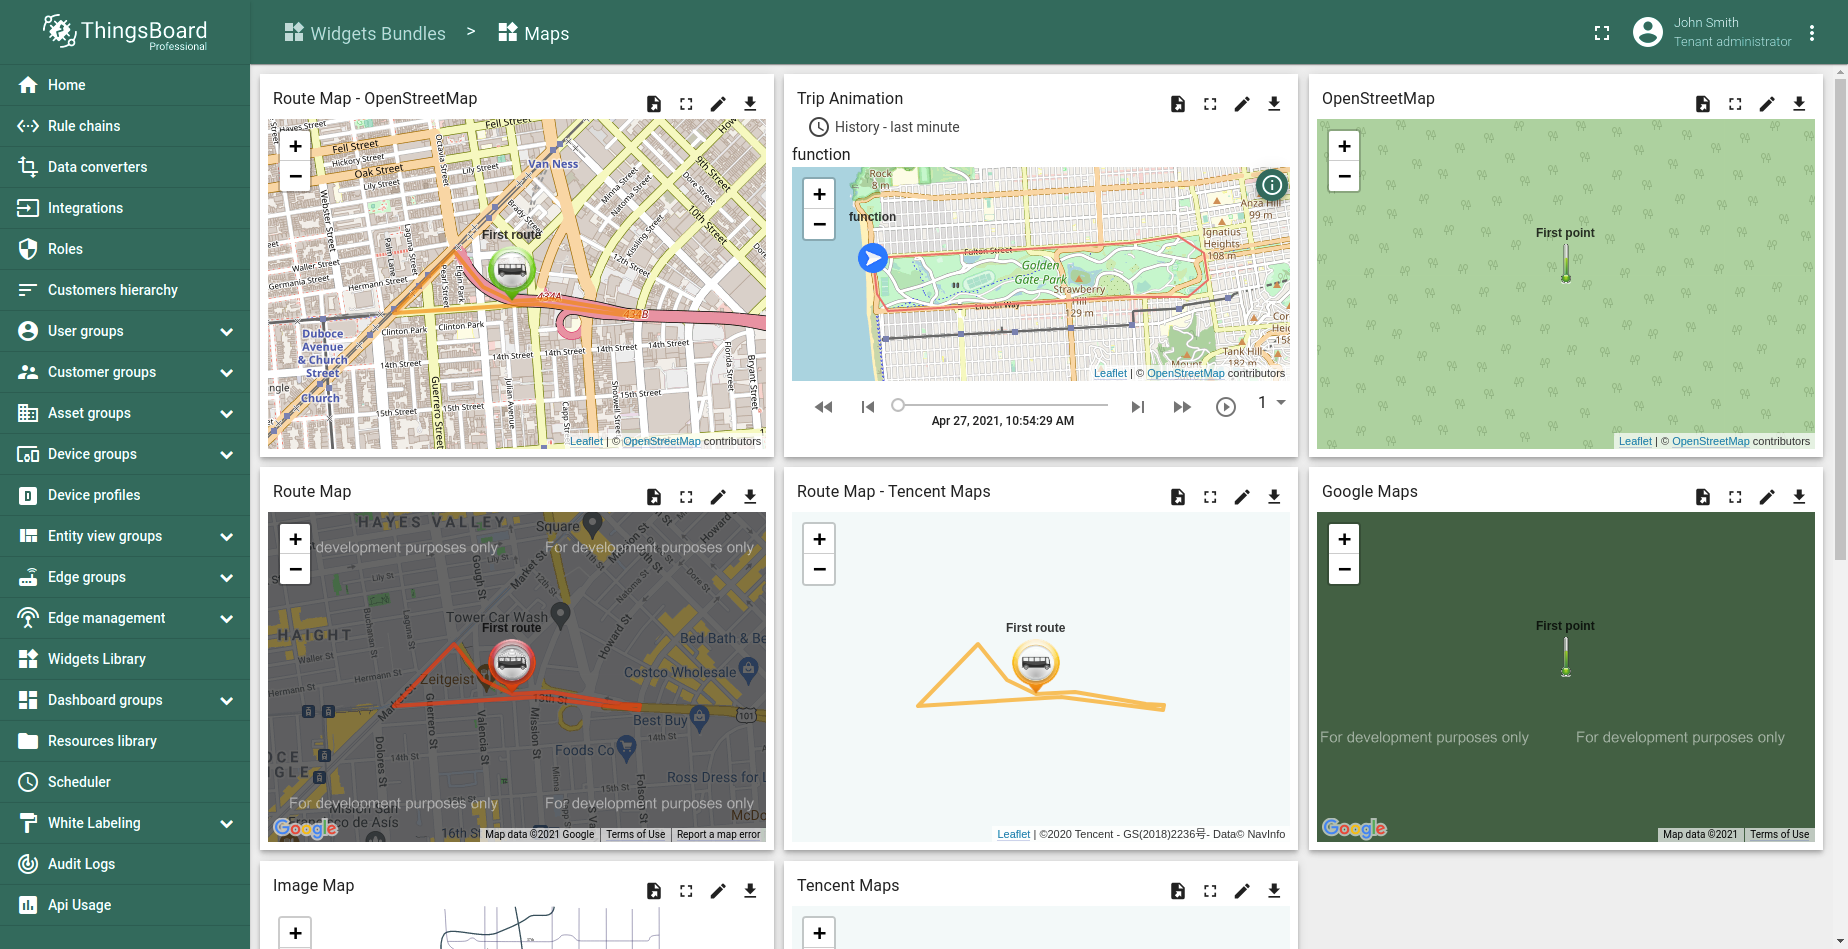
Maps widgets
Map widgets bundle is useful for visualizing the geographic location of devices and tracking device routes in both real-time and history modes.
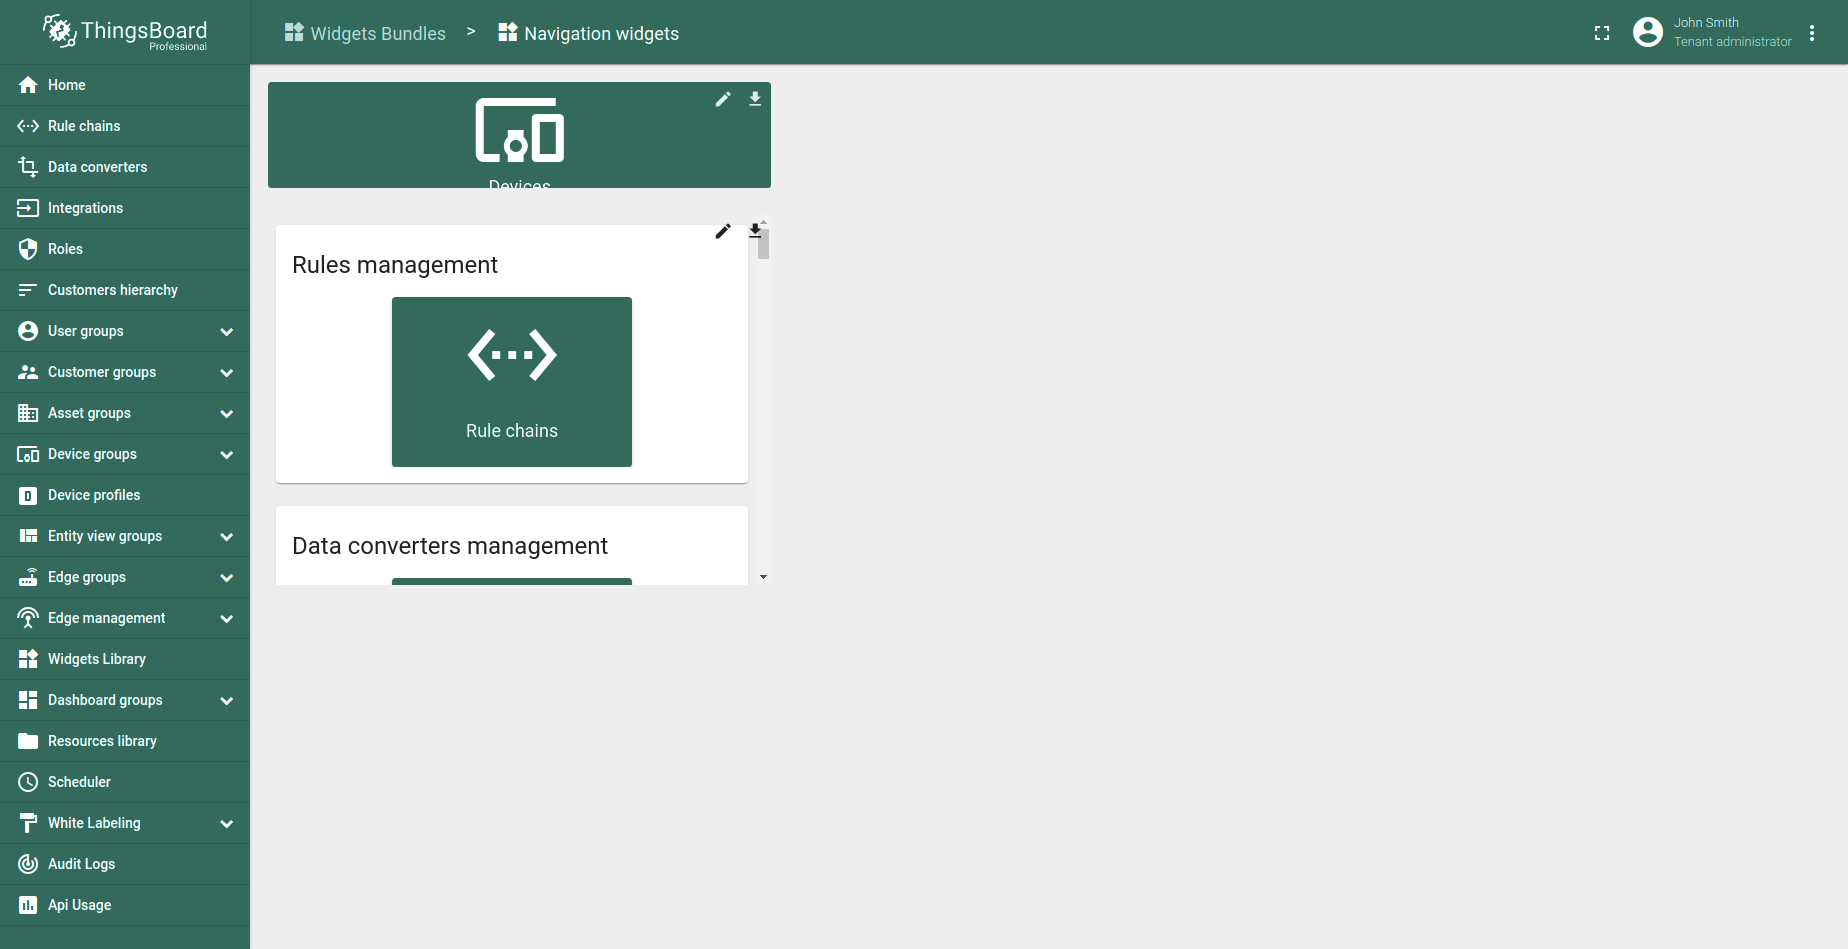
Navigation widgets
Navigation widgets bundle is useful to define home dashboard of the user.
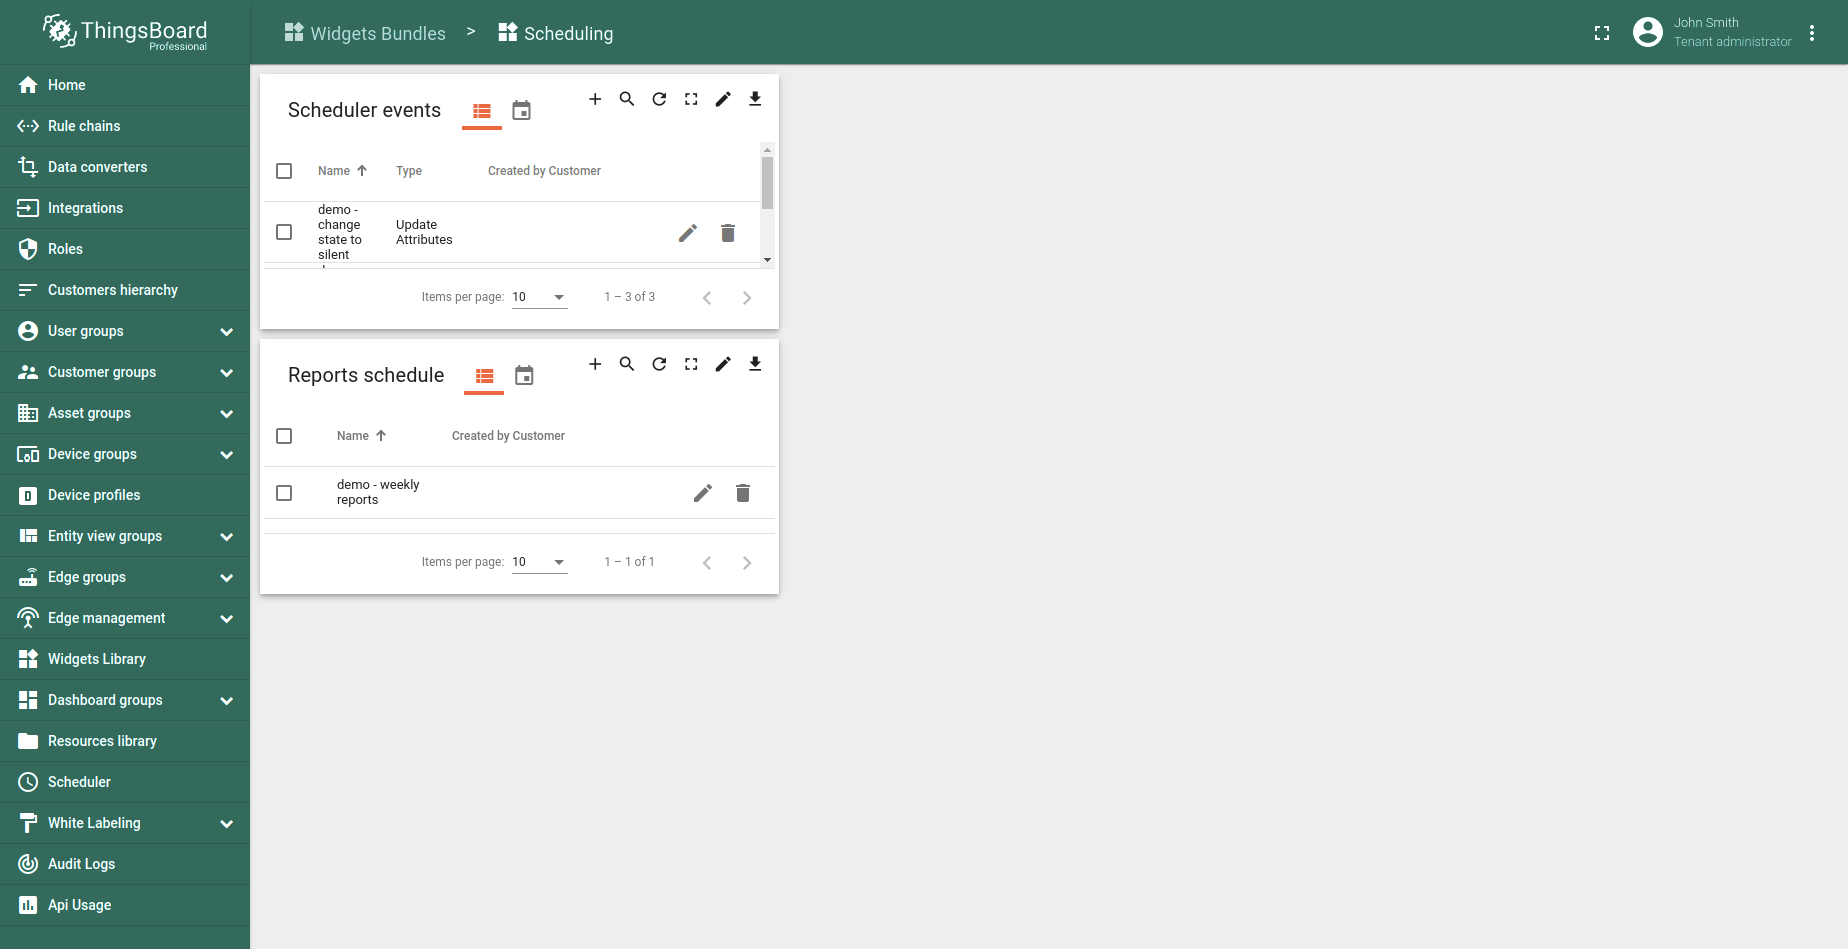
Scheduling widgets
Scheduling widgets bundle is useful for scheduling various types of events with flexible schedule configuration.
Available only in PE and PaaS.
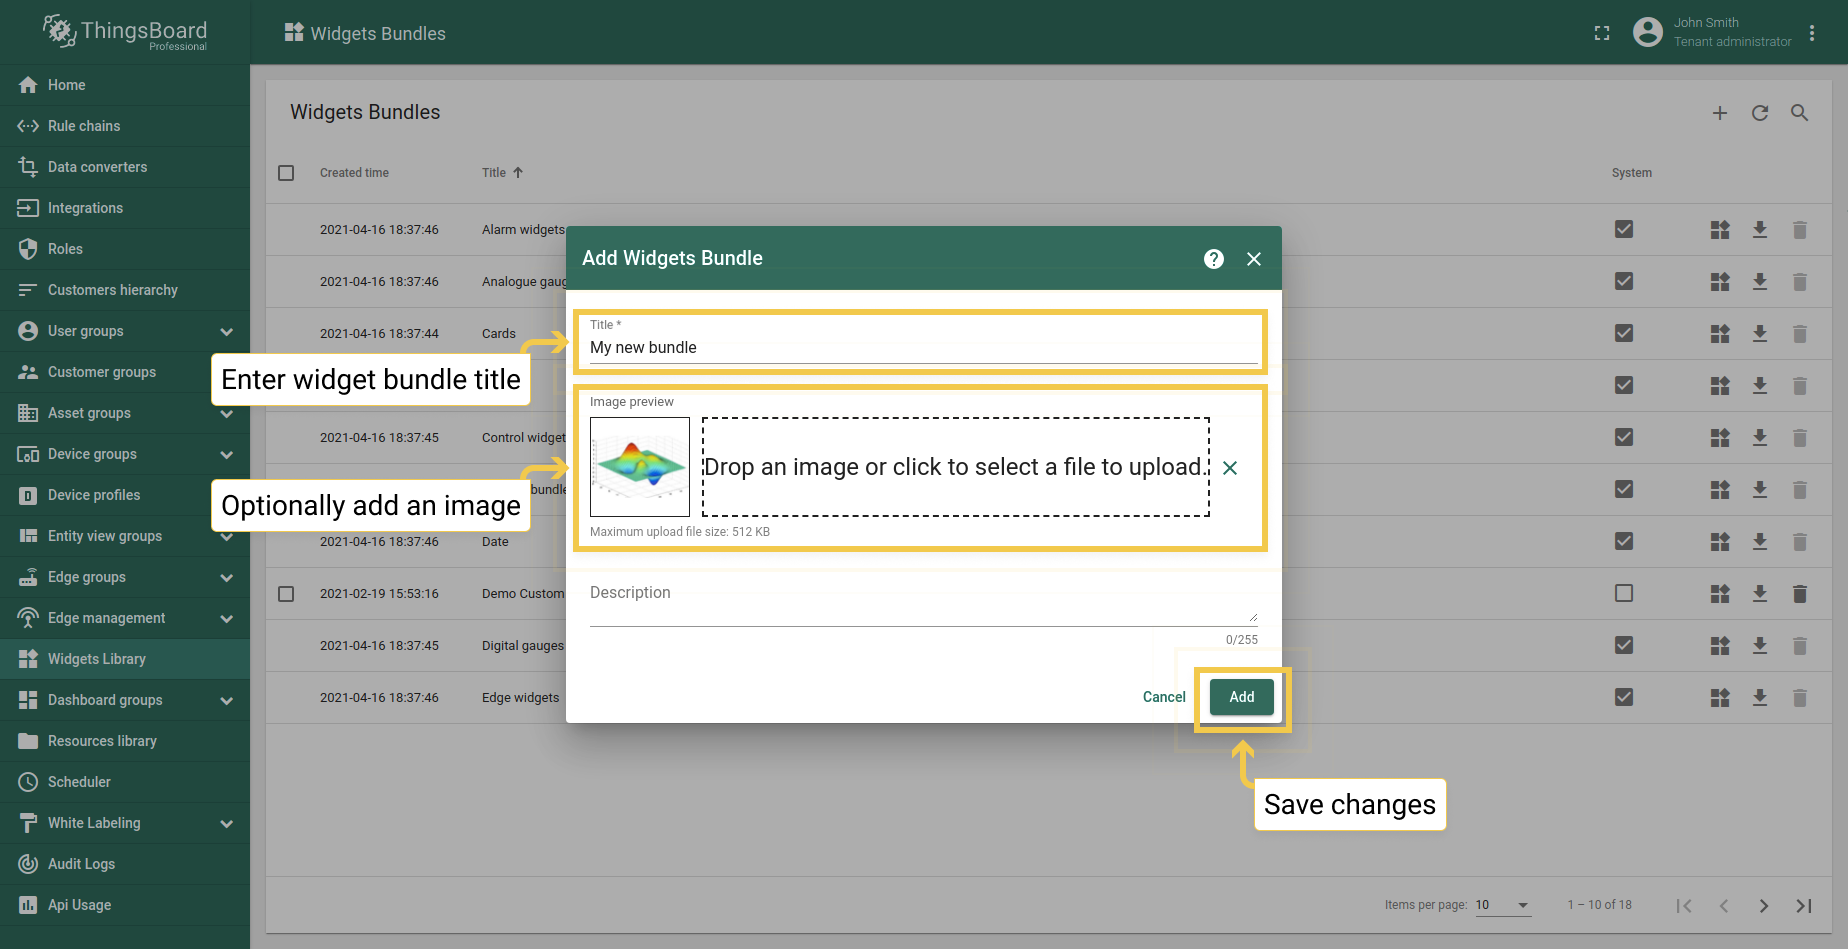
Adding widgets bundle
If the system administrator adds a new widgets bundle, it automatically becomes a system one. It means that only he can delete, edit and add widget types into the bundle. Tenant administrators can create widgets bundles as well. In this case, they have permissions to modify created bundles. You can always implement and add your widgets by following this guide.
To add a new widgets bundle, you should:
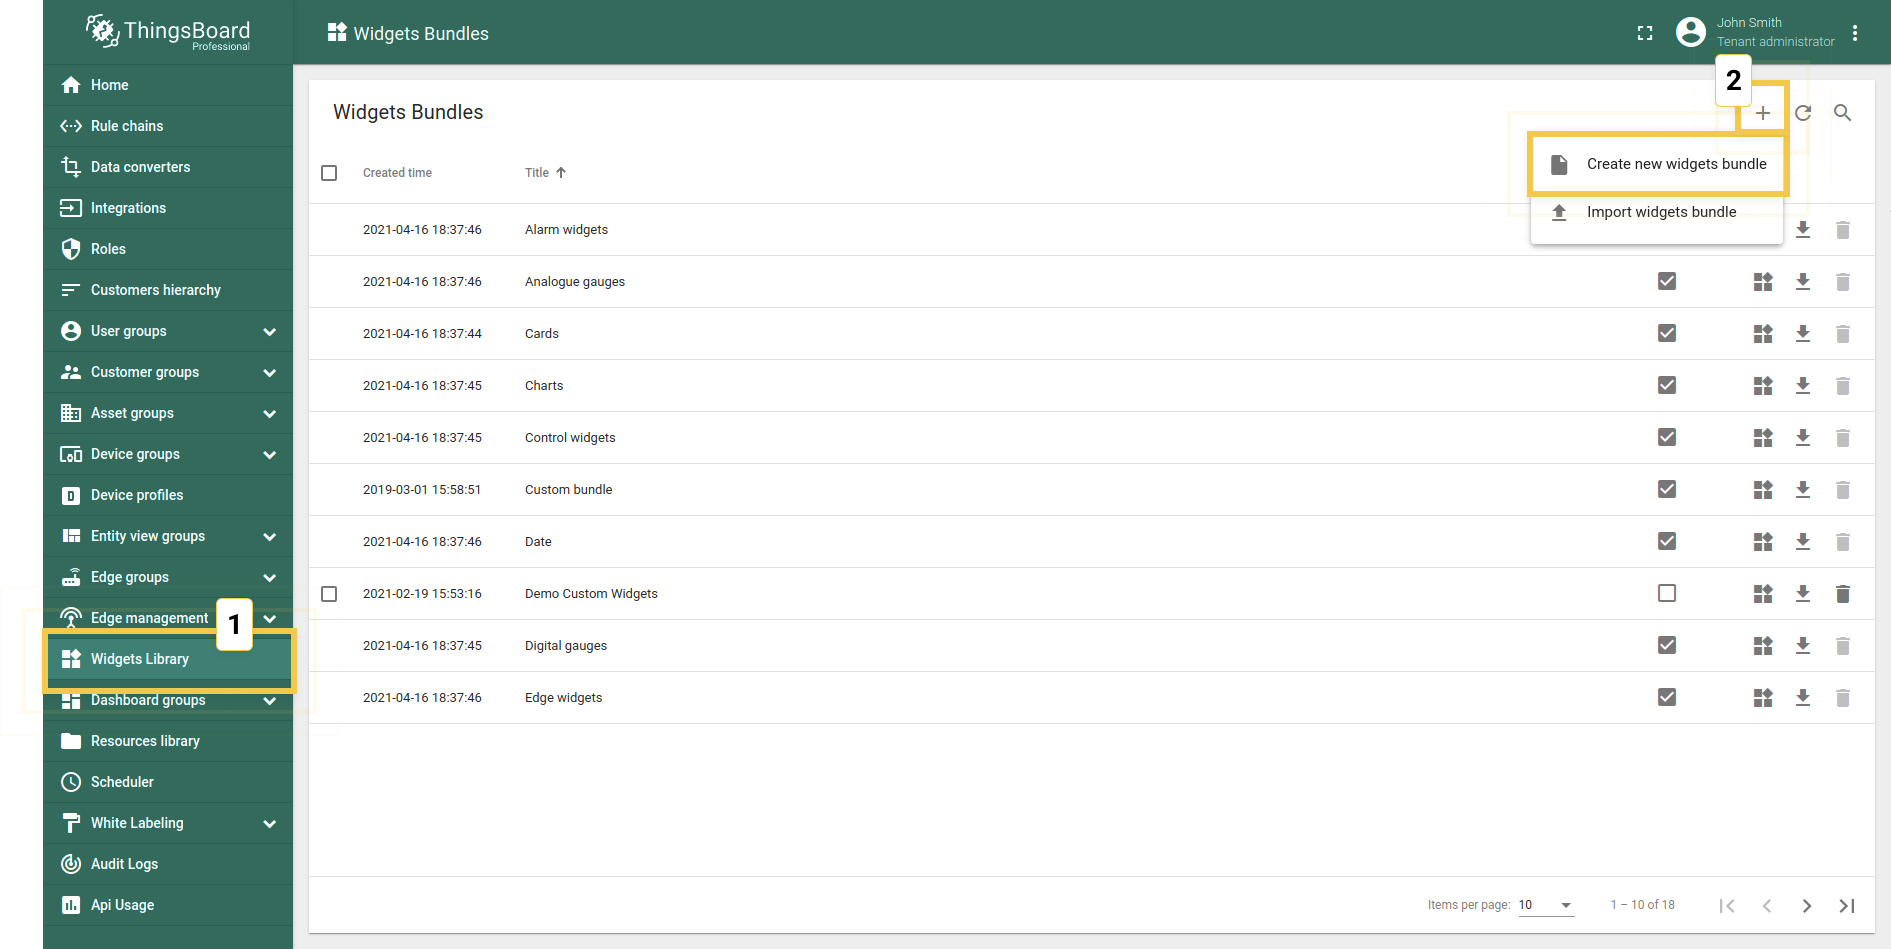
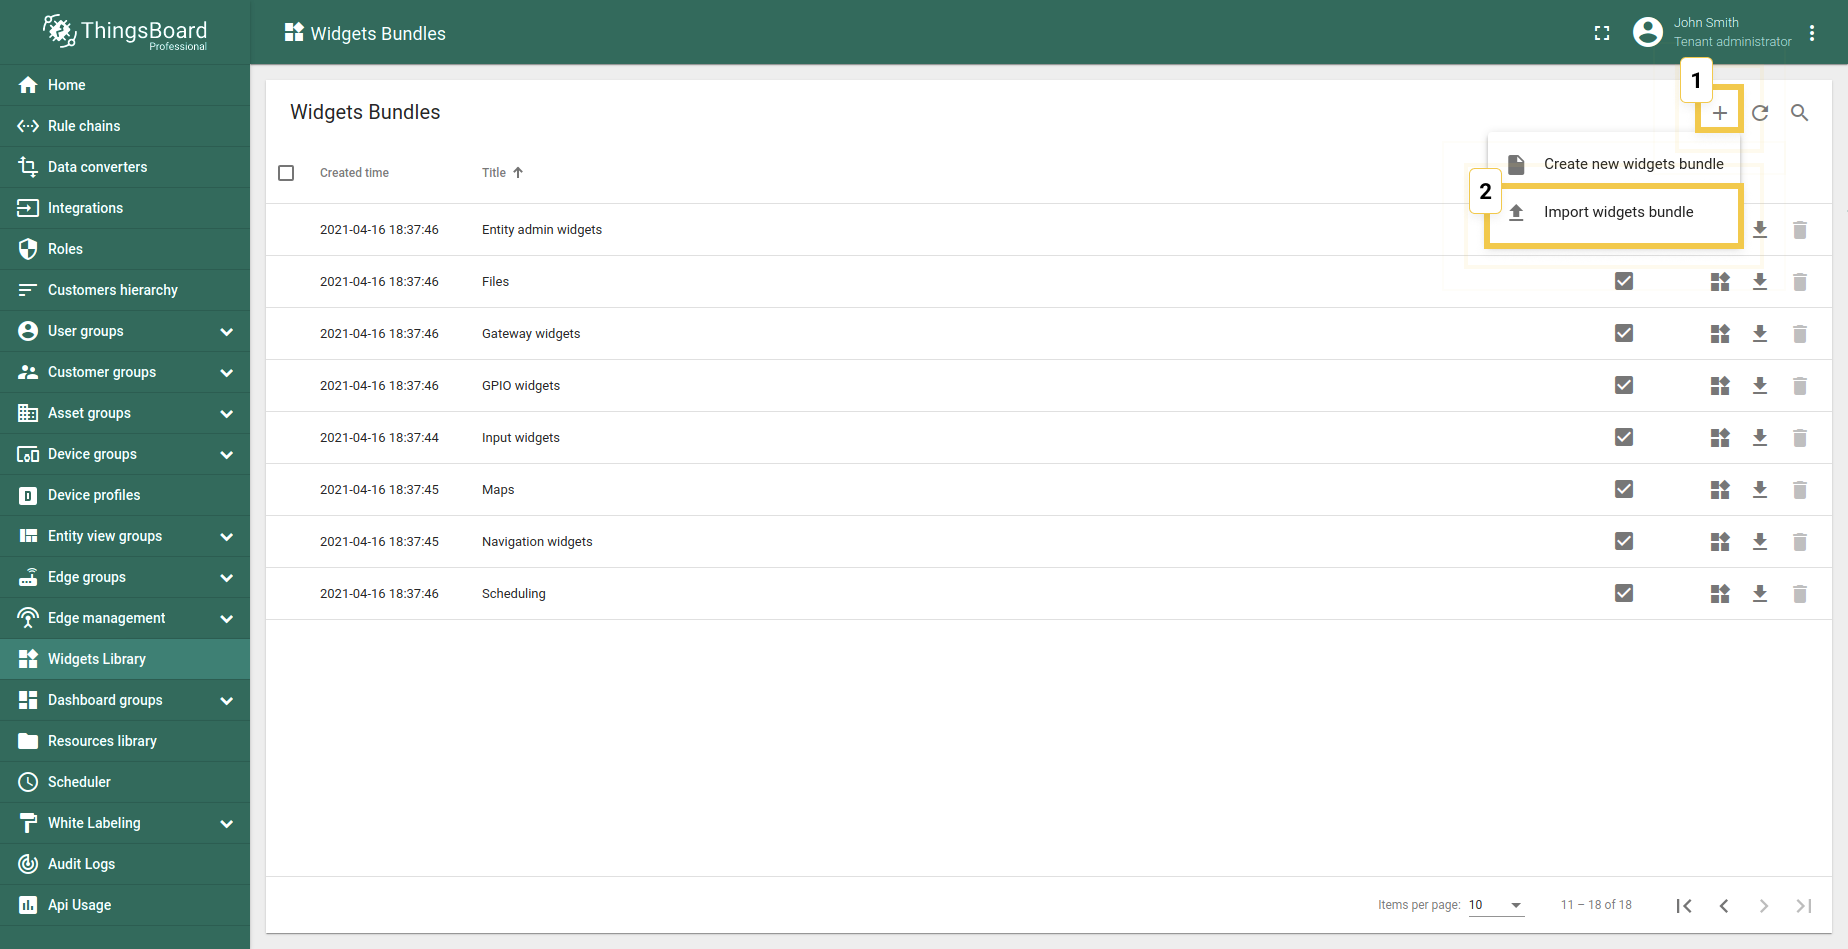
- Navigate to the widgets bundle page via the main menu on the left. Click the "+" icon in the upper right of the screen, and select the "Create new widgets bundle" option from the drop-down menu.
- In the opened dialog window, enter the name for the new bundle. Adding an image and a description is optional. Click "Add" to save applied changes.
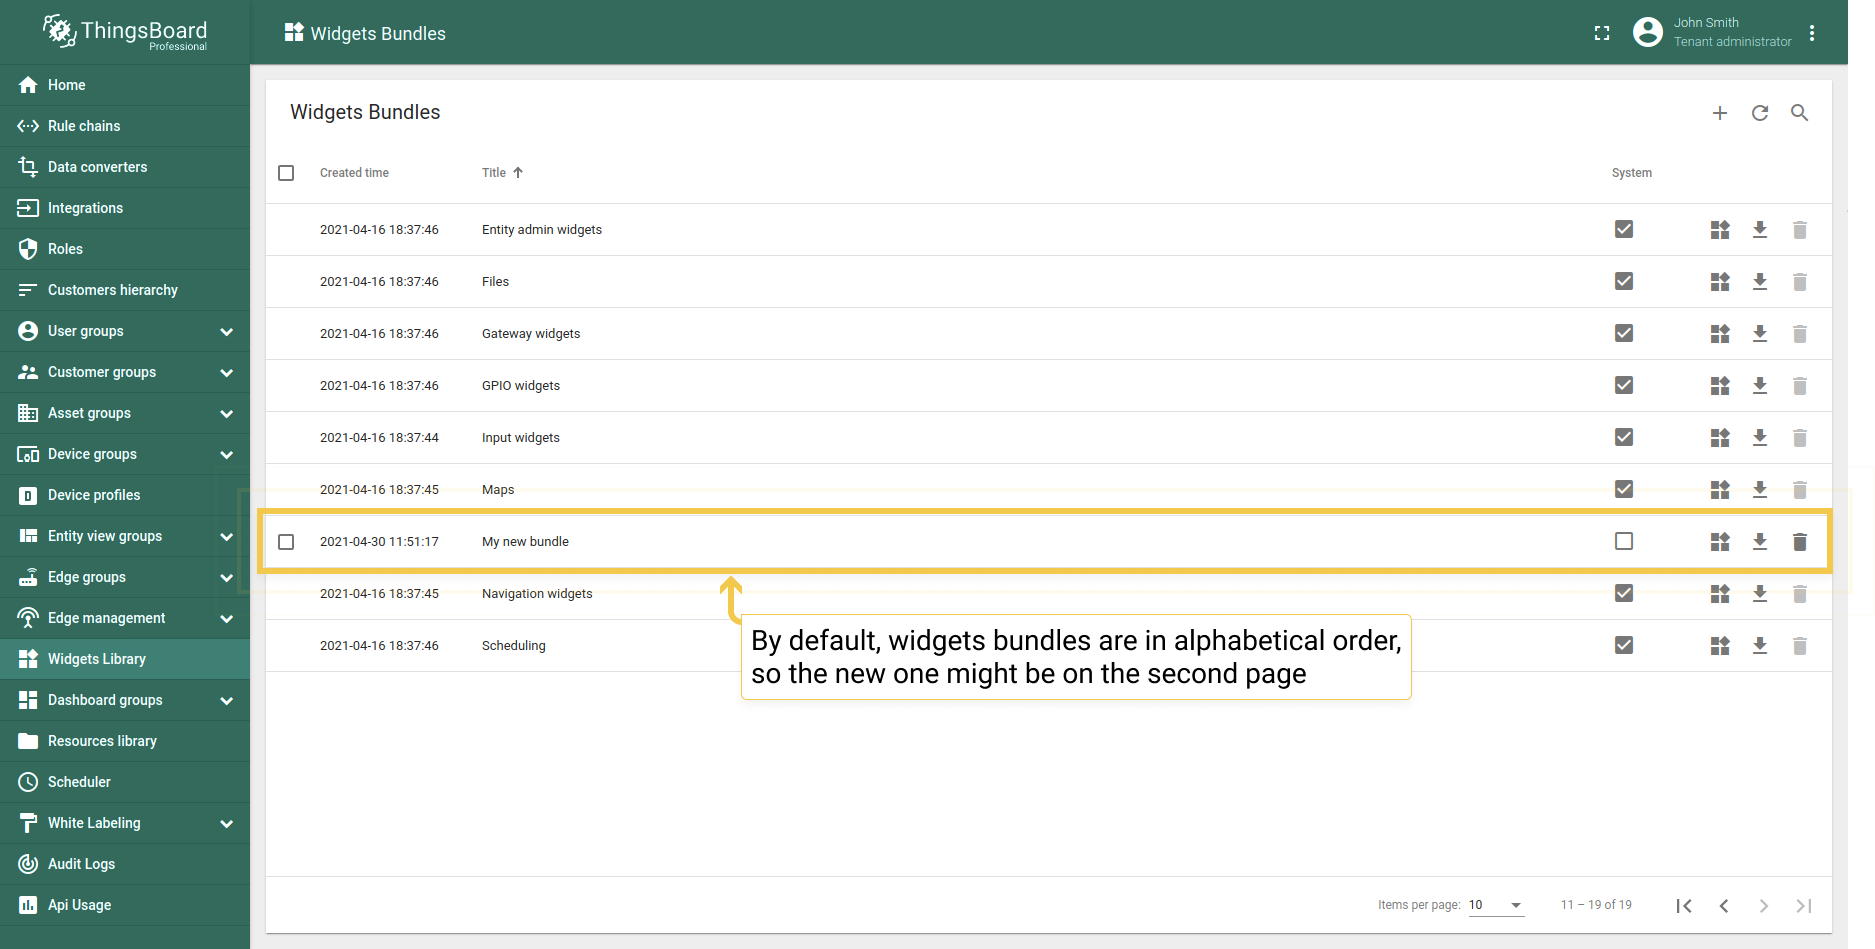
- Since widgets bundles are in alphabetical order, the newly created one may be on the second page.
- After adding the widgets bundle, you can add widget types in there.
Widgets Bundles export/import
Widgets Bundle export
You can export a widgets bundle in JSON format, and import it in the same or different IoT Hub instance.
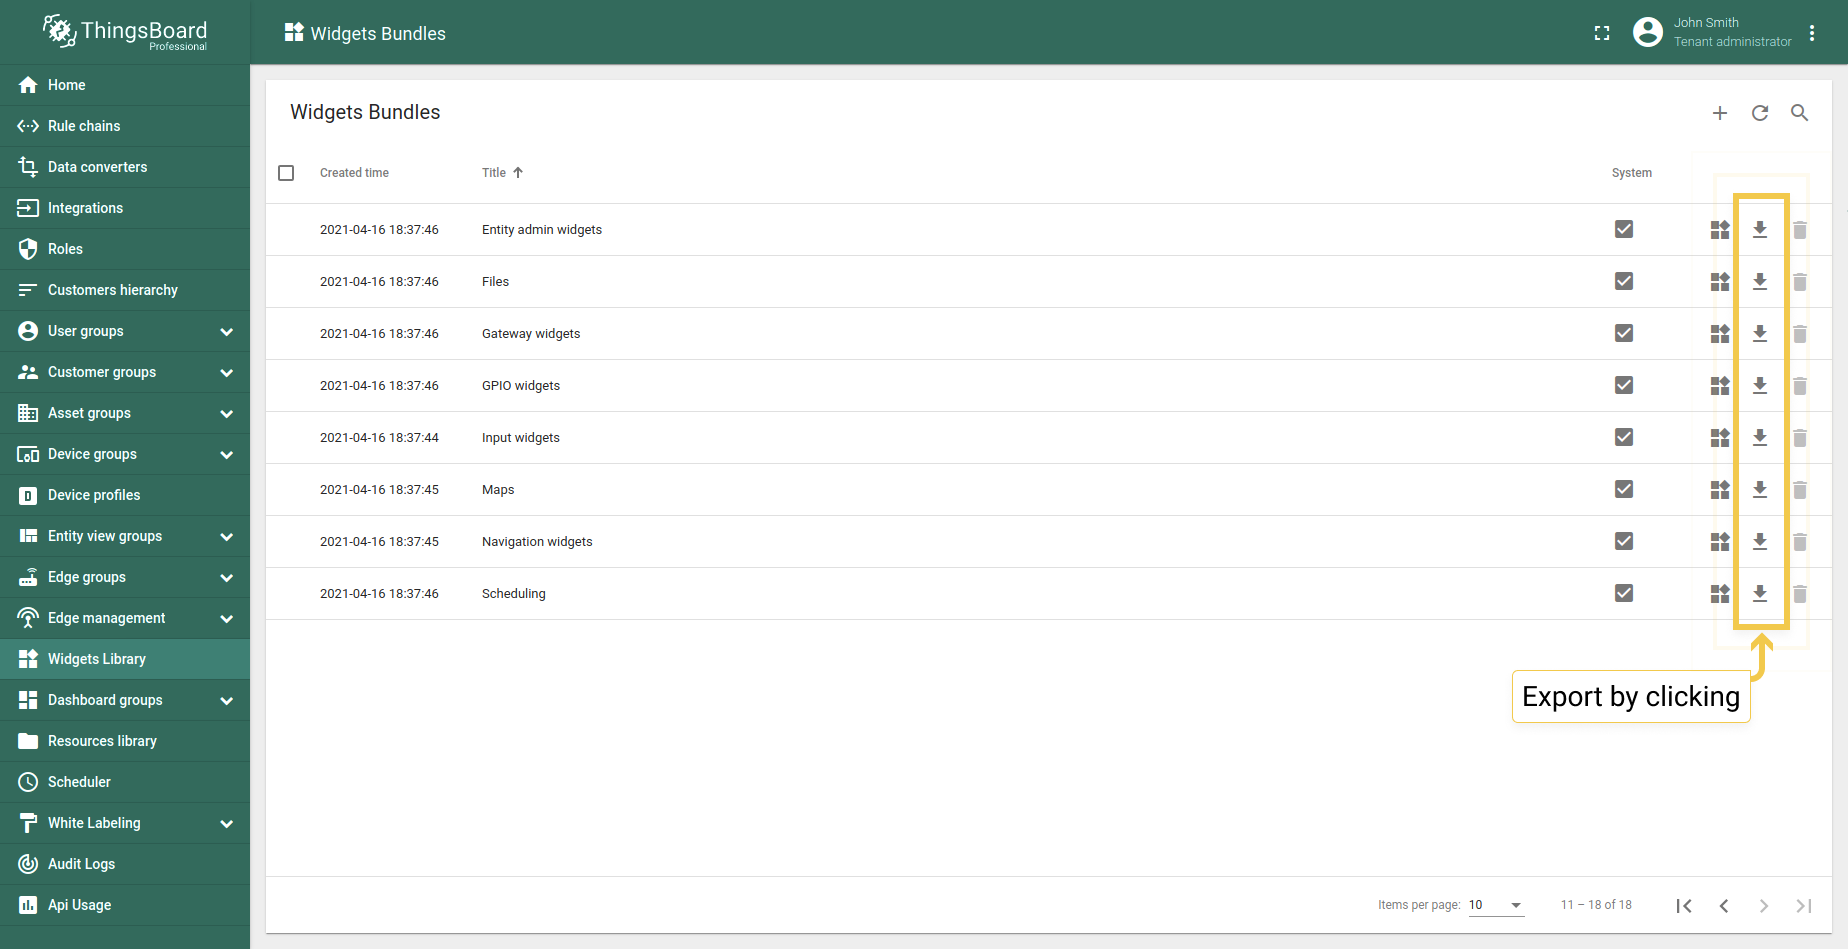
In order to export widgets bundle, you should:
- Go to the Widgets Library page and click the export button on the specific widgets bundle row.
Widgets Bundle import
Importing a widgets bundle is very similar to exporting it. To import the widgets bundle, you should:
- Go to the Widgets Library page, click the "+" button in the upper right corner of the "Widgets Bundles" page. Select "Import widgets bundle" from the drop-down menu.
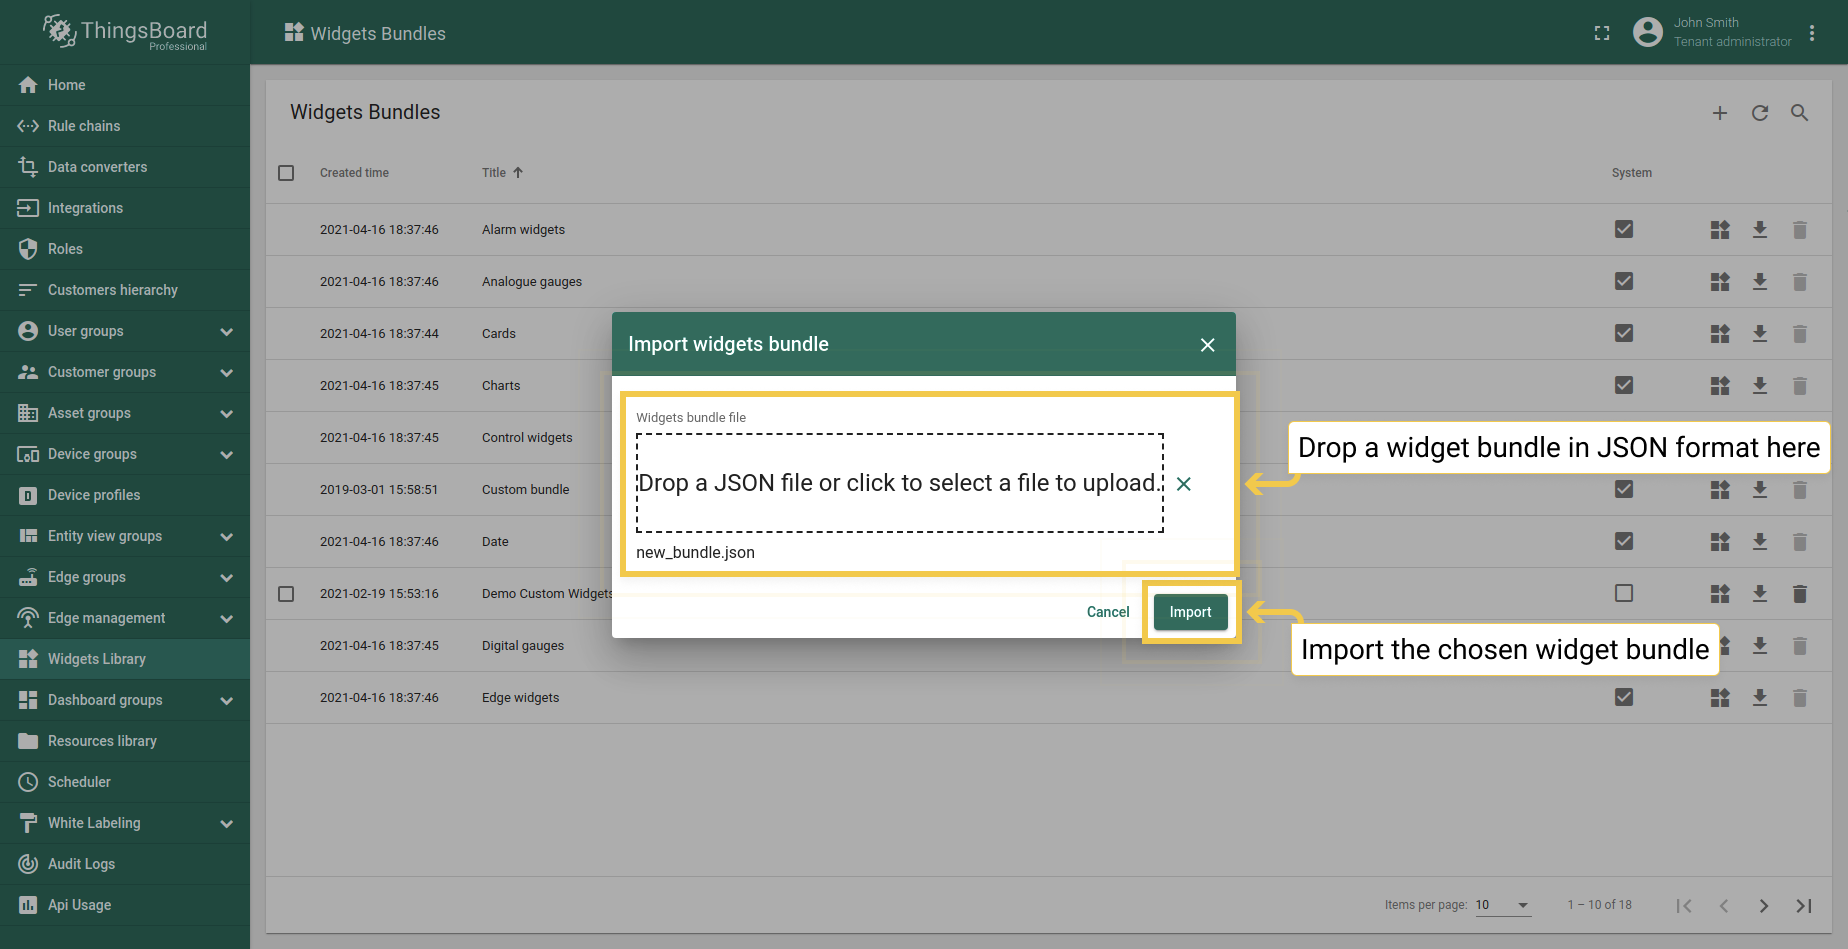
- The widgets bundle import window should a popup, and you will be prompted to upload the JSON file. Drag and drop a file from your computer, and click "Import" to add a widget bundle to the library.
Widget Types export/import
You can export a specific type of widget from a widget bundle in JSON format, and import it in the same or different IoT Hub instance.
Widget Type export
In order to export a widget type, you should:
- Go to the Widgets Library page, then open the desired widgets bundle and click the export button on the particular widget type card.
Widget Type import
Please note that only system administrators can modify system (default) widget bundles. This means that only they can delete the system widget bundle, edit and delete widgets inside the bundle,
add or import new widgets into the bundle. By creating a new widget bundle at the system administrator level, it will be displayed in the accounts of his tenants as a system one,
and they will not be able to modify it.
Nevertheless, tenants can add their own widgets bundles. In this case, they have full rights to manage created widget types inside the bundle.
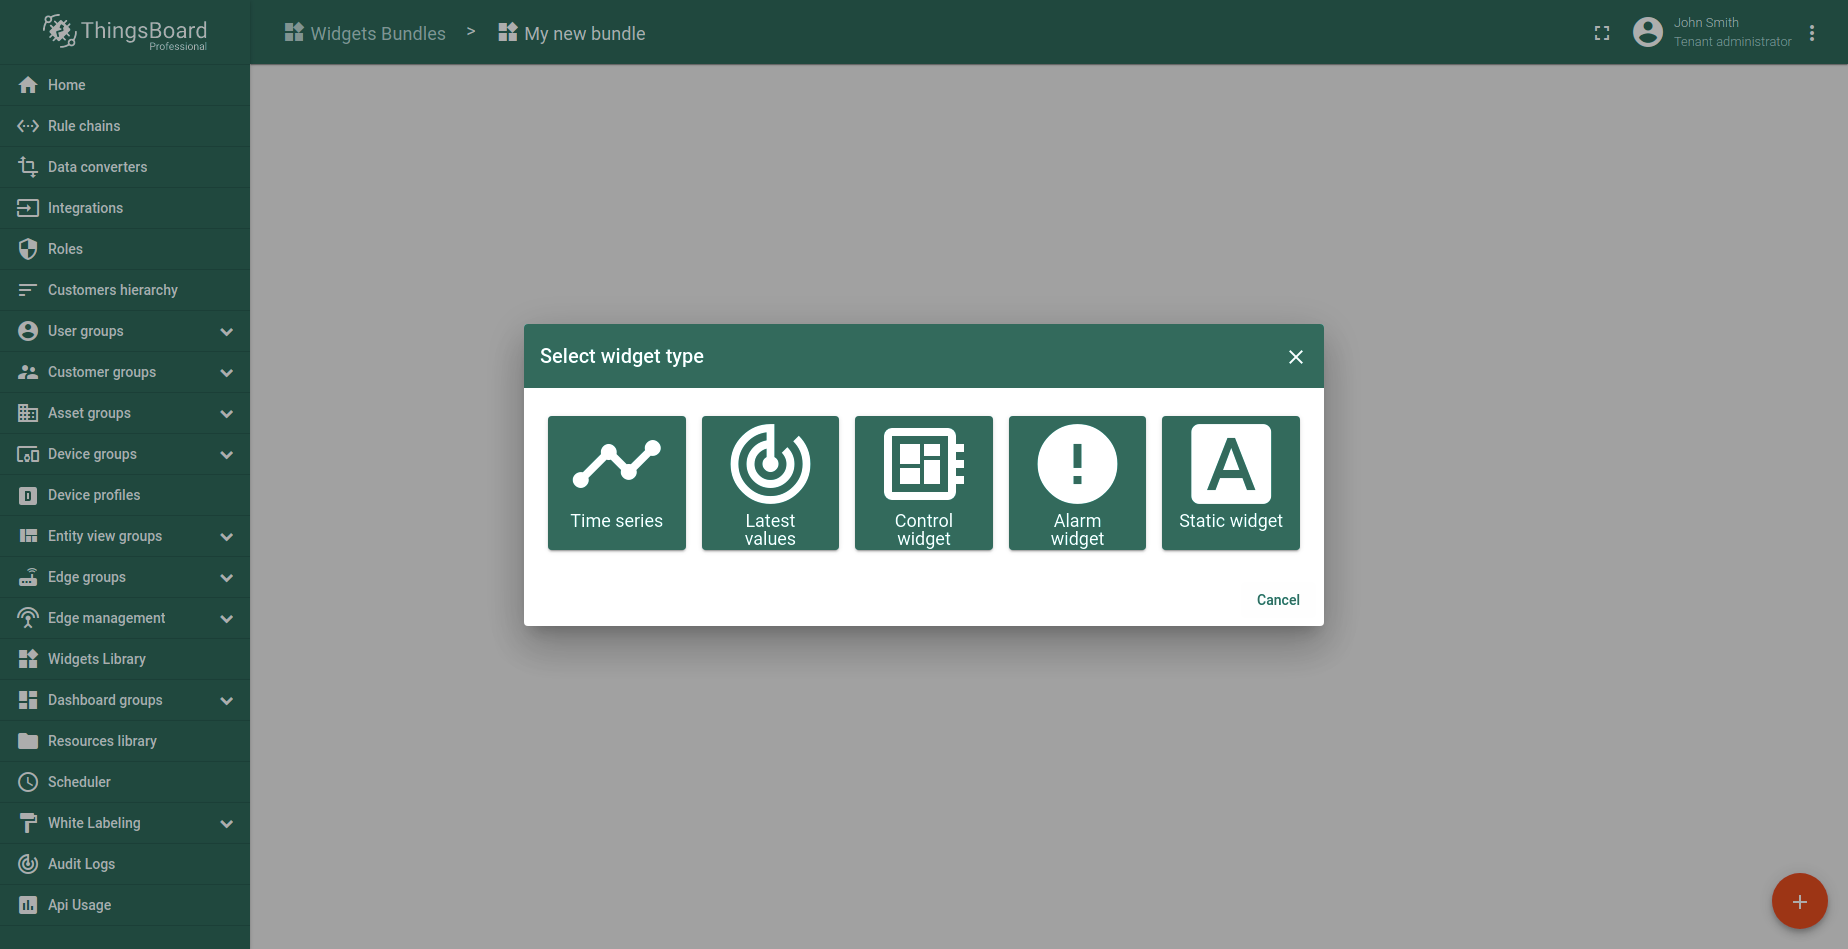
To import a widget type, you should:
- Go to the Widgets Library page, open the widgets bundle and click the “+” button in the lower right corner of the screen.
- Click the import button.
- A popup will appear in the import widget type window, and you will be prompted to load the JSON file. Drag and drop a file from your computer and click "Import" to add a widget type to the bundle.