- Overview
- Create Uplink Converter
- Create integration
- Send uplink message
- Downlink Converter
- Next steps
Overview
HTTP Integration allows converting existing protocols and payload formats to IoT Hub message format and is useful in several deployment scenarios:
- stream device and/or asset data from external system, IoT platform or connectivity provider back-end.
- stream device and/or asset data from your custom application running in the cloud.
- connect the existing device with custom HTTP based protocol to IoT Hub.

Create Uplink Converter
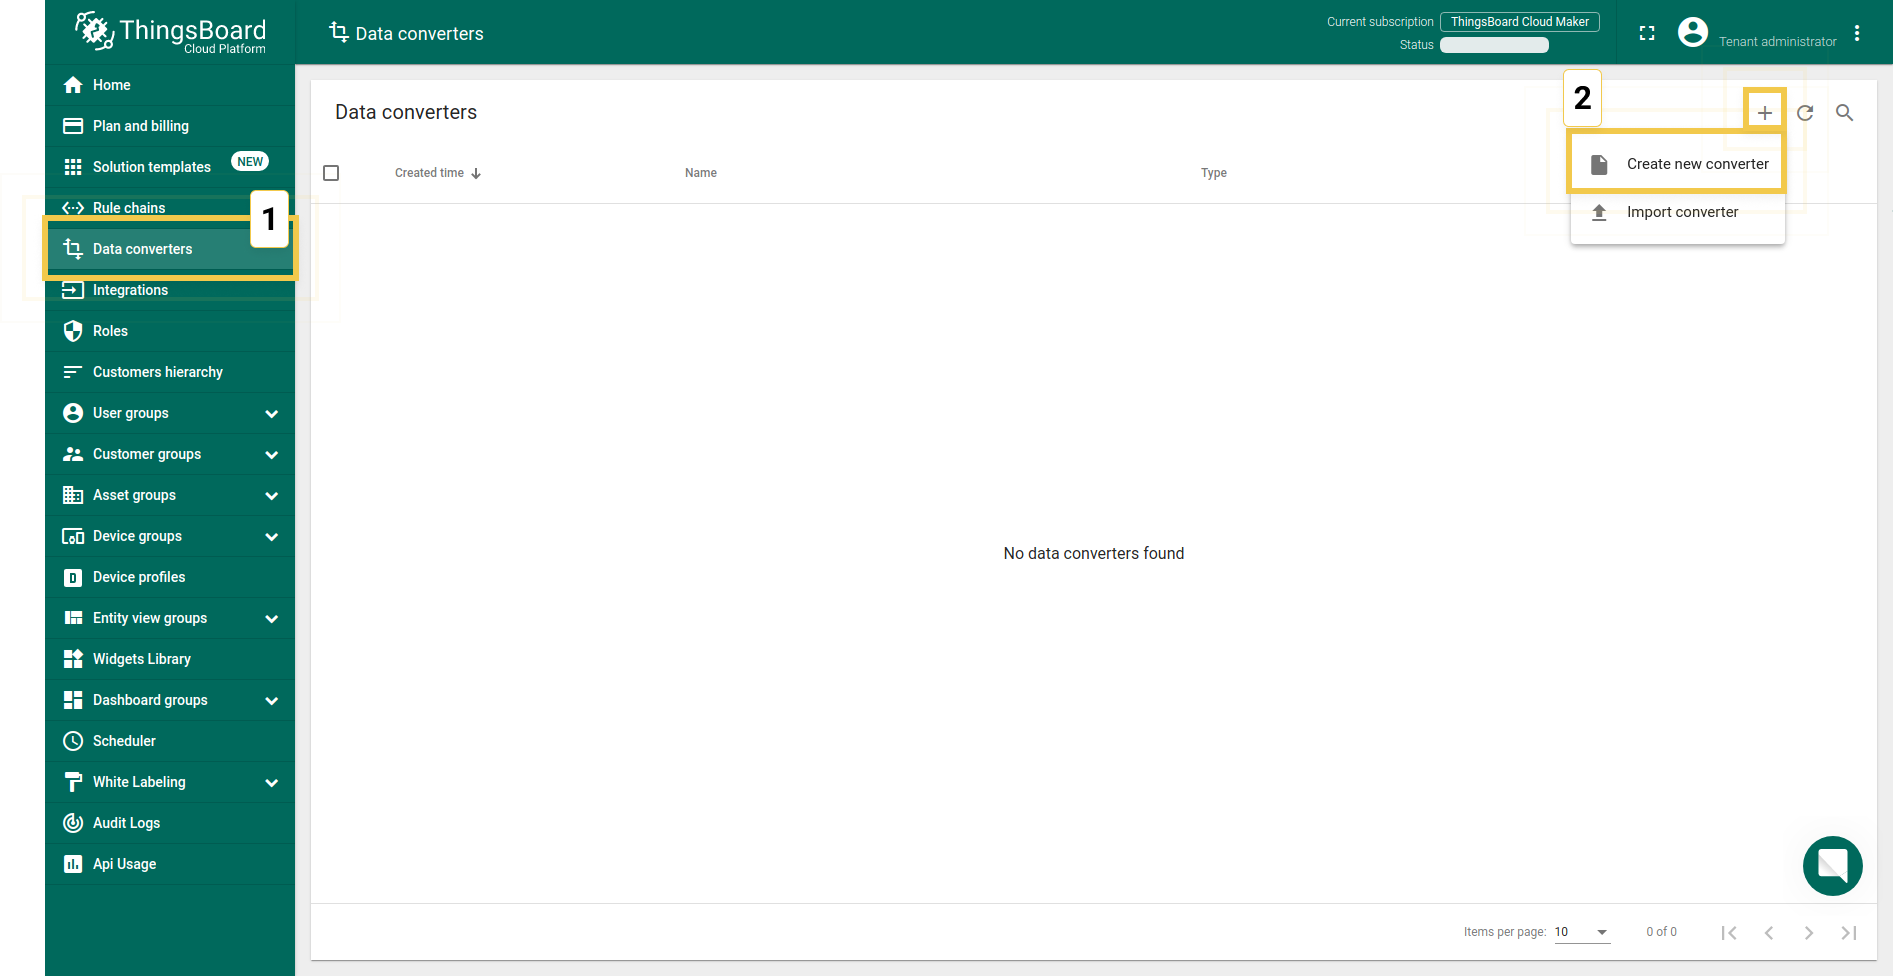
Before creating the integration, you need to create an Uplink converter in Data converters. Uplink is necessary in order to convert the incoming data from the device into the required format for displaying them in IoT Hub. Click on the “plus” and on “Create new converter”. To view the events, enable Debug. In the function decoder field, specify a script to parse and transform data.

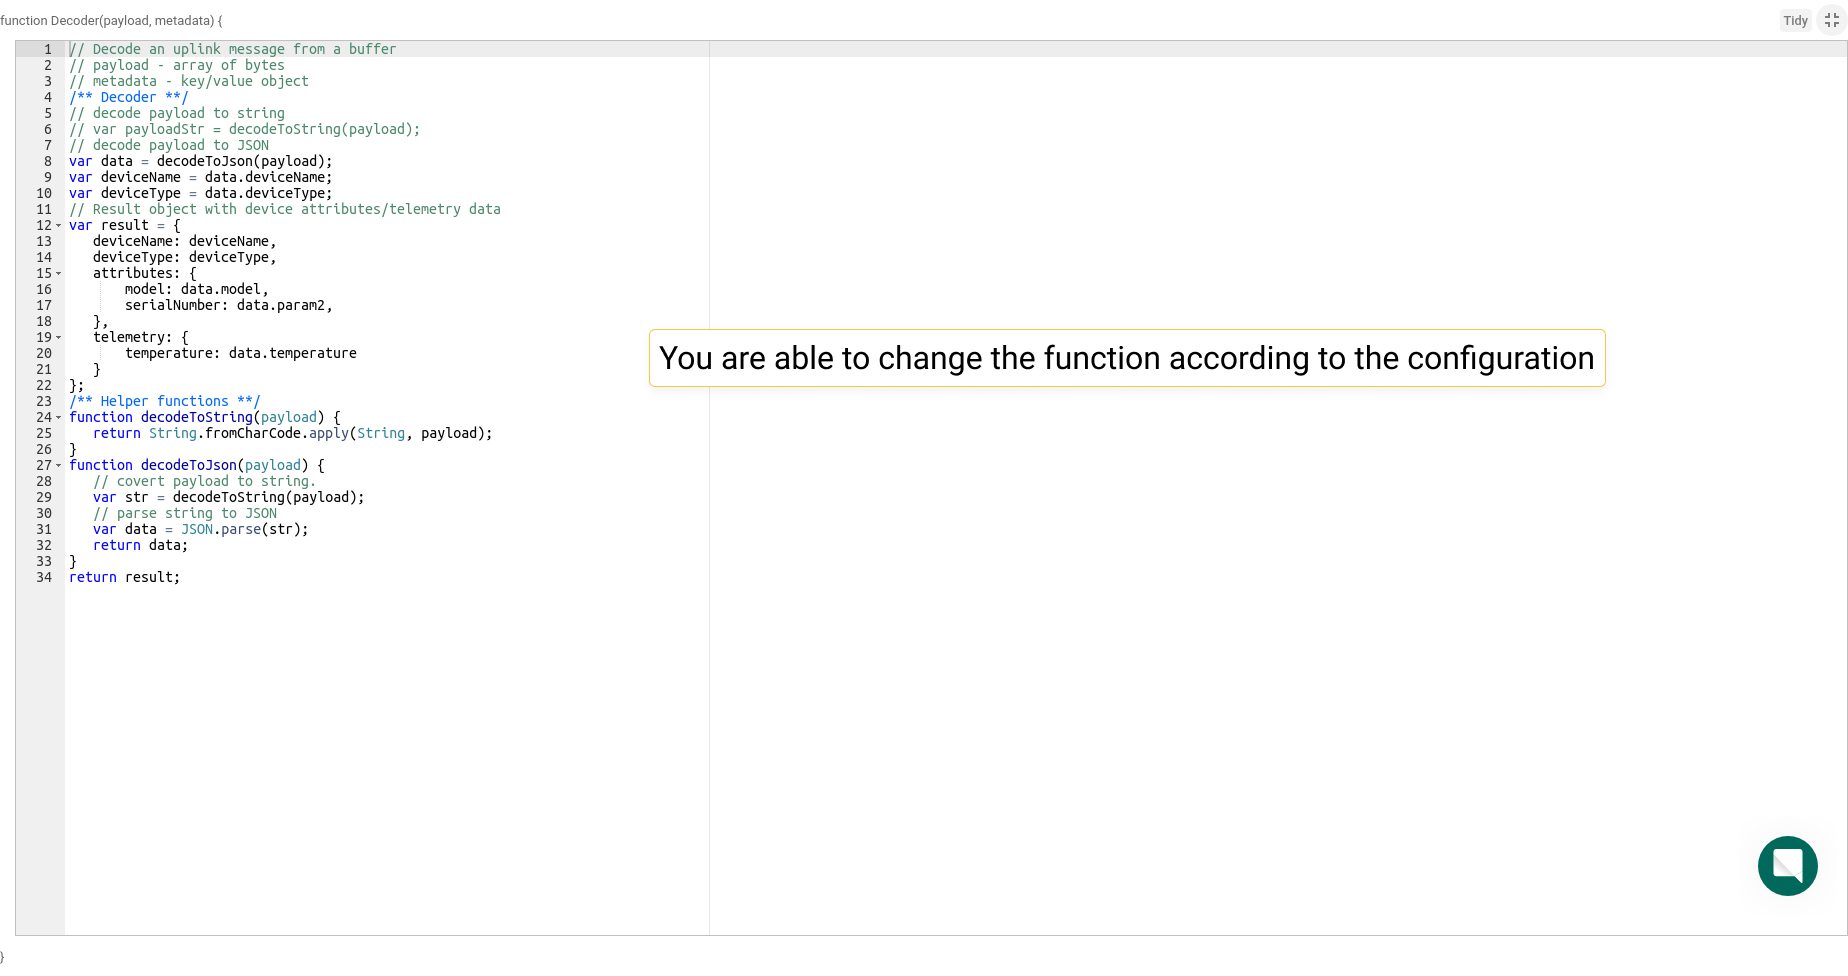
Example for the Uplink converter:
1
2
3
4
5
6
7
8
9
10
11
12
13
14
15
16
17
18
19
20
21
22
23
24
25
26
27
28
29
30
31
32
33
34
// Decode an uplink message from a buffer
// payload - array of bytes
// metadata - key/value object
/** Decoder **/
// decode payload to string
// var payloadStr = decodeToString(payload);
// decode payload to JSON
var data = decodeToJson(payload);
var deviceName = data.deviceName;
var deviceType = data.deviceType;
// Result object with device attributes/telemetry data
var result = {
   deviceName: deviceName,
   deviceType: deviceType,
   attributes: {
       model: data.model,
       serialNumber: data.param2,
   },
   telemetry: {
       temperature: data.temperature
   }
};
/** Helper functions **/
function decodeToString(payload) {
   return String.fromCharCode.apply(String, payload);
}
function decodeToJson(payload) {
   // covert payload to string.
   var str = decodeToString(payload);
   // parse string to JSON
   var data = JSON.parse(str);
   return data;
}
return result;
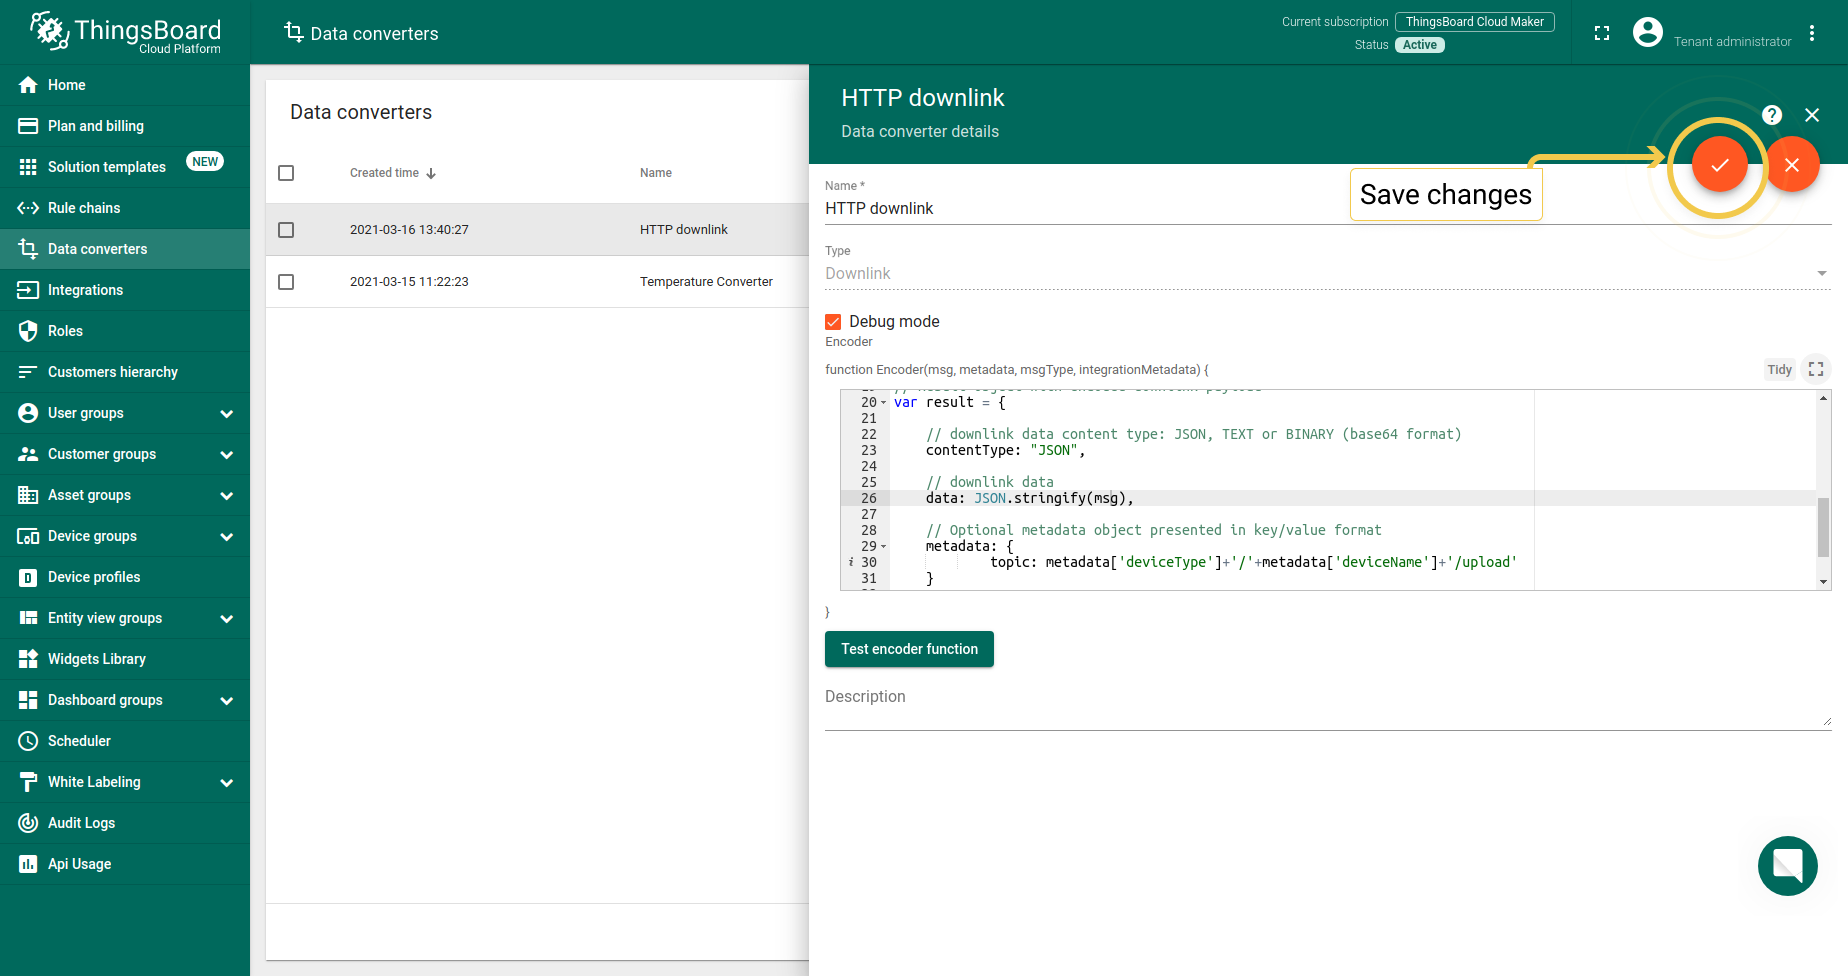
You can change the decoder function while creating the converter or after creating it. If the converter has already been created, then click on the “pencil” icon to edit it. Copy the configuration example for the converter (or your own configuration) and insert it into the decoder function. Save changes by clicking on the “checkmark” icon.
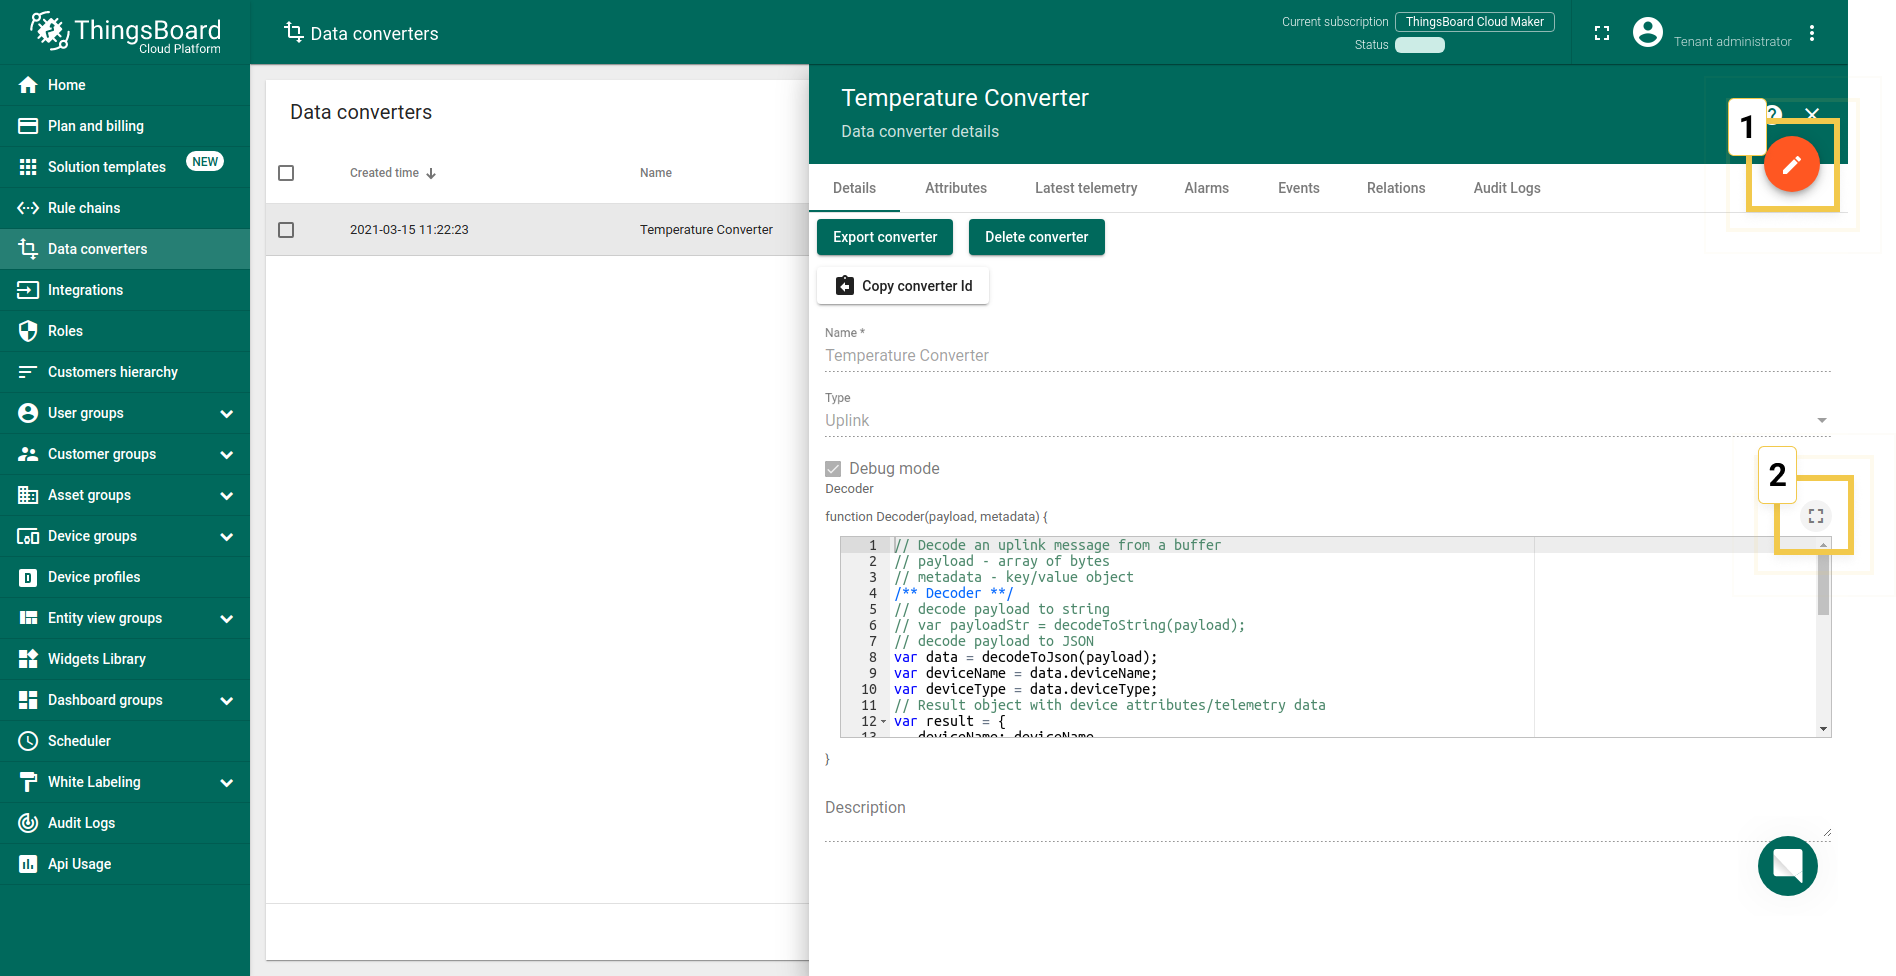
NOTE While Debug mode is very useful for development and troubleshooting, leaving it enabled in production mode can significantly increase the disk space used by the database since all the debug data is stored there. It is highly recommended turning the Debug mode off after debugging is complete.
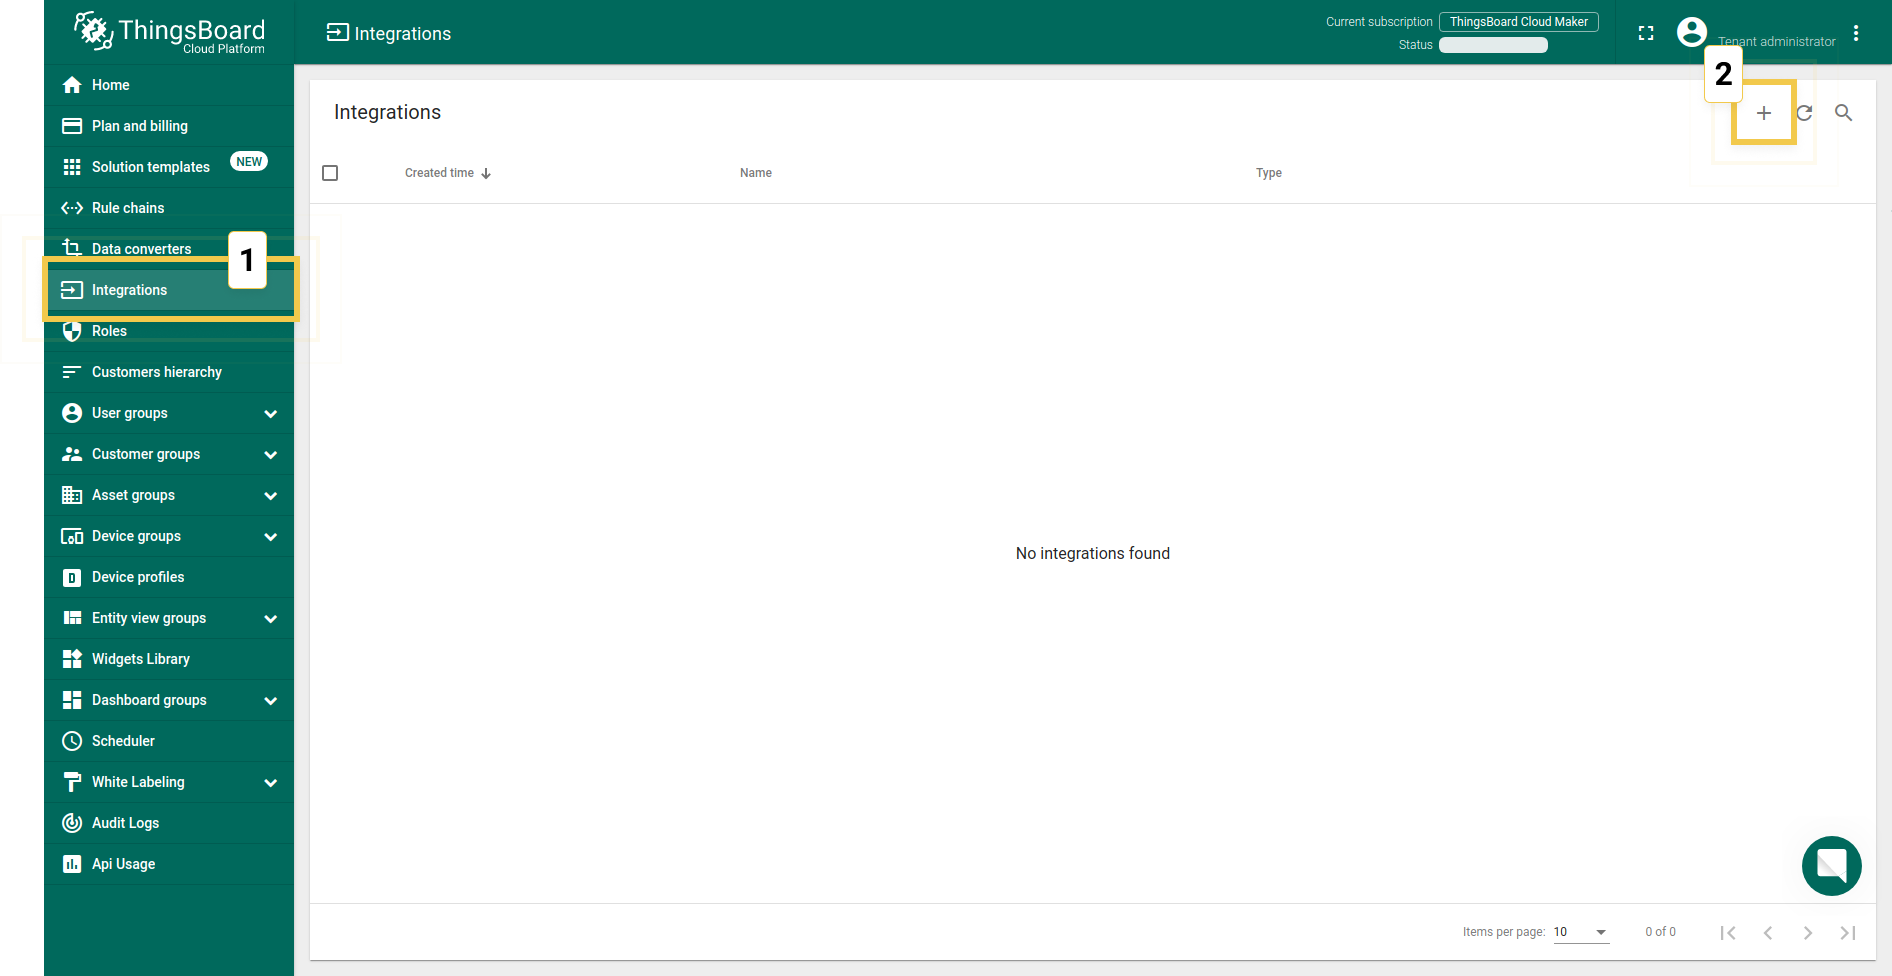
Create integration
Now that the Uplink converter has been created, it is possible to create an integration.
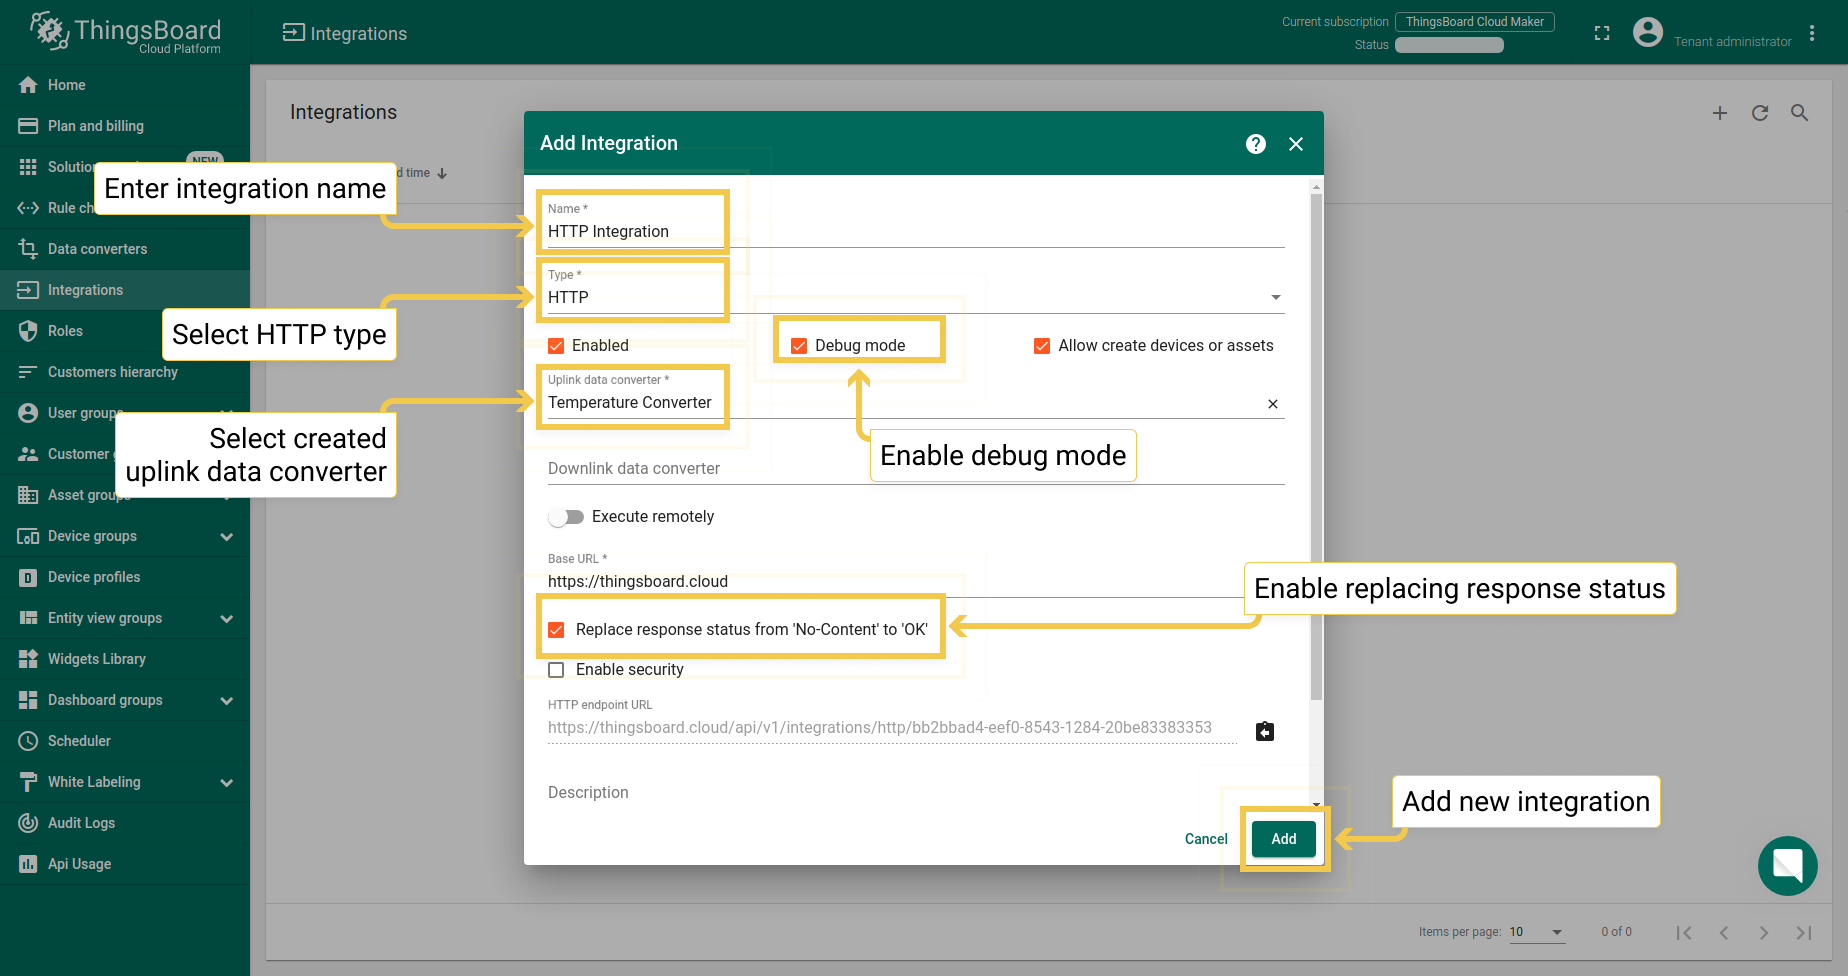
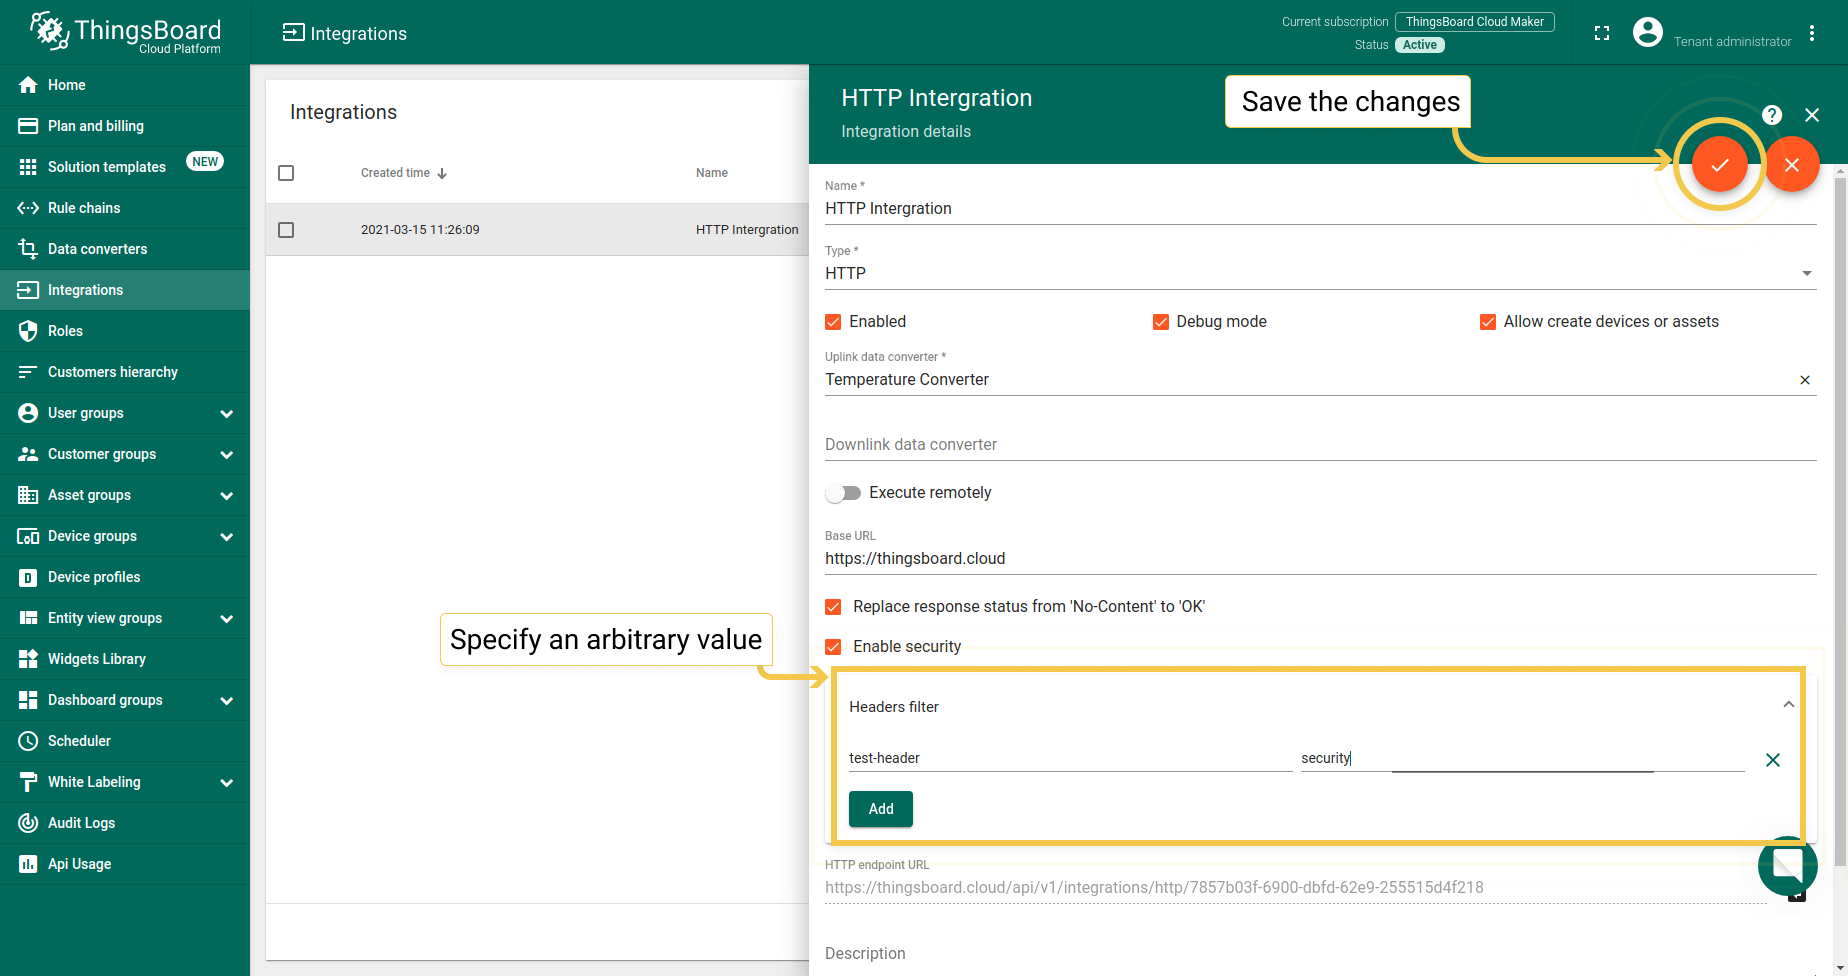
Enable security option
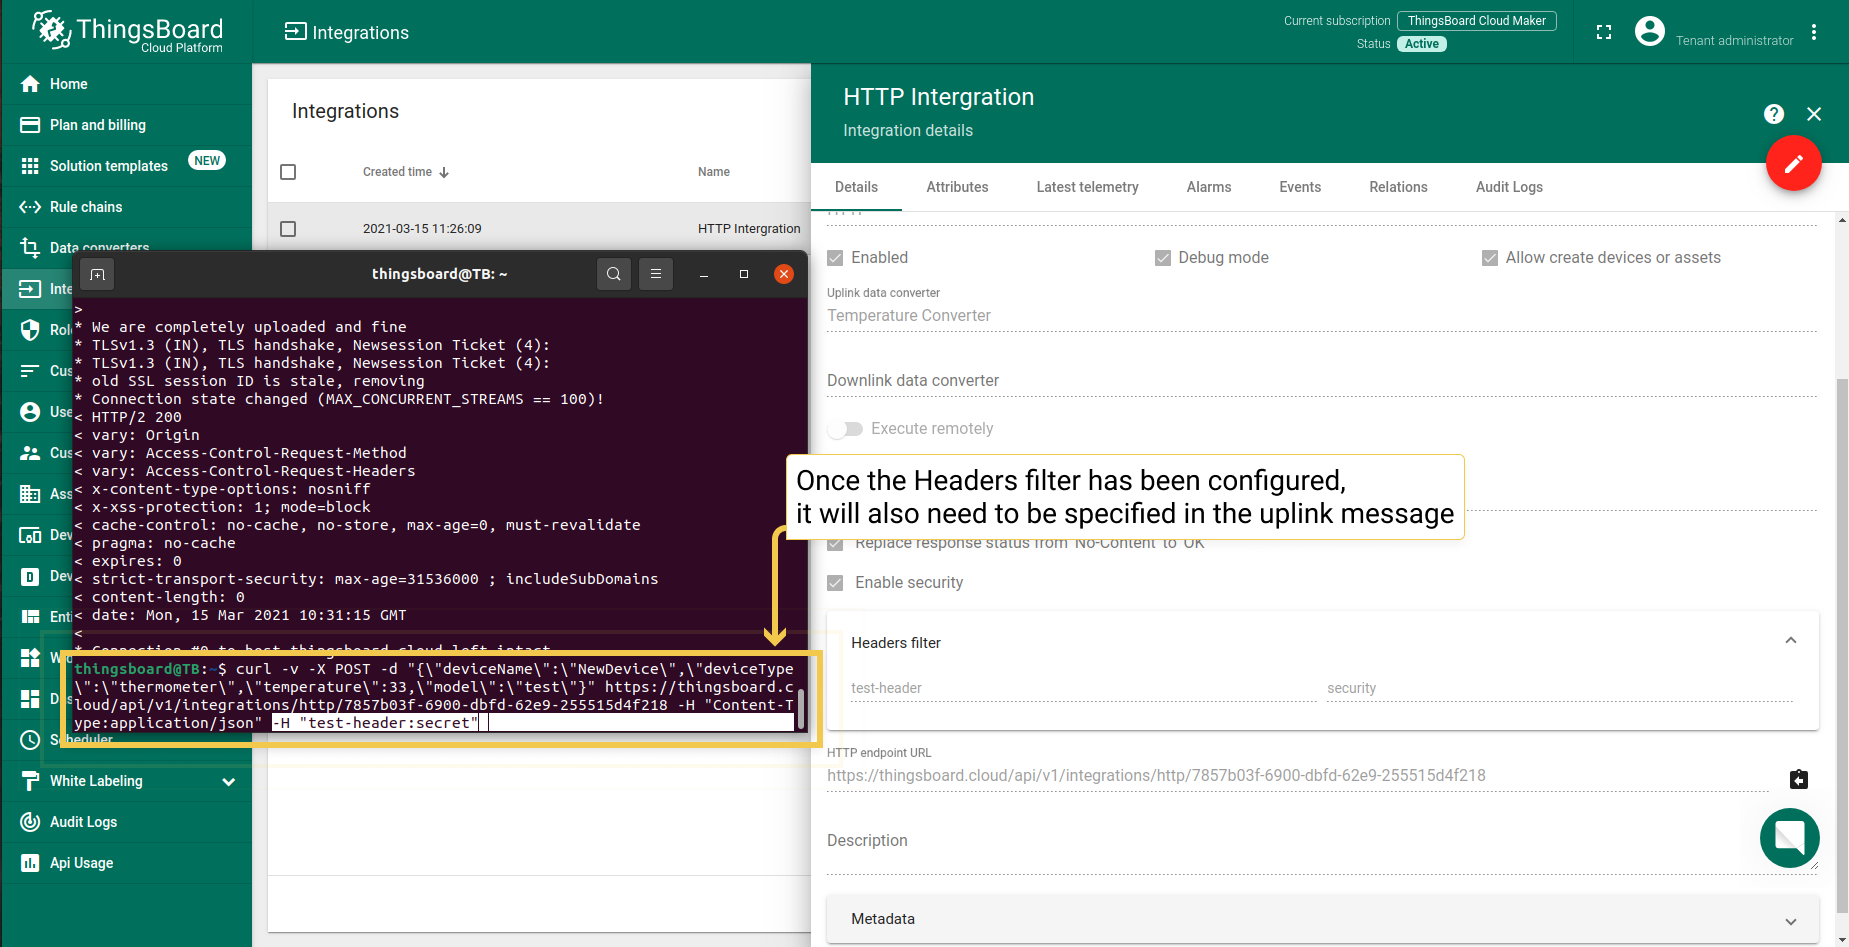
If necessary, you can specify additional parameters, without which the data will not be included in the integration. To do this, check the Enable security checkbox and click on the Headers filter. Specify an arbitrary value and save the changes.

Once the Headers filter has been configured, it will also need to be specified in the uplink message as follows.
1
-H "test-header:secret"
Send uplink message
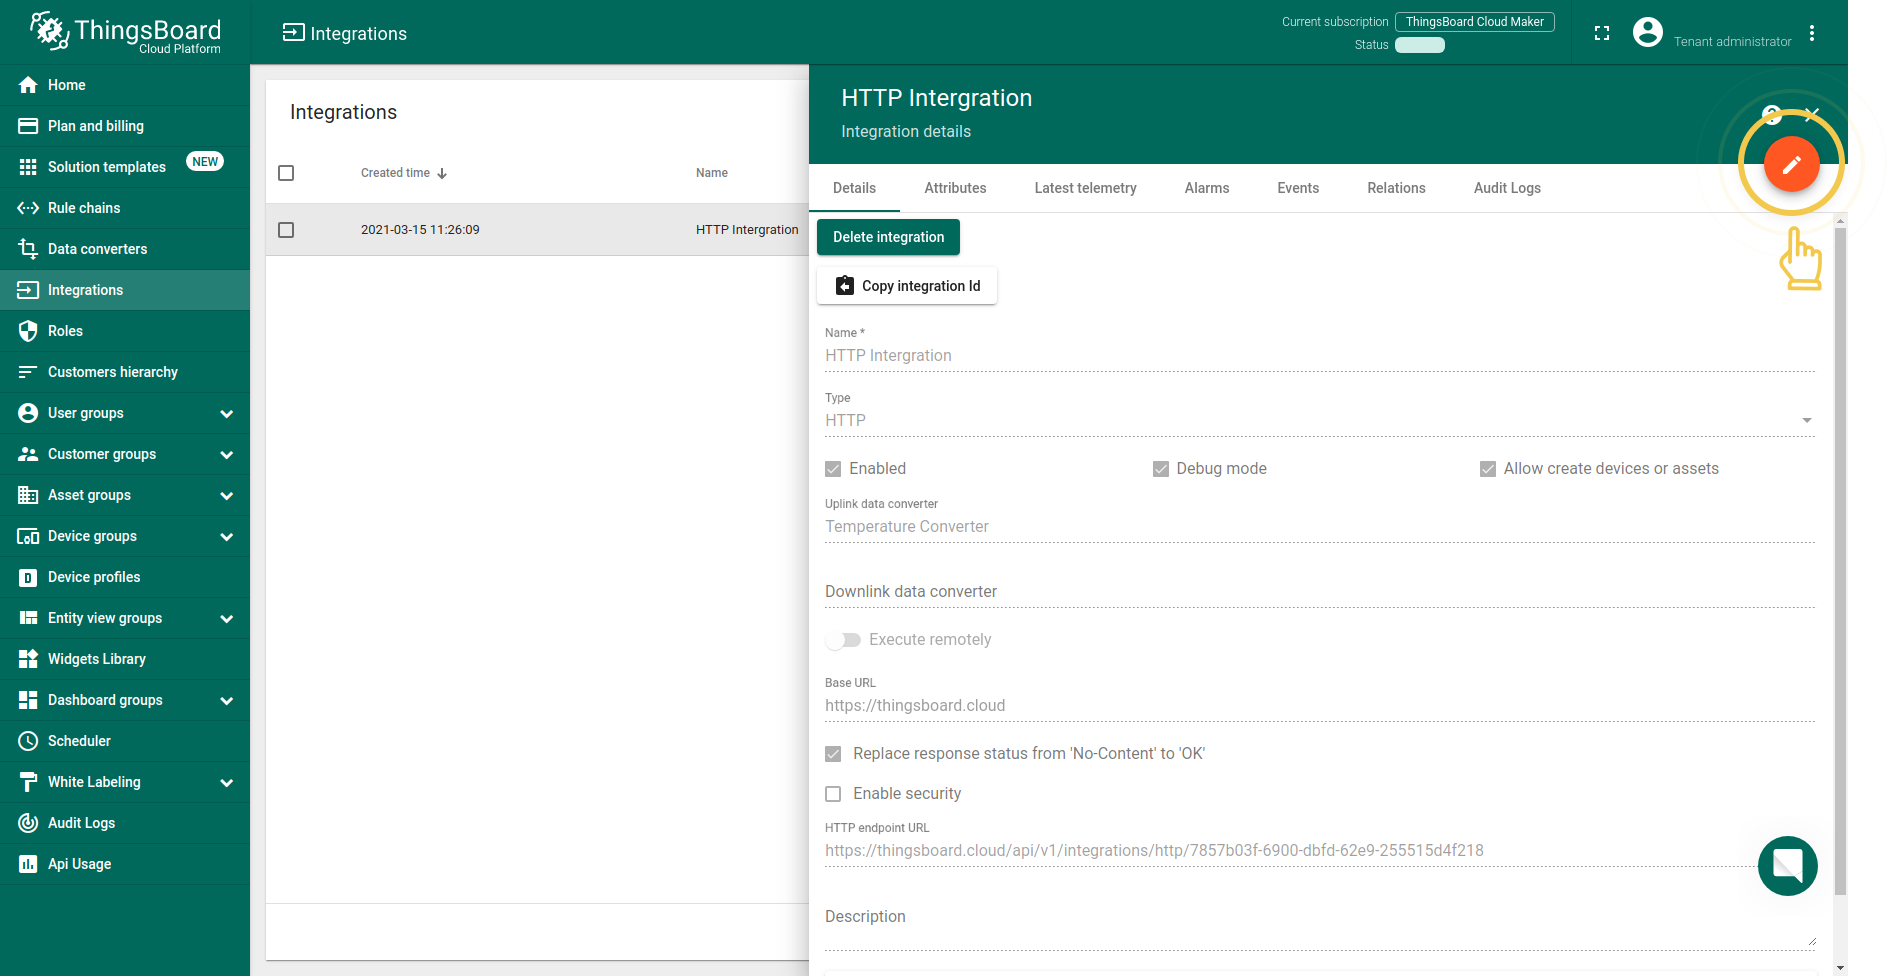
To send an uplink message, you need a HTTP endpoint URL from the integration.
Let`s go to the Integrations tab in IoT Hub. Find your HTTP integration and click on it. There you can find the HTTP endpoint URL. Click on the icon to copy the url.
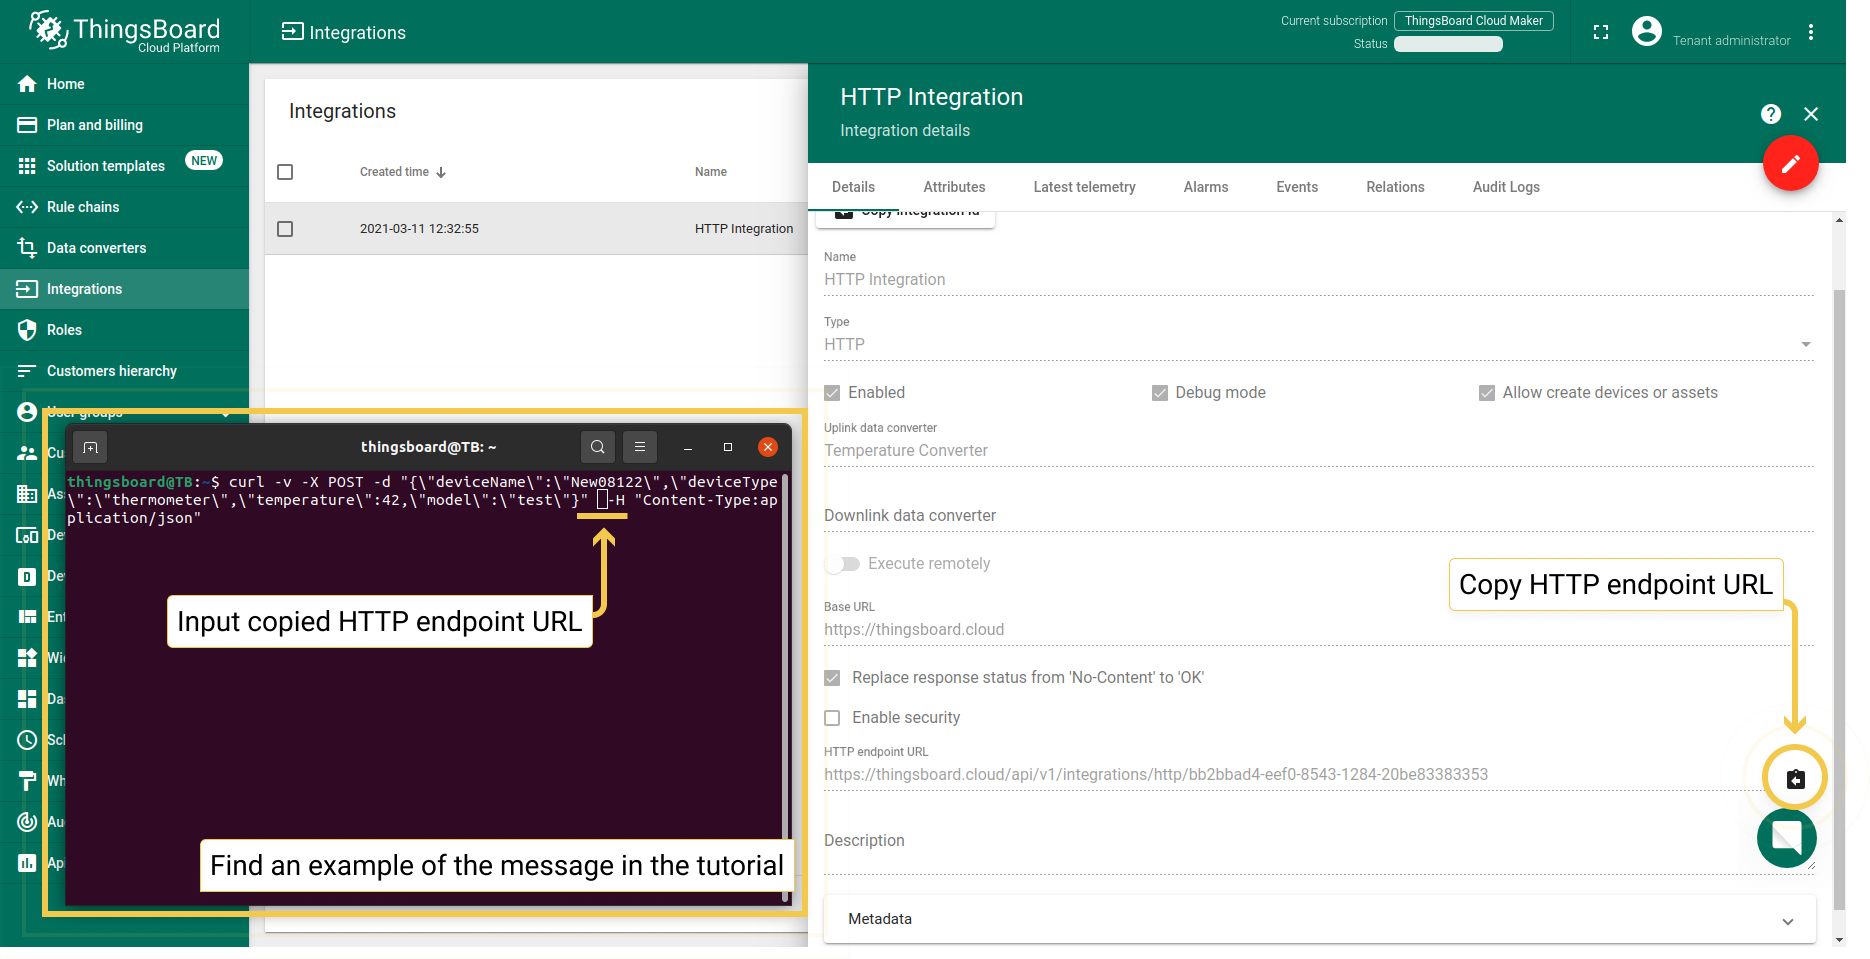
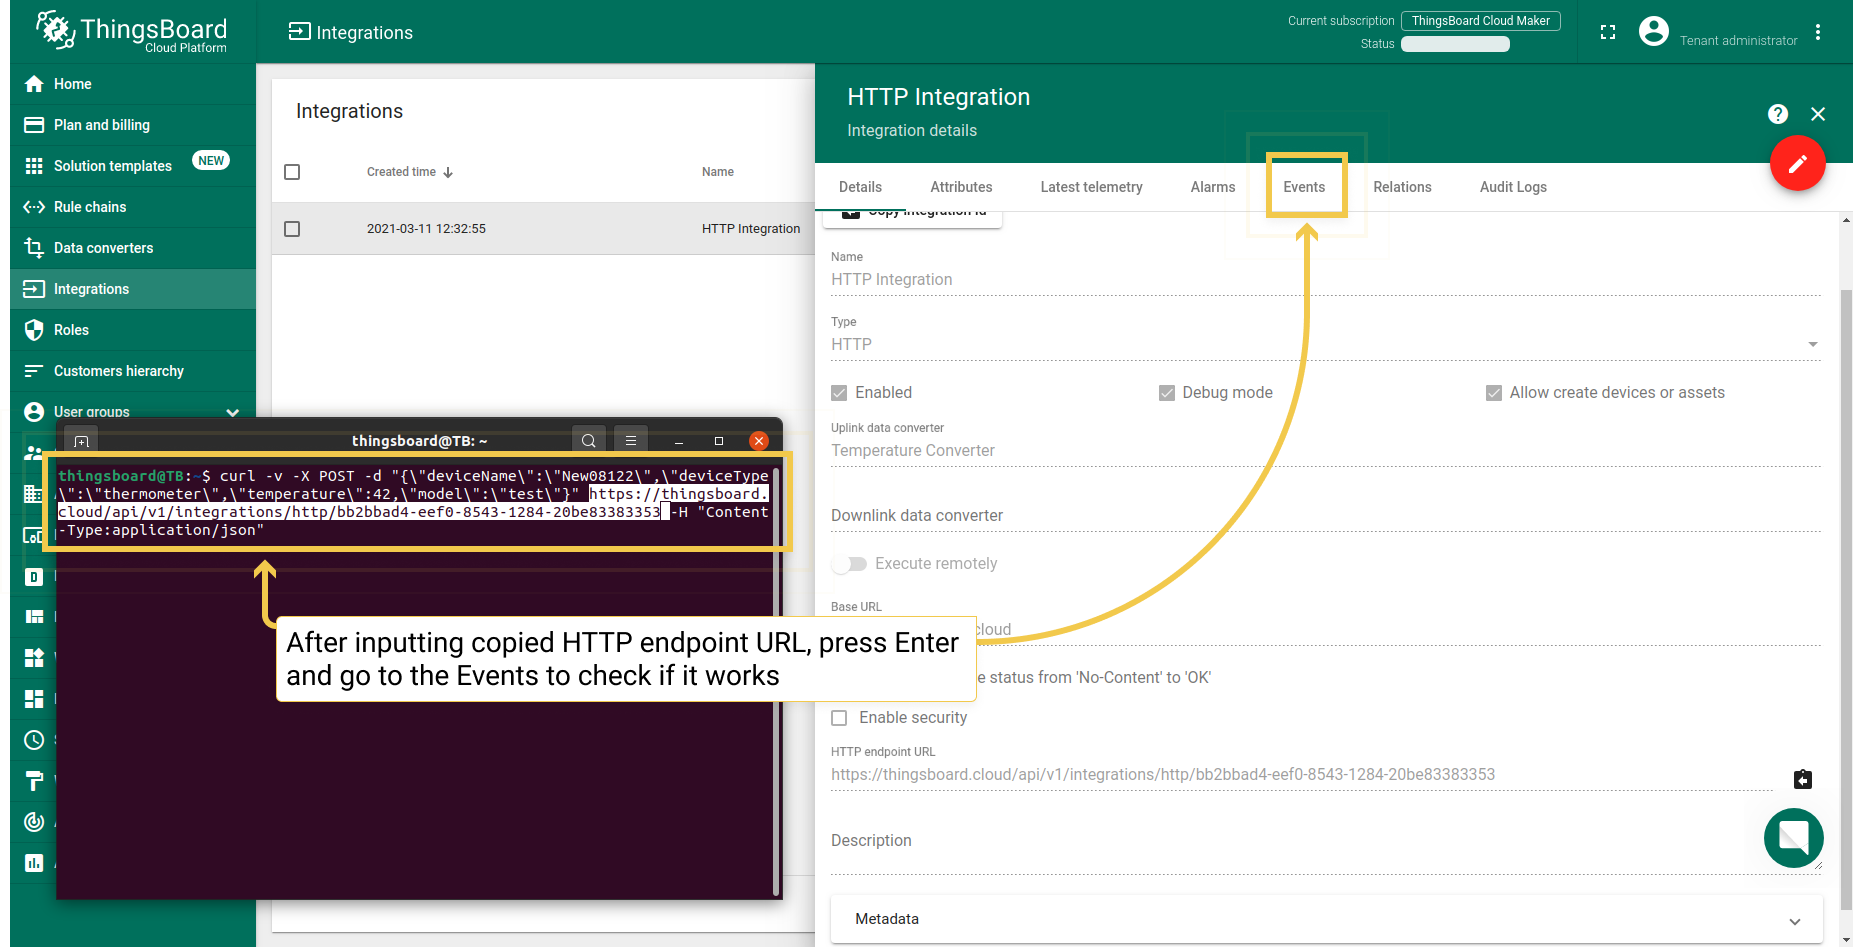
Use this command to send the message. Replace $DEVICEname, $DEVICEtype and $YOUR_HTTP_ENDPOINT_URL with corresponding values.
1
curl -v -X POST -d "{\"deviceName\":\"$DEVICEname\",\"deviceType\":\"$DEVICEtype\",\"temperature\":33,\"model\":\"test\"}" $YOUR_HTTP_ENDPOINT_URL -H "Content-Type:application/json"
Use this command to send the message. Replace $DEVICEname, $DEVICEtype, $YOUR_HTTP_ENDPOINT_URL and $VALUE with corresponding values.
1
curl -v -X POST -d "{\"deviceName\":\"$DEVICEname\",\"deviceType\":\"$DEVICEtype\",\"temperature\":33,\"model\":\"test\"}" $YOUR_HTTP_ENDPOINT_URL -H "Content-Type:application/json" -H "$VALUE"
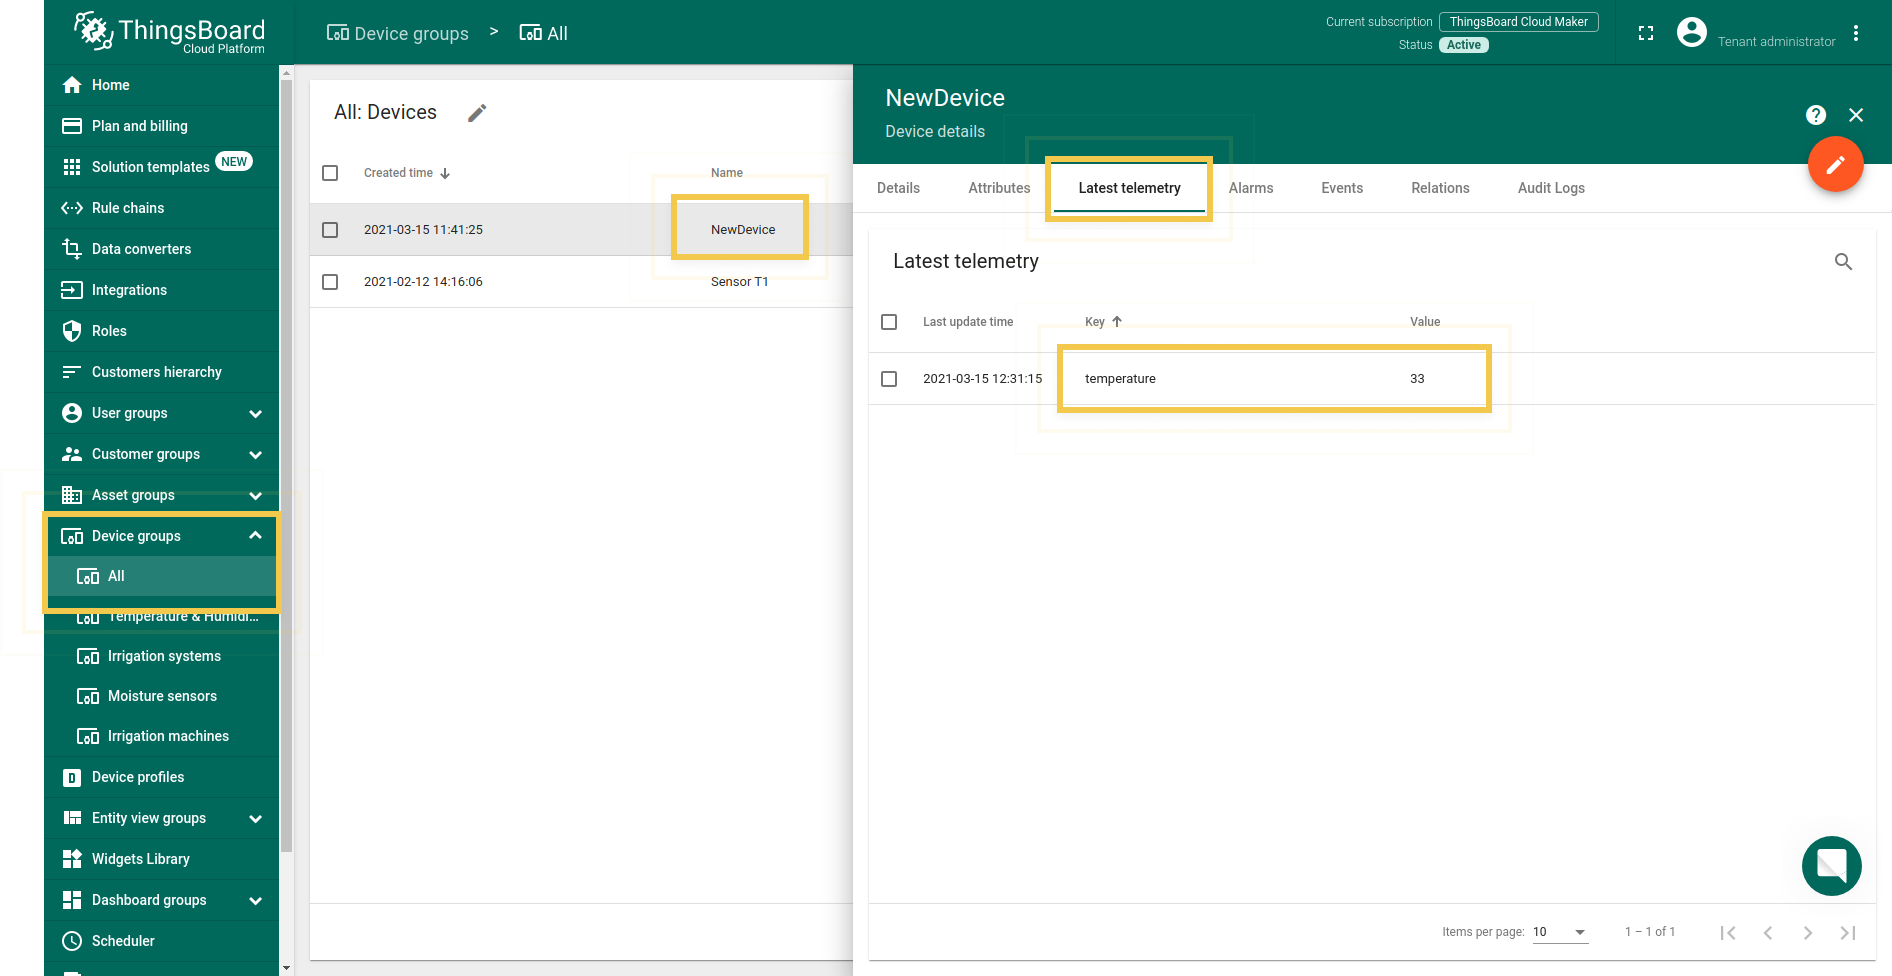
The created device with data can be seen in the section Device groups -> All
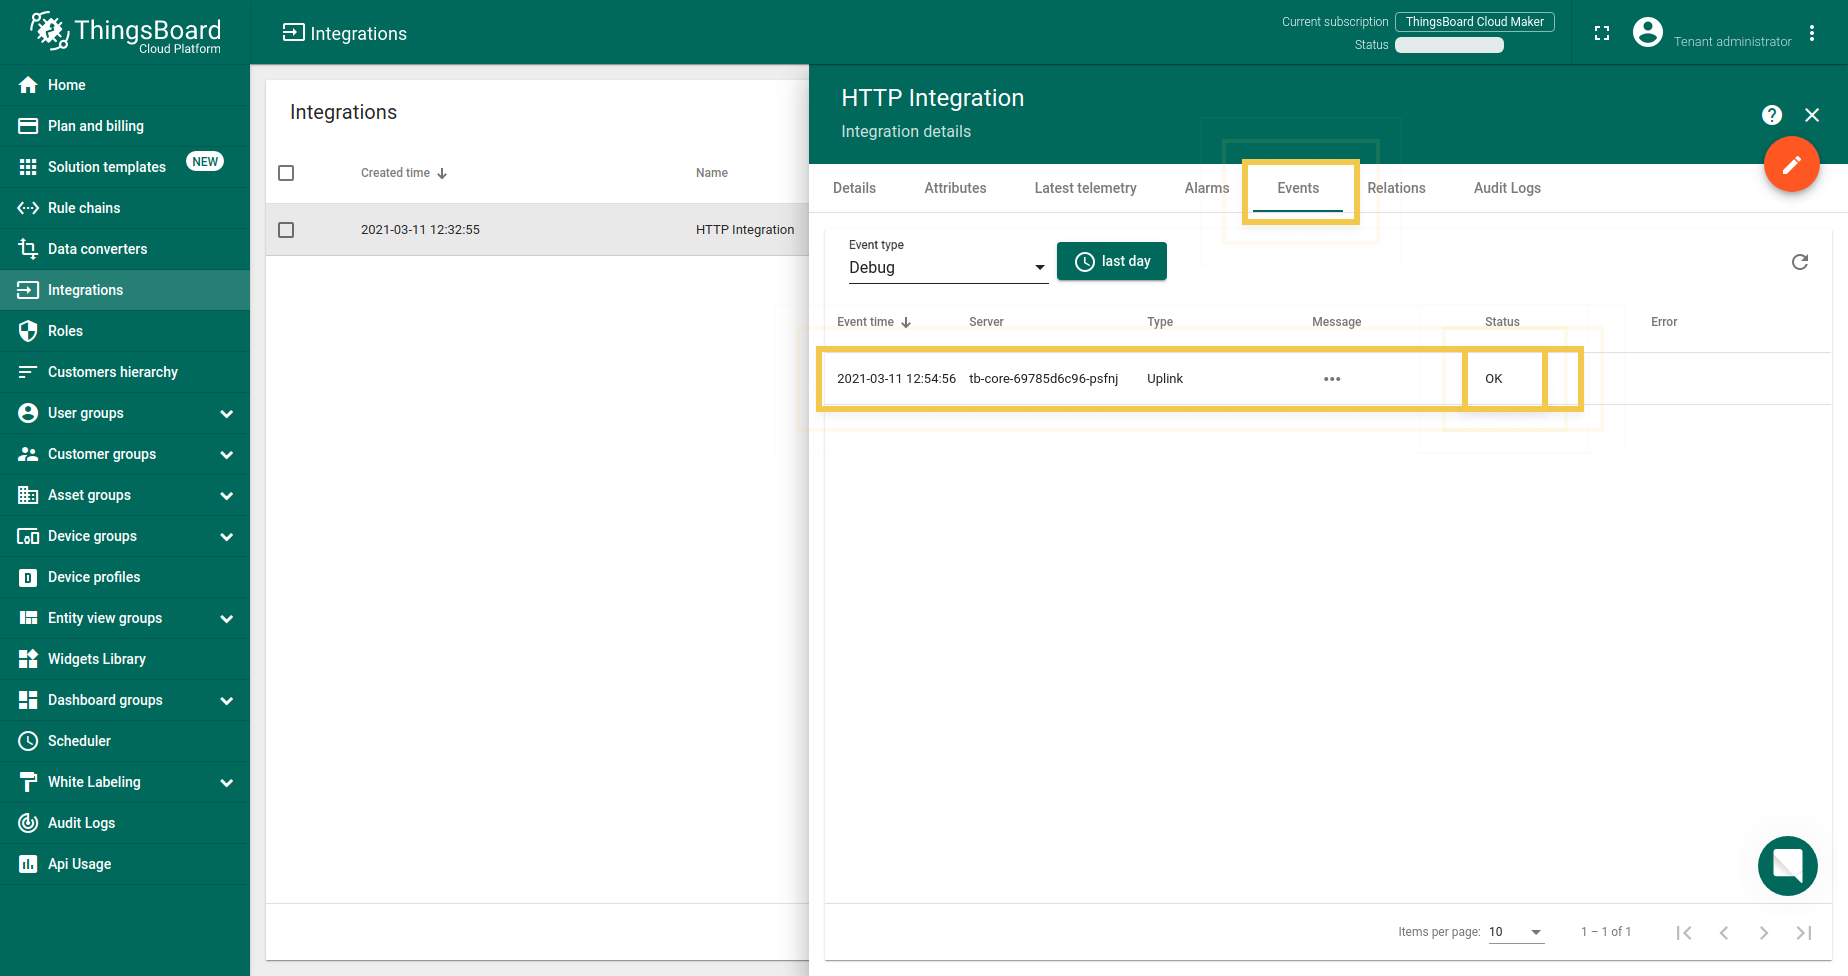
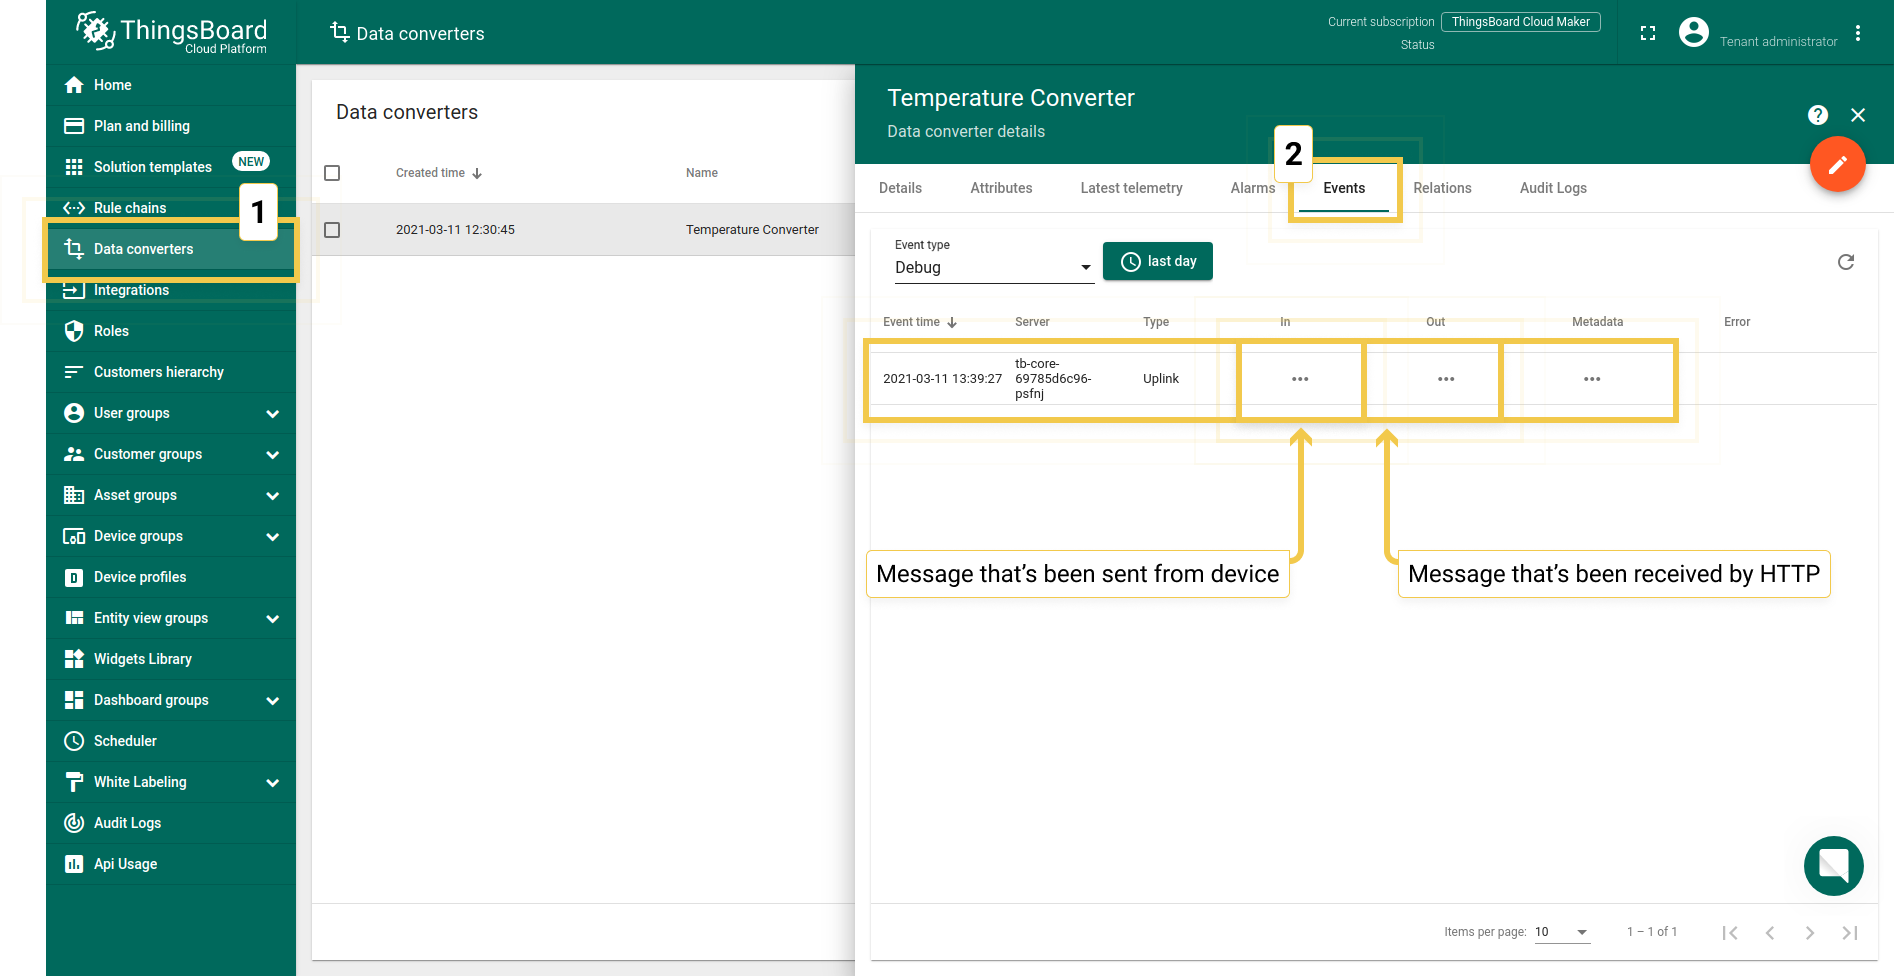
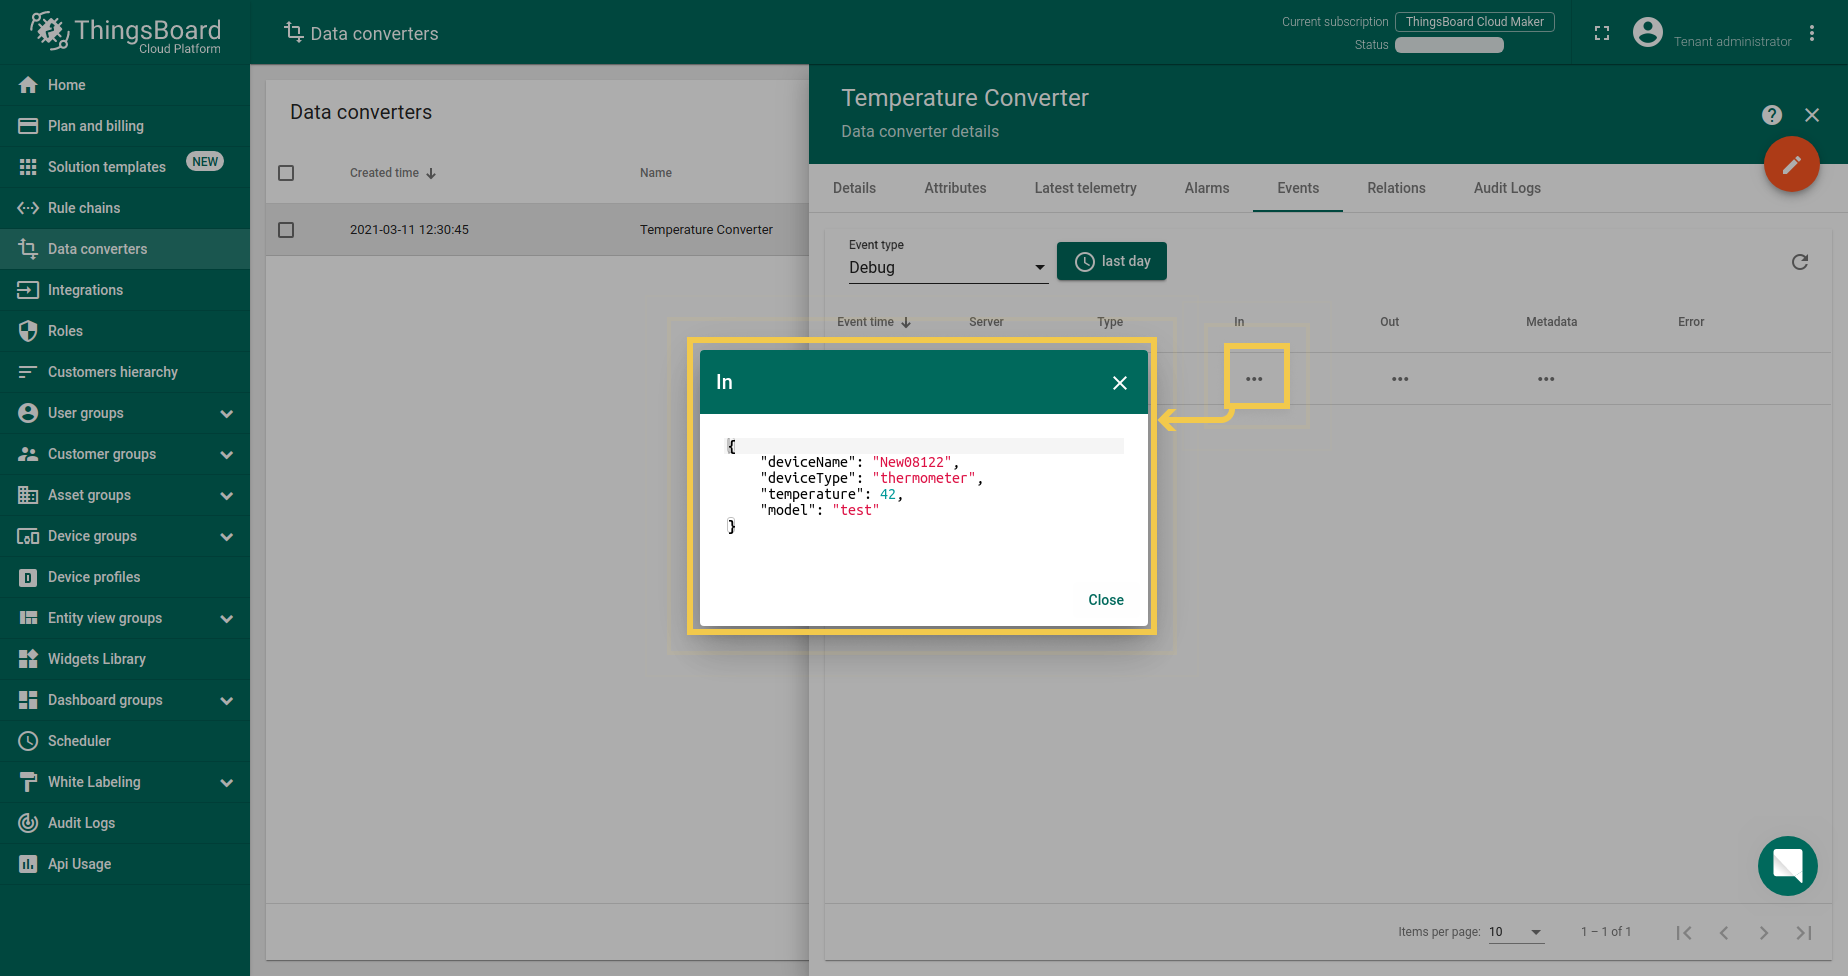
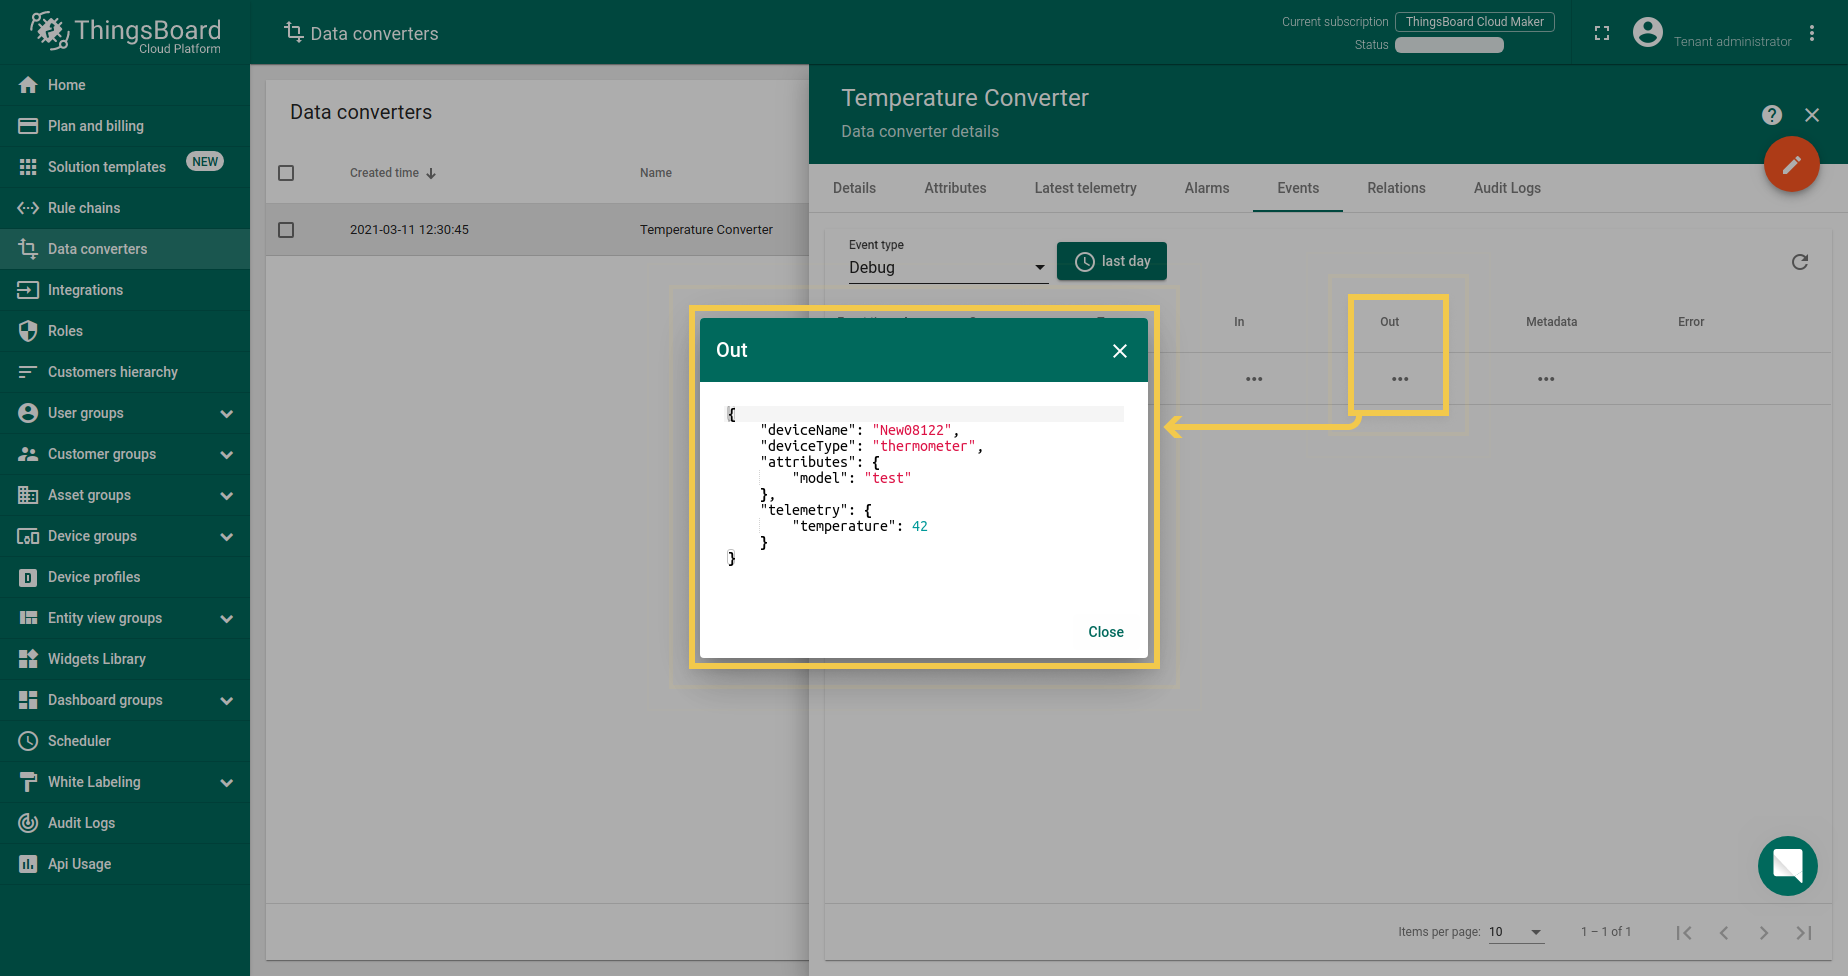
Received data can be viewed in the Uplink converter. In the “In” and “Out” blocks of the Events tab:
Use the Dashboards to work with data. Dashboards are a modern format for collecting and visualizing data sets. Visibility of data presentation is achieved through a variety of widgets.
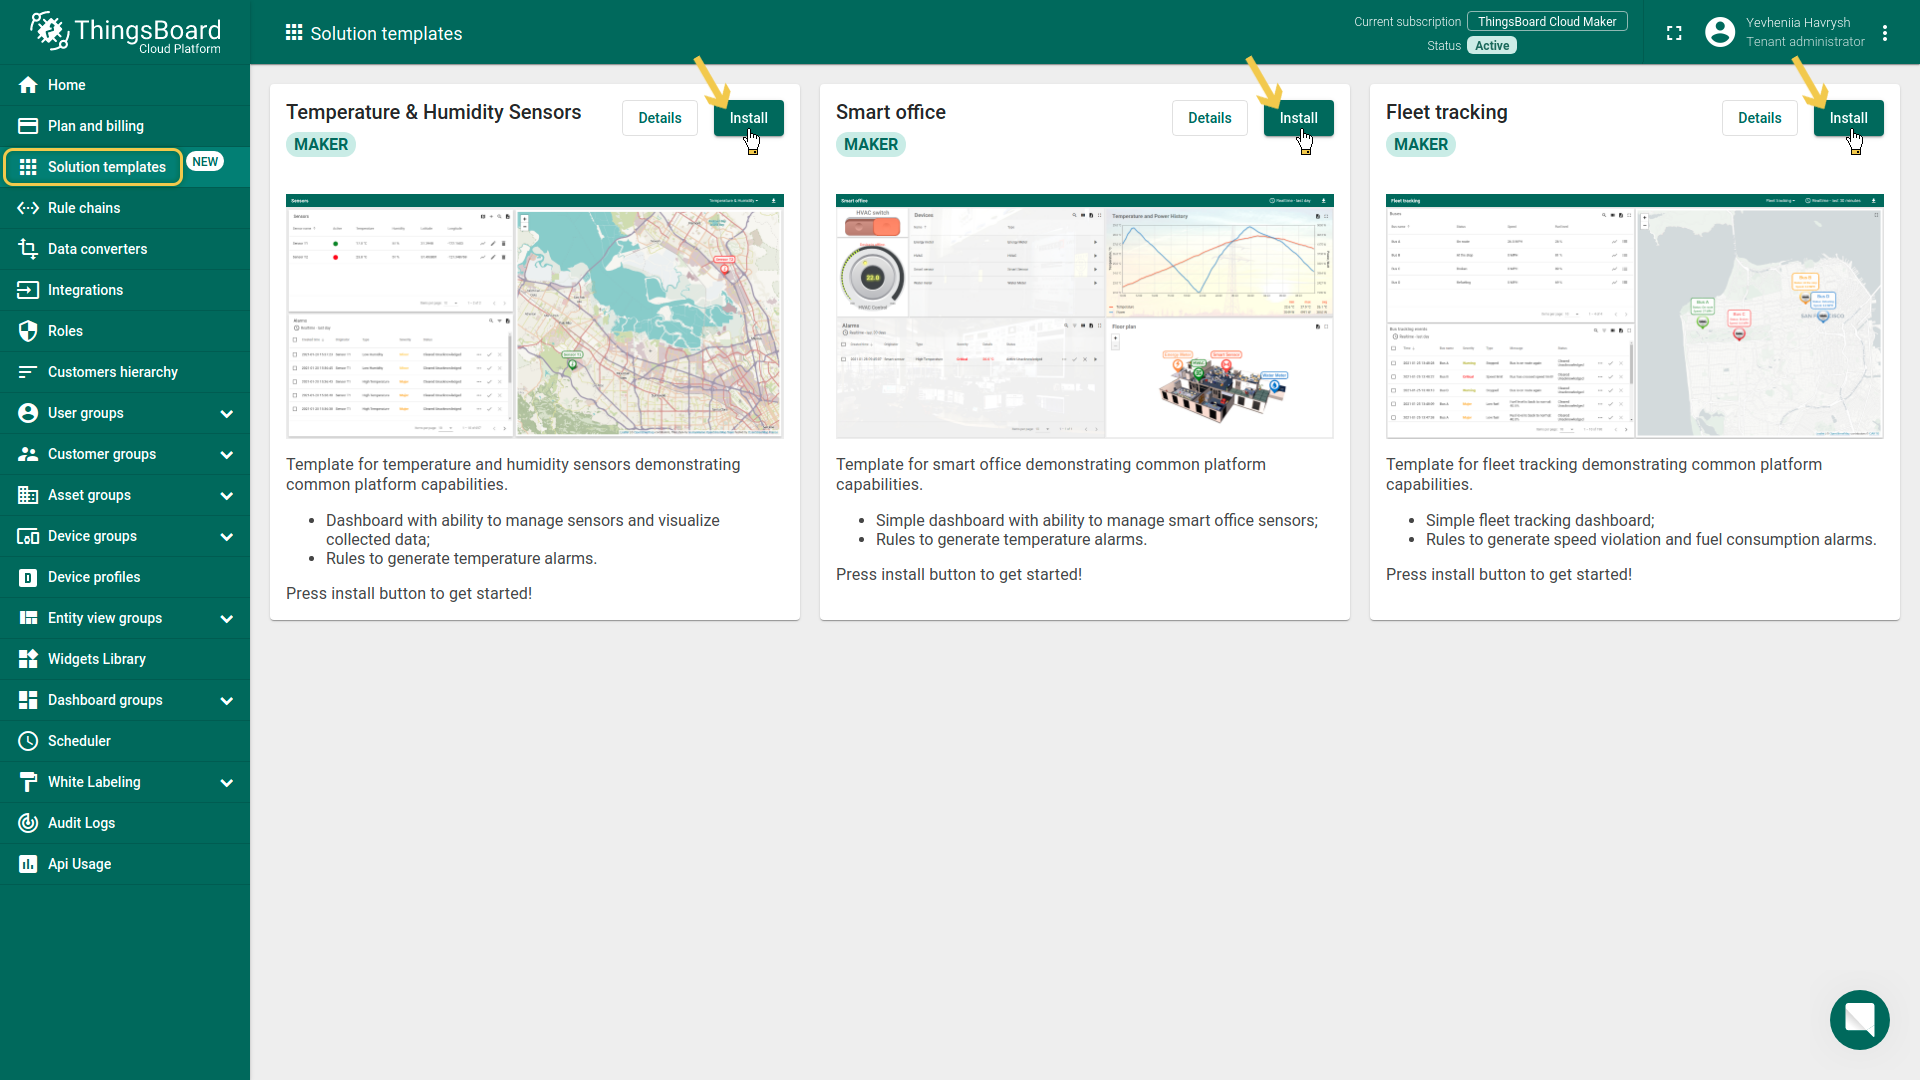
IoT Hub has examples of several types of dashboards that you can use. You can find them in Solution templates tab.
How to work with dashboards read here.
Downlink Converter
Create Downlink in Data converters. To see events enable Debug.
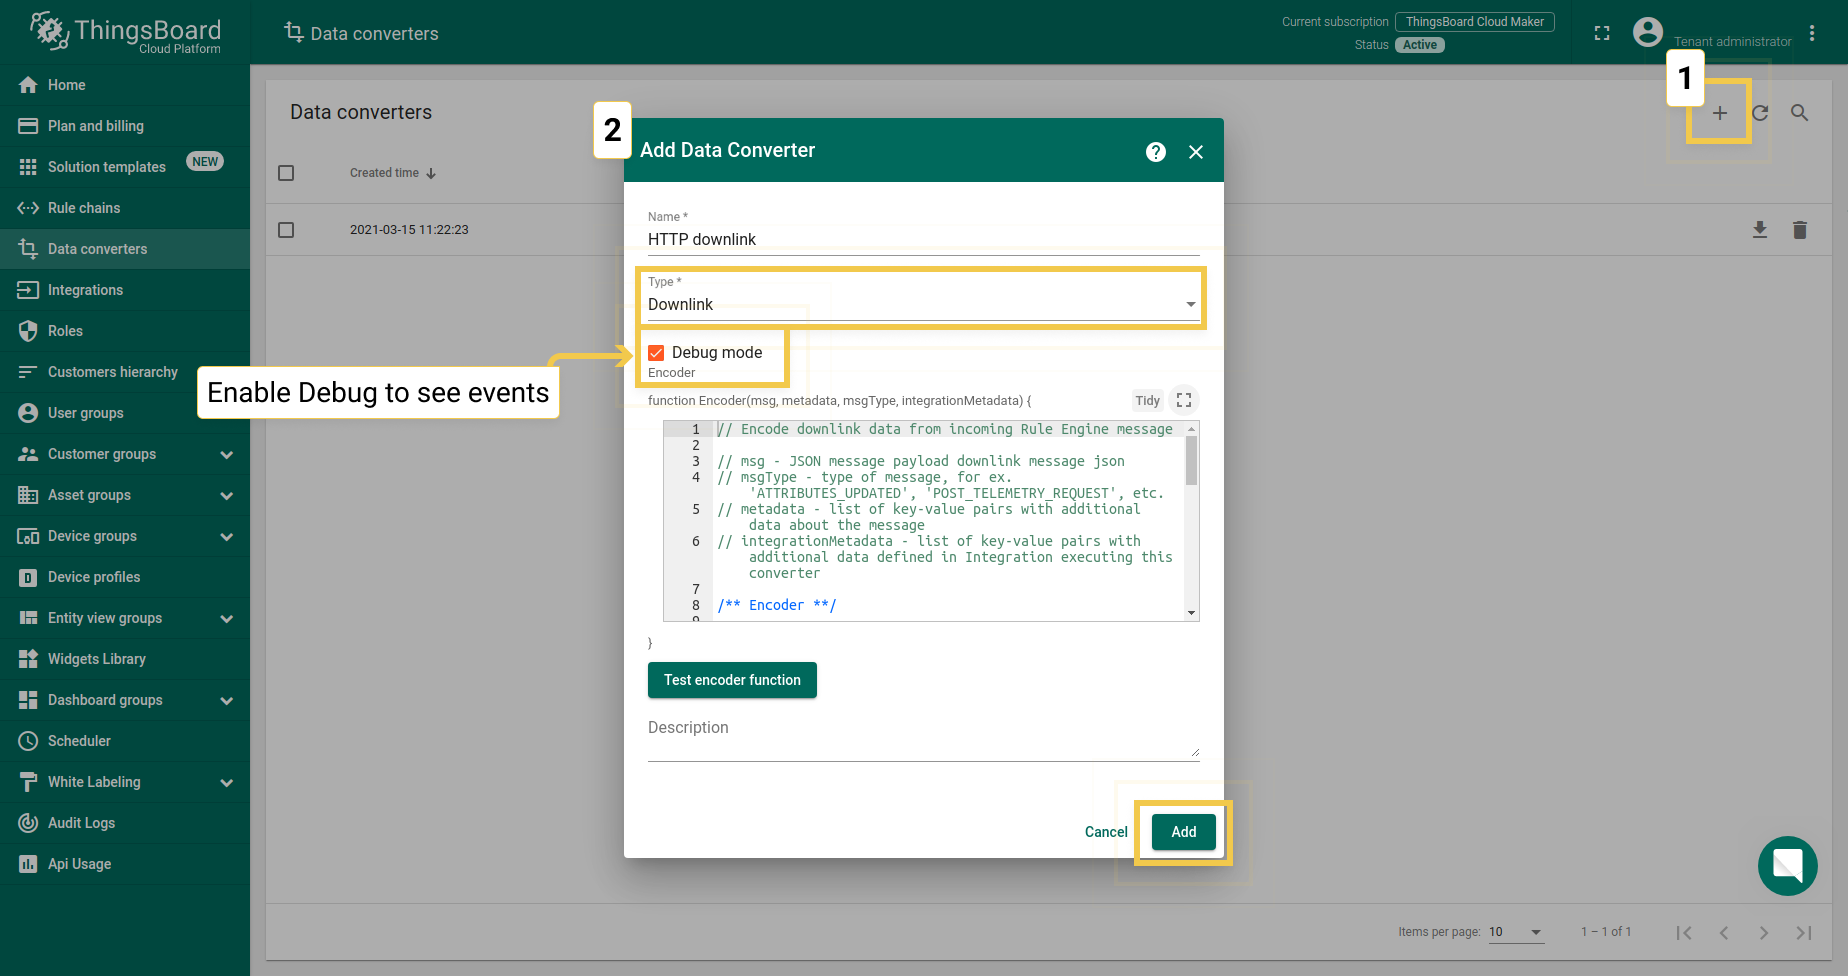
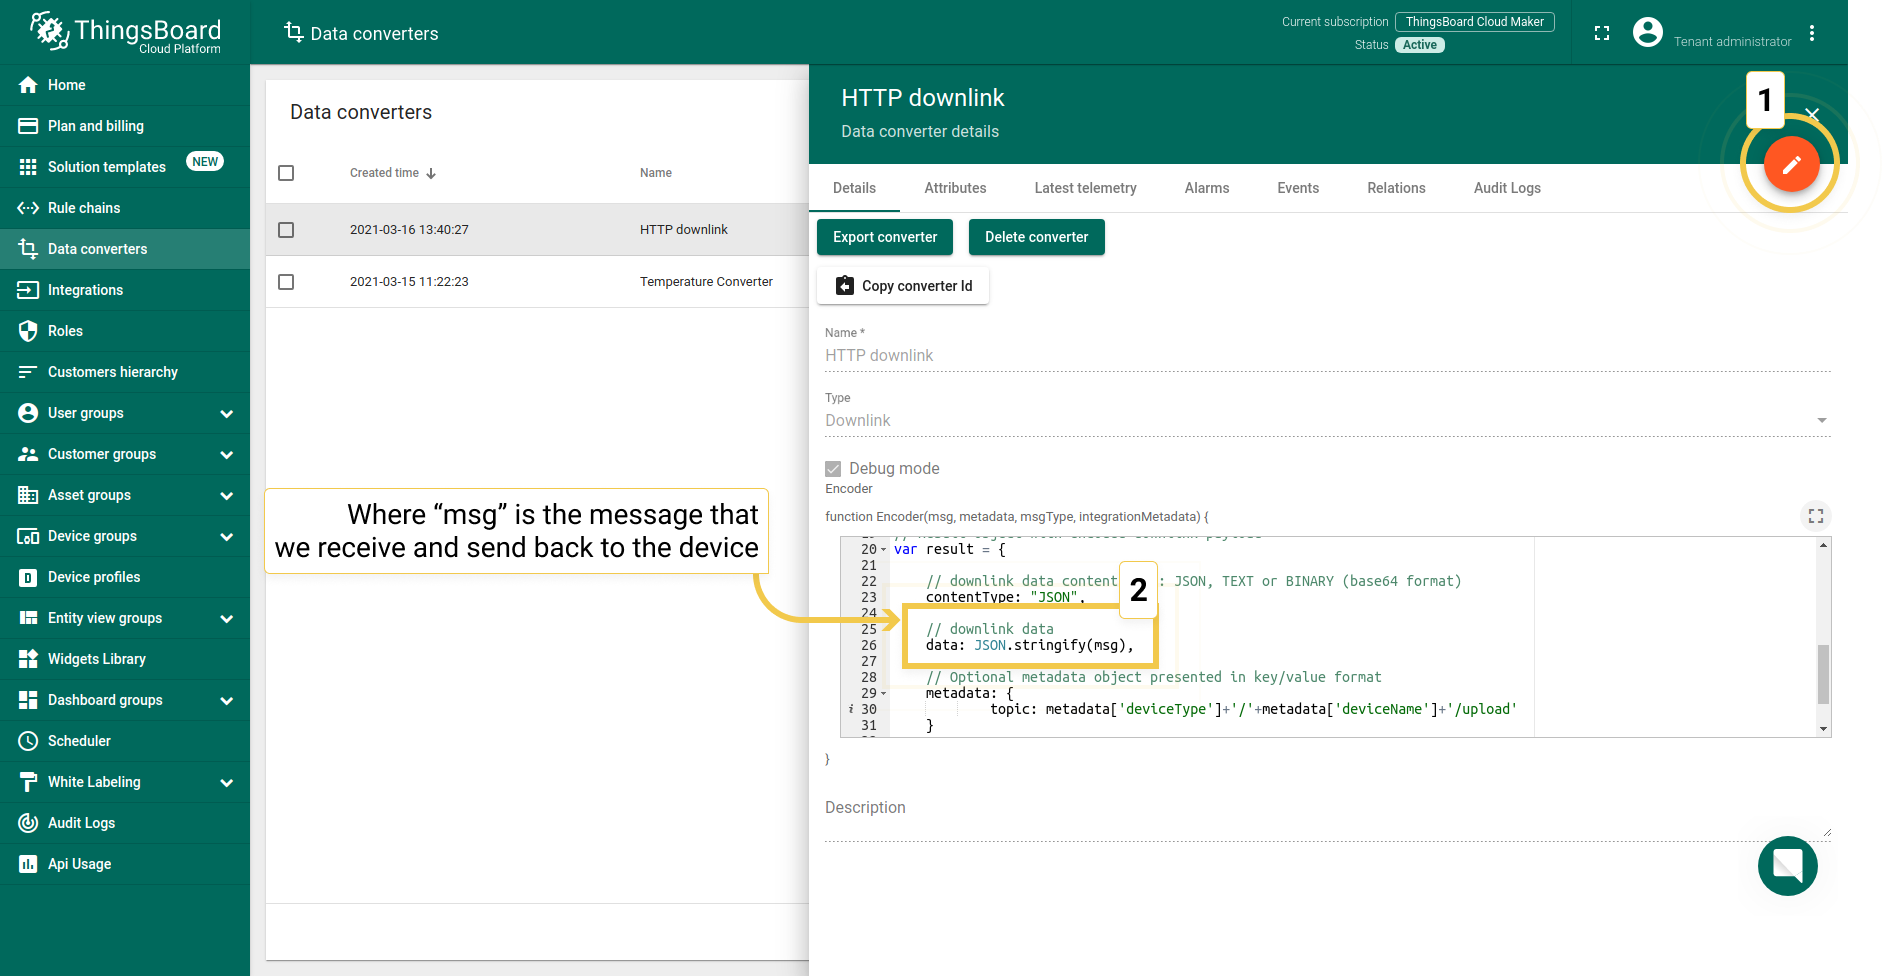
Add a converter to the integration. You can customize a downlink according to your configuration. Let’s consider an example where we send an attribute update message. So we should change code in the downlink encoder function under line //downlink data input:
1
data: JSON.stringify(msg)
where msg is the message that we receive and send back to the device.
An example of downlink converter:
1
2
3
4
5
6
7
8
9
10
11
12
13
14
15
16
17
18
19
20
21
// Encode downlink data from incoming Rule Engine message

// msg - JSON message payload downlink message json
// msgType - type of message, for ex. 'ATTRIBUTES_UPDATED', 'POST_TELEMETRY_REQUEST', etc.
// metadata - list of key-value pairs with additional data about the message
// integrationMetadata - list of key-value pairs with additional data defined in Integration executing this converter

var result = {

    // downlink data content type: JSON, TEXT or BINARY (base64 format)
    contentType: "JSON",

    // downlink data
    data: JSON.stringify(msg),

    // Optional metadata object presented in key/value format
    metadata: {
    }
};

return result;
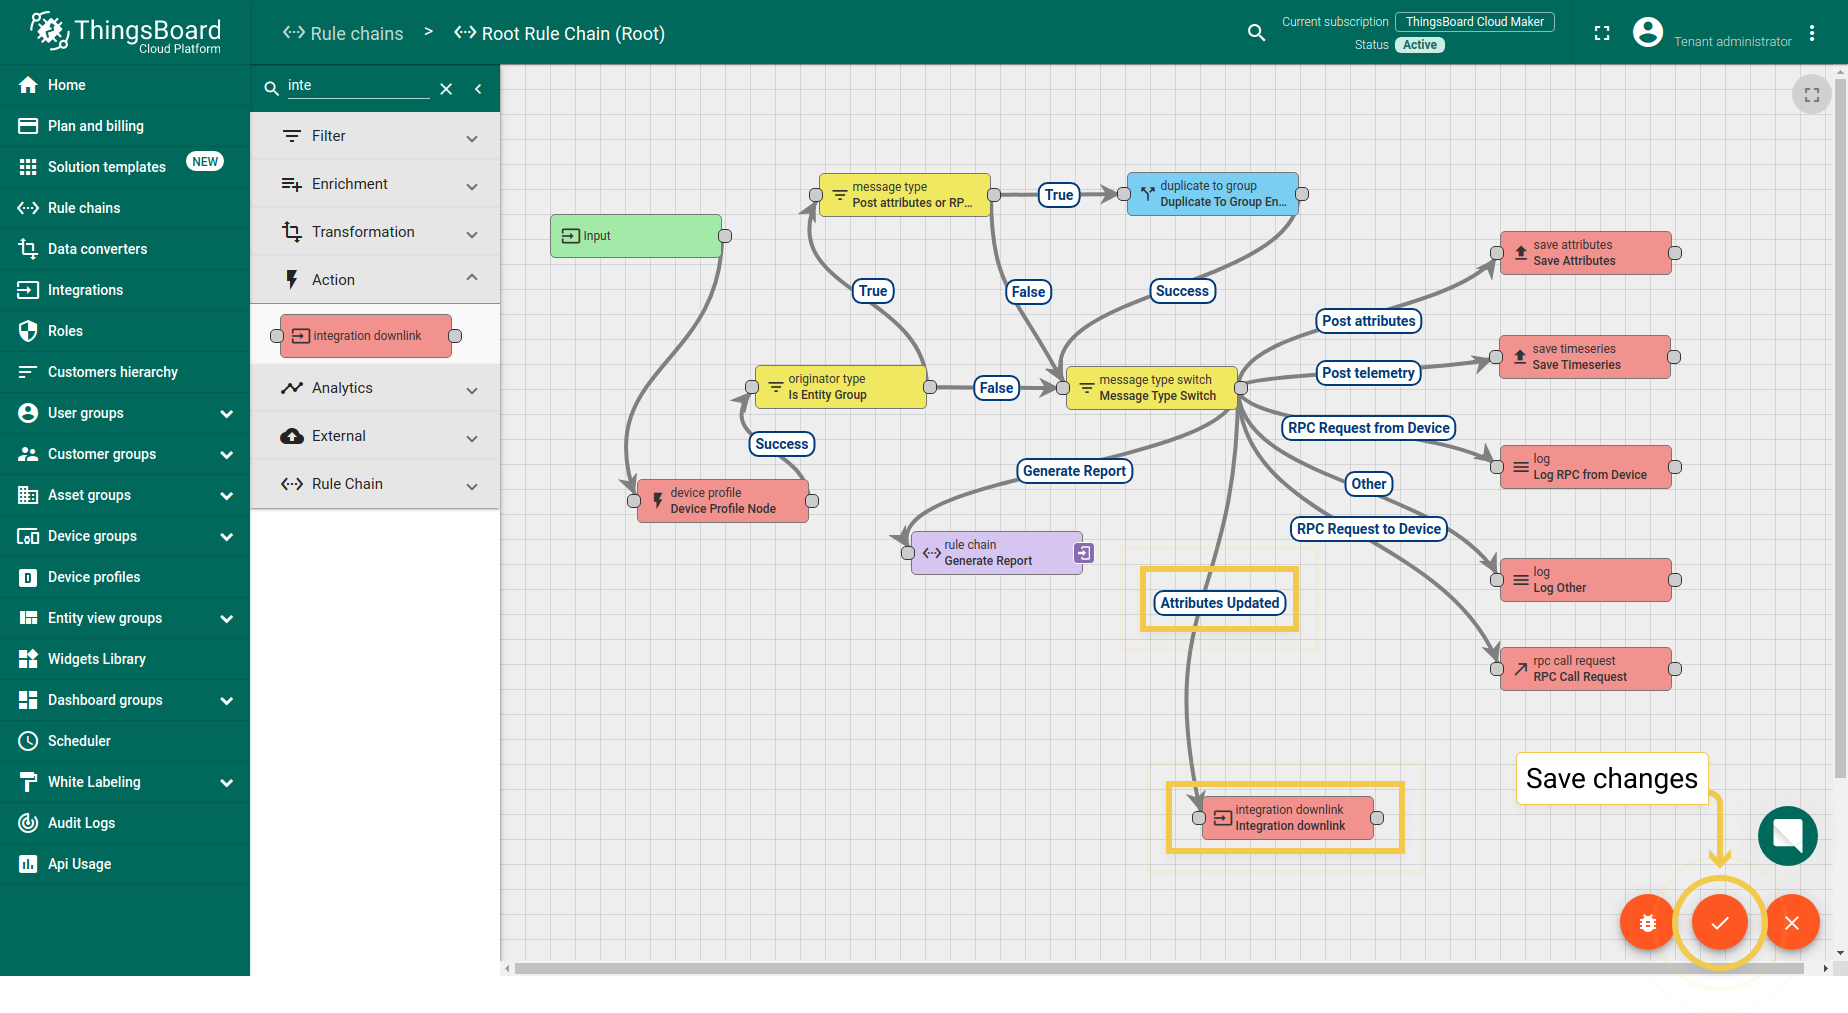
We can send a message to the device from Rule chain using the rule node. For example, create an integration downlink node and set the “Attributes updated” link to it. When changes are made to the attribute, the downlink message will be sent to the integration.
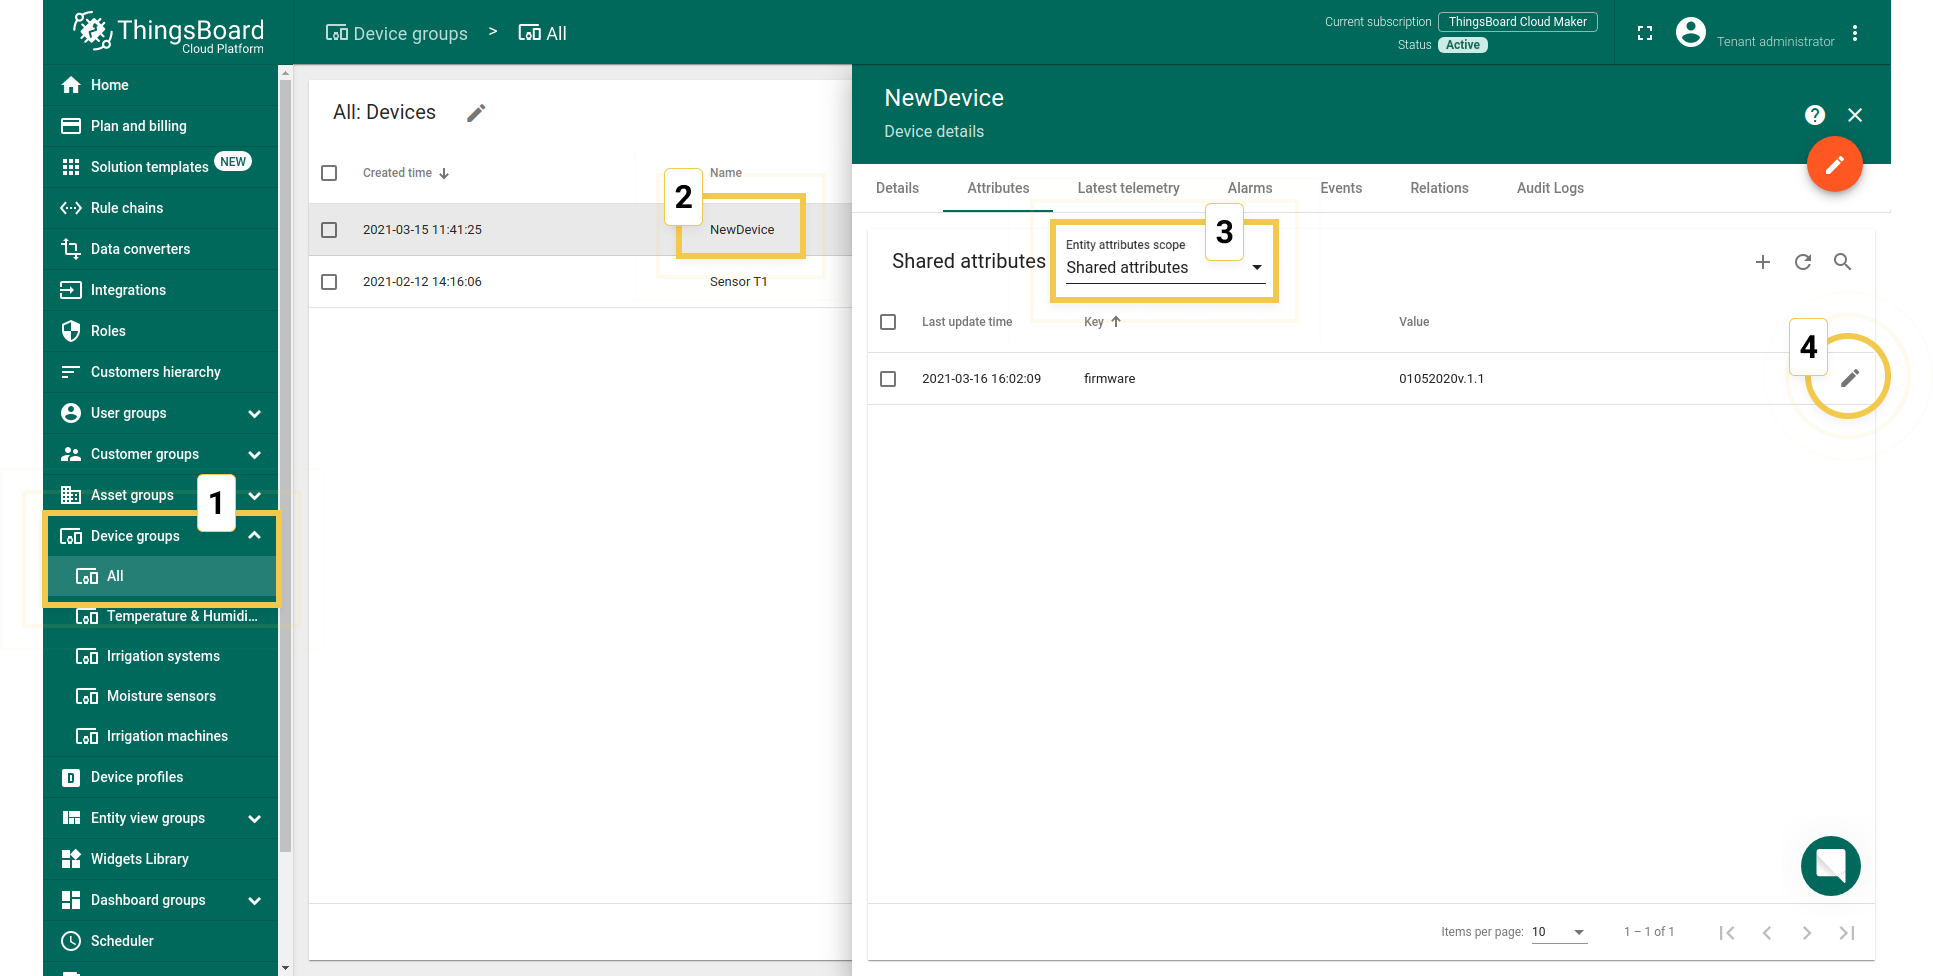
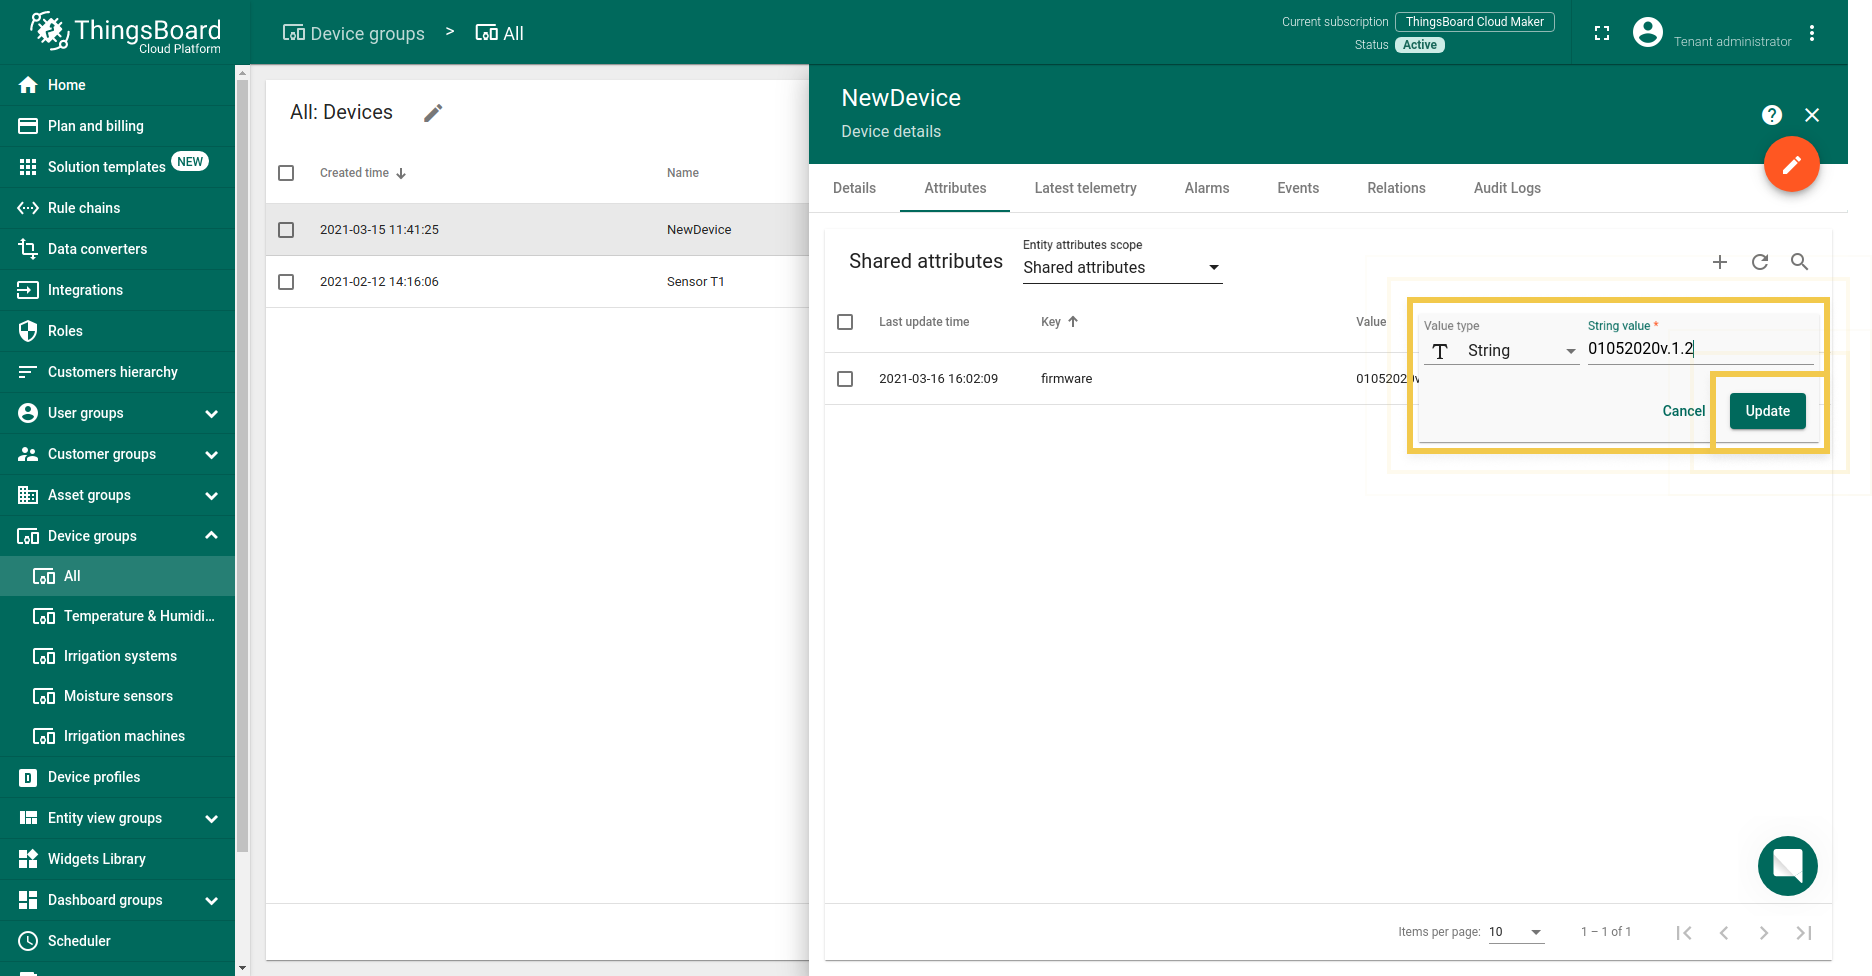
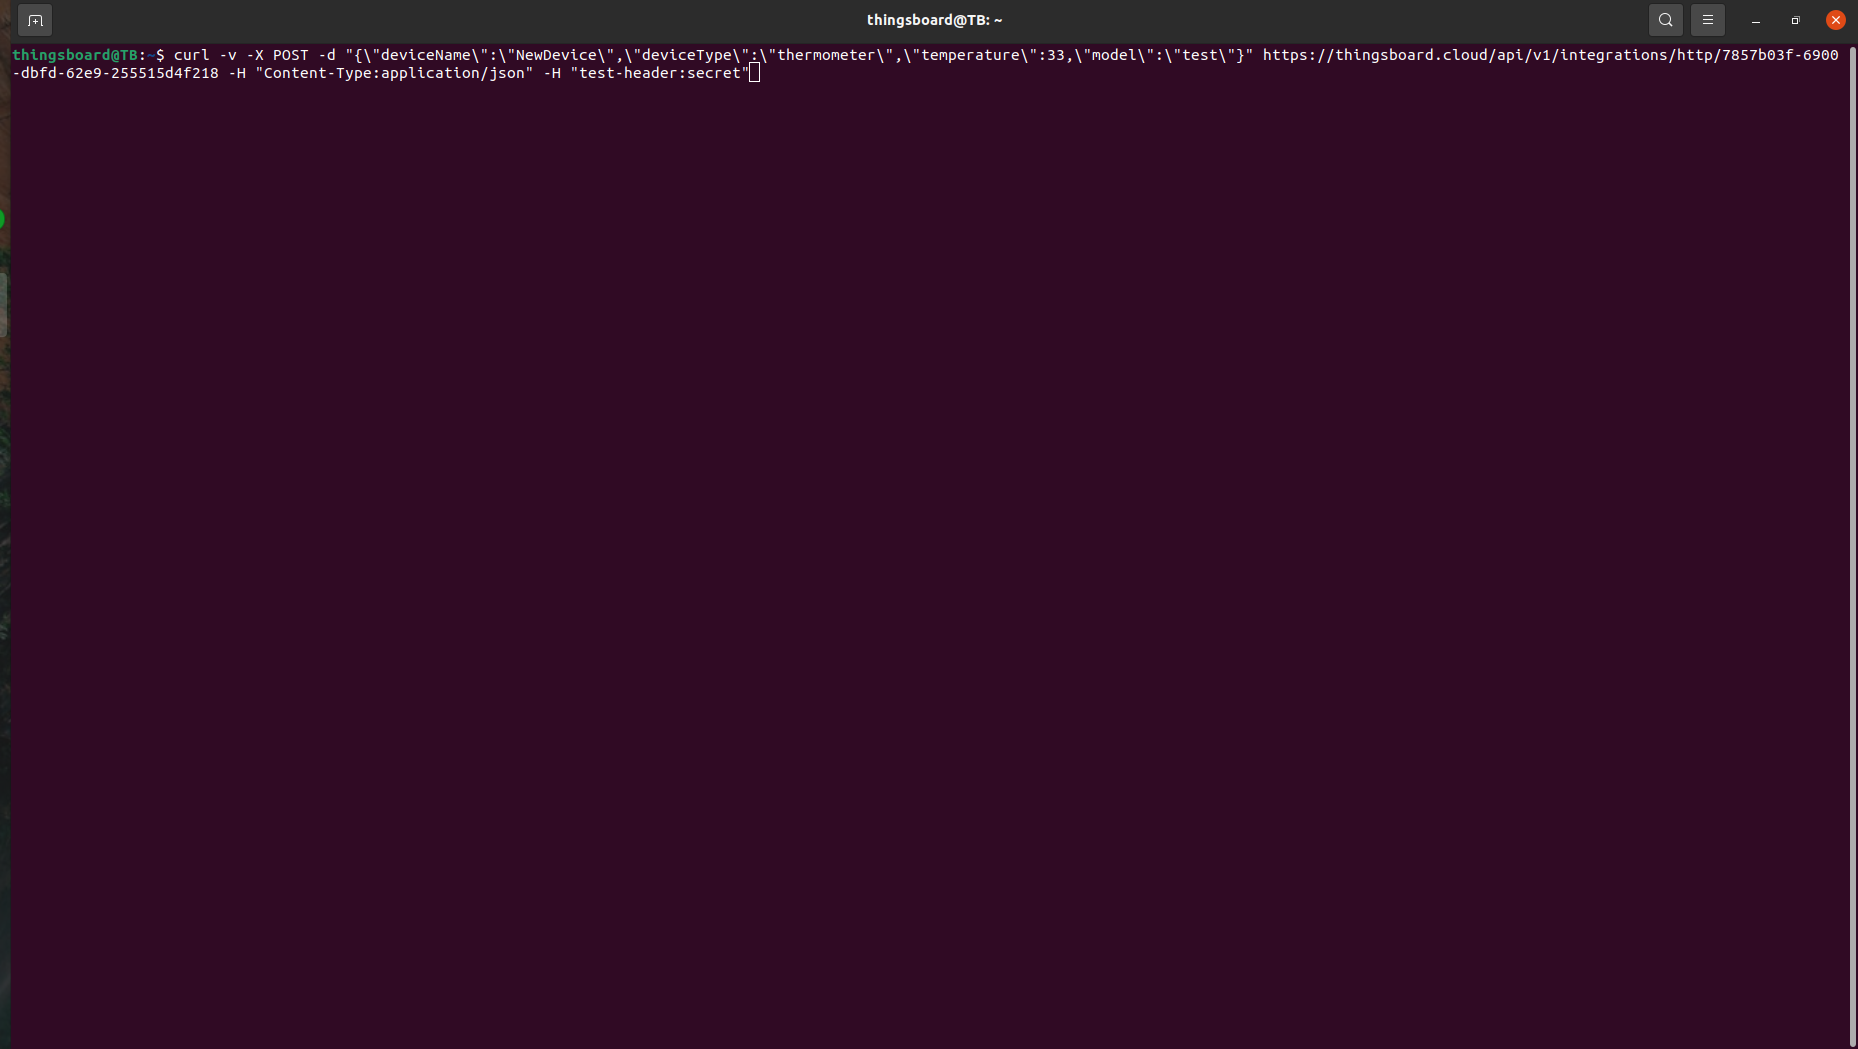
We go to the Device group section in the All folder, to see this with an example. We have indicated the serial number of the device in the Shared attributes. Now we edit it by clicking on the “pencil” icon. Then we make changes to the attribute (change the firmware from 01052020.v1.1 to 01052020.v1.2) and save the data.
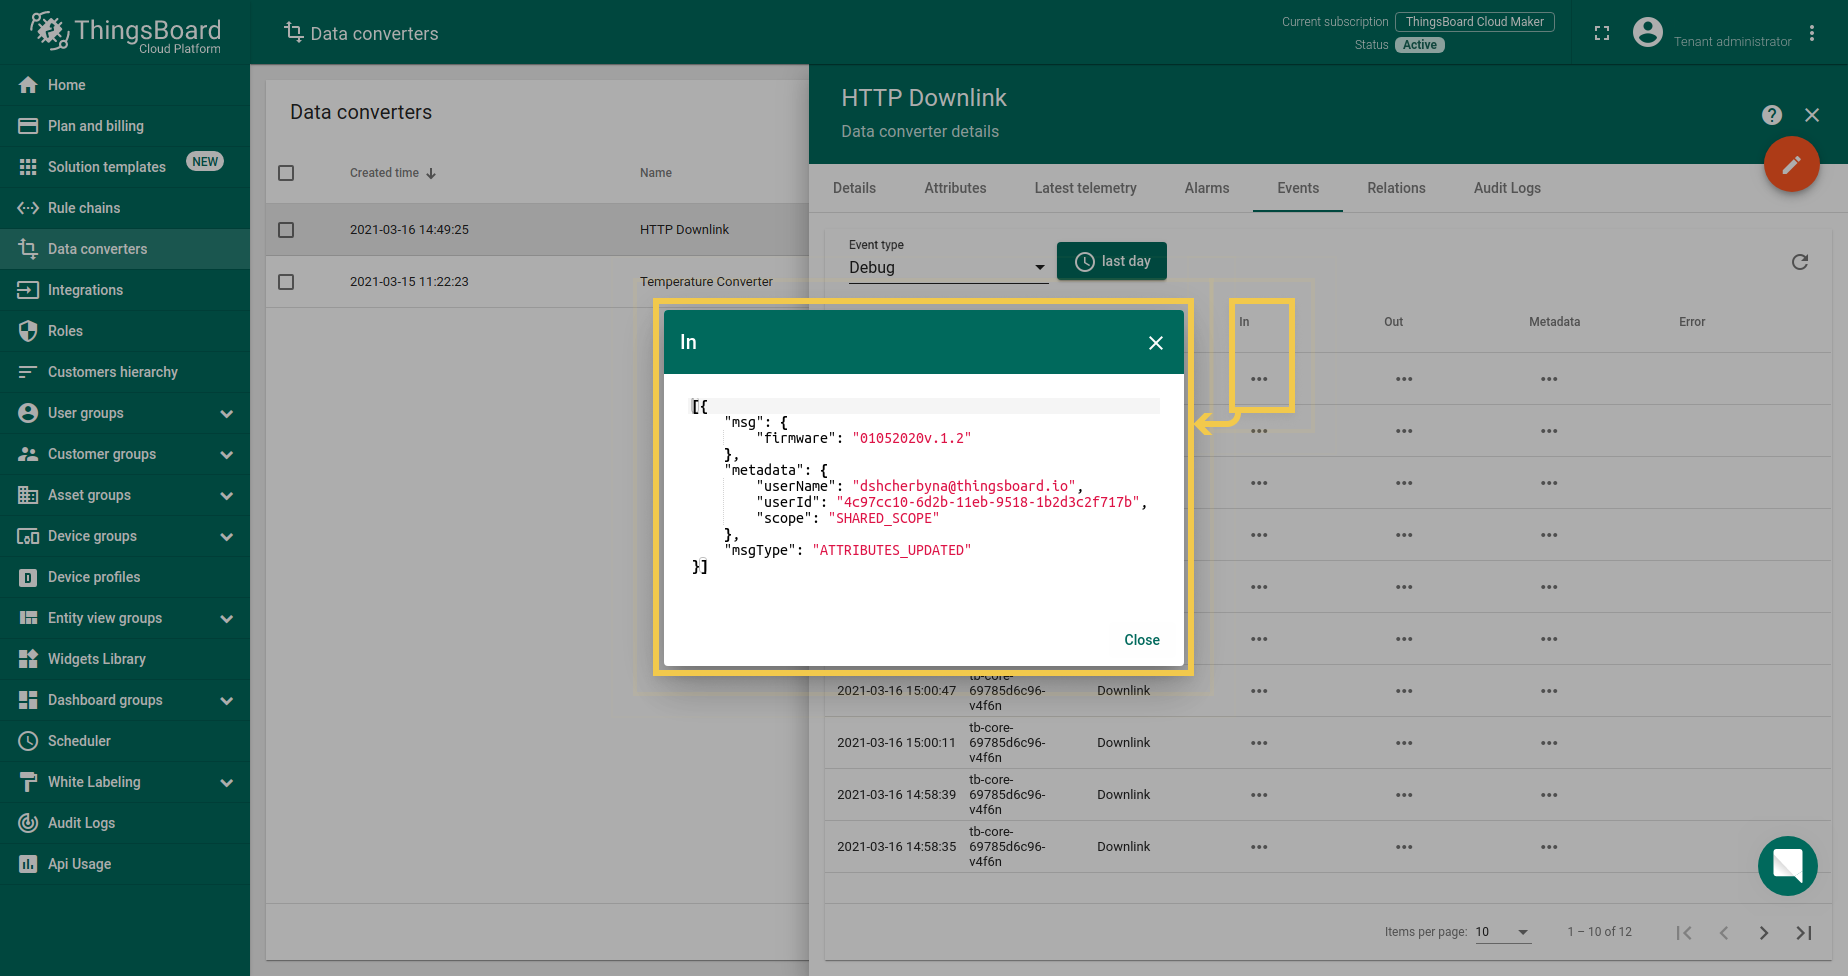
Received data and data that was sent can be viewed in the downlink converter. In the “In” block of the Events tab, we see what data entered and in the “Out” field displays messages to device:
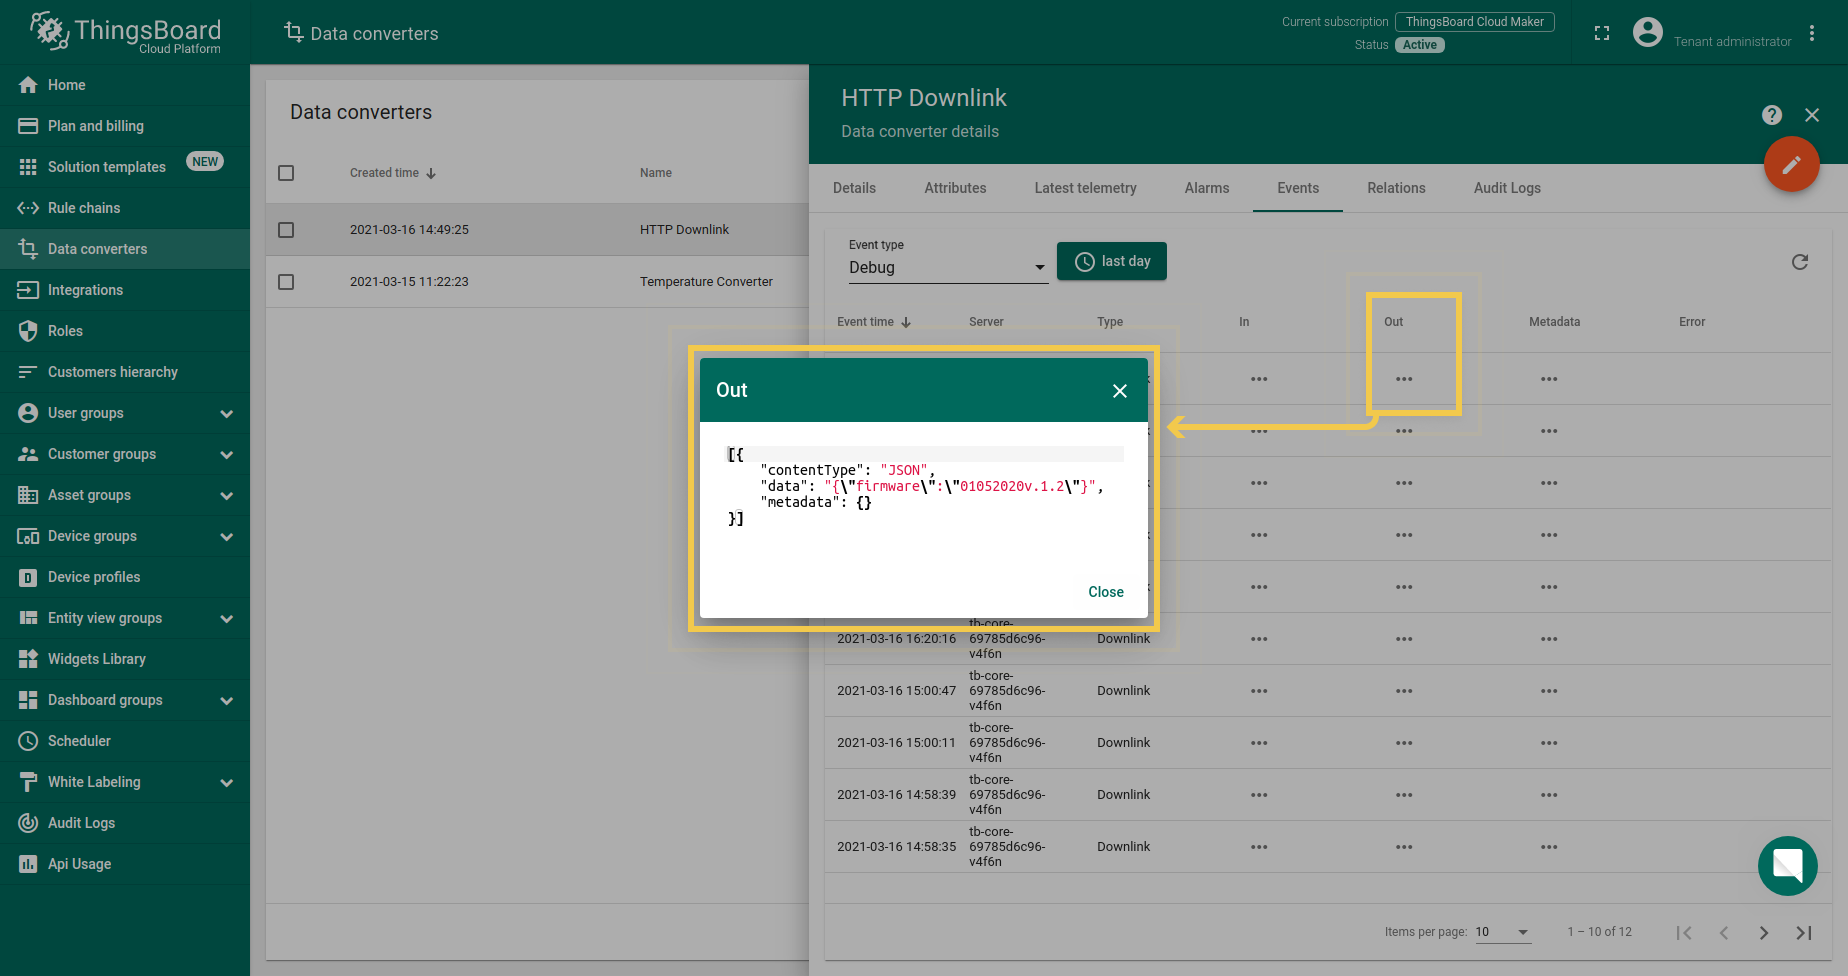
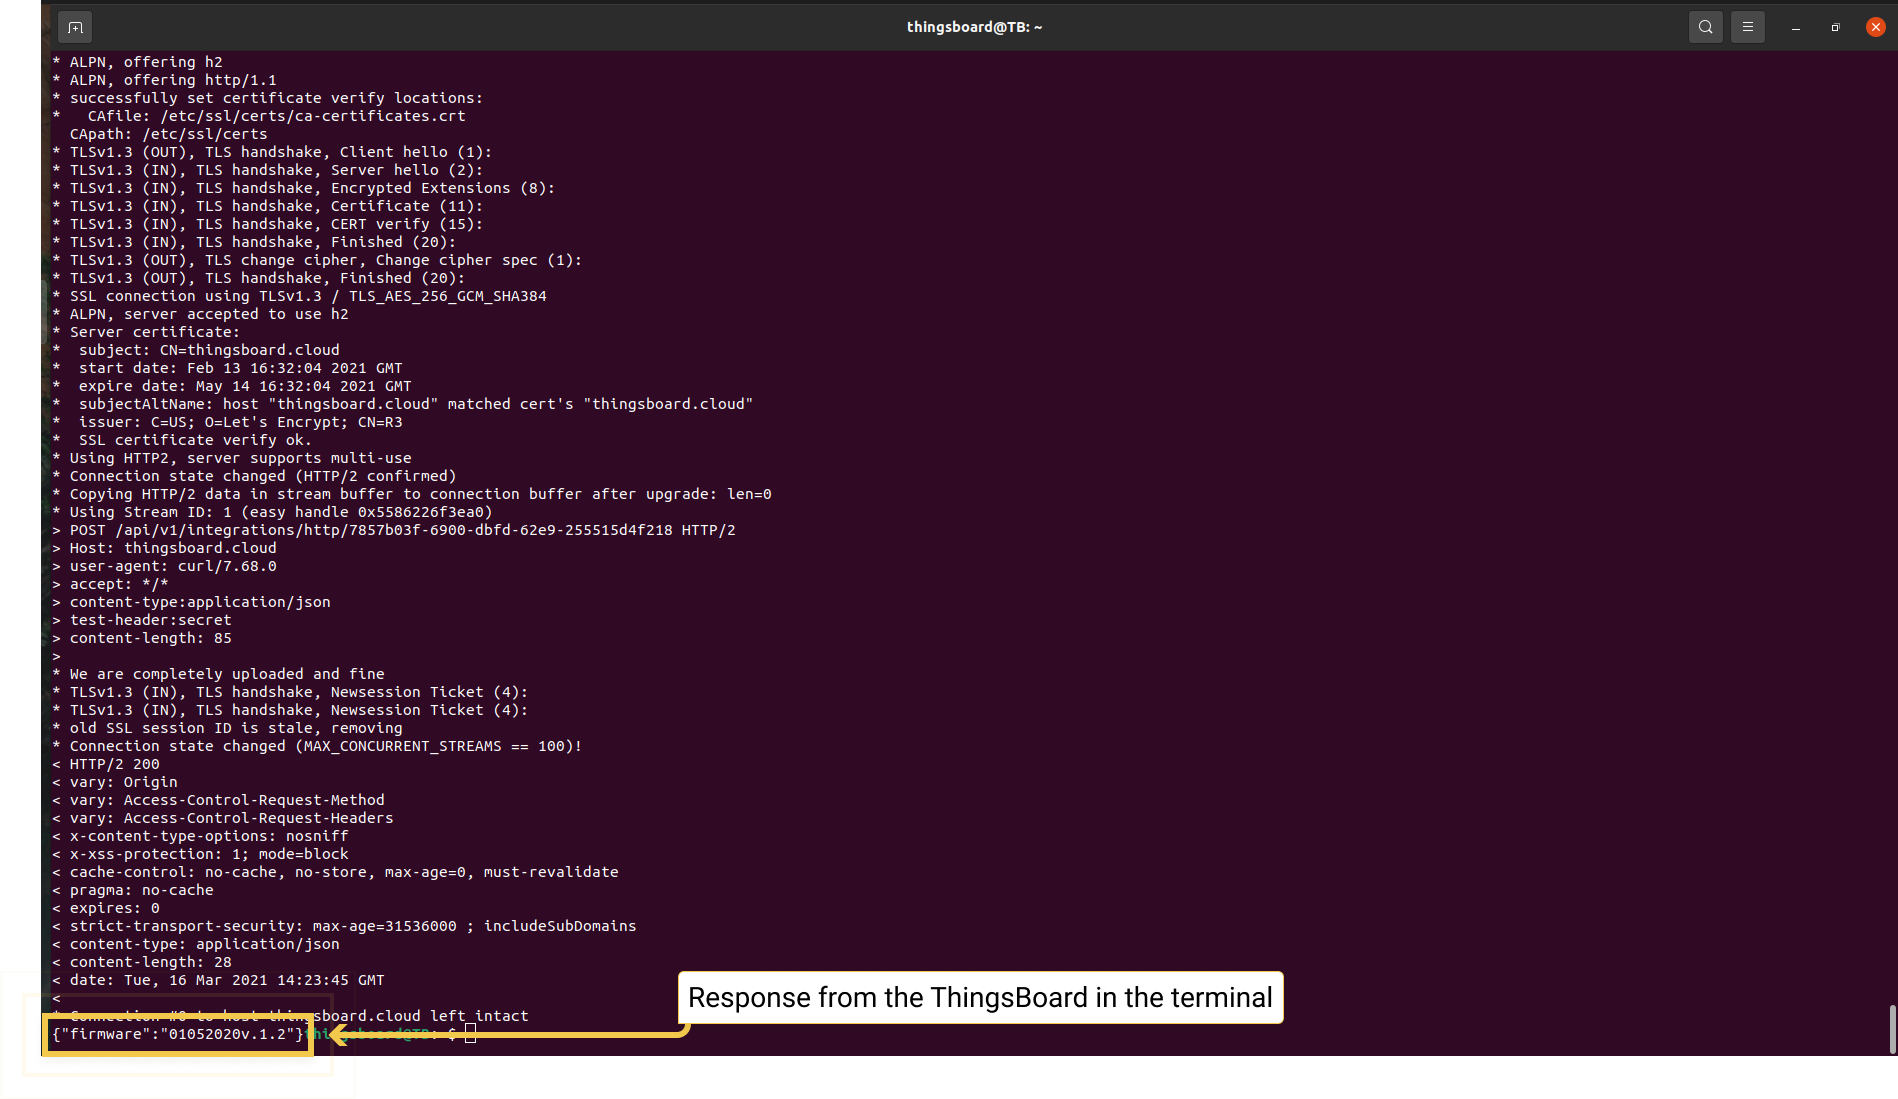
An example of a sent message and a response from IoT Hub in the terminal:
Next steps
- Getting started guides - These guides provide quick overview of main IoT Hub features. Designed to be completed in 15-30 minutes.
-
Data visualization - These guides contain instructions how to configure complex IoT Hub dashboards.
-
Data processing & actions - Learn how to use IoT Hub Rule Engine.
-
IoT Data analytics - Learn how to use rule engine to perform basic analytics tasks.
-
Hardware samples - Learn how to connect various hardware platforms to IoT Hub.
-
Advanced features - Learn about advanced IoT Hub features.